Easy Polymer Clay Wall Decor Ideas for Creative Home Projects
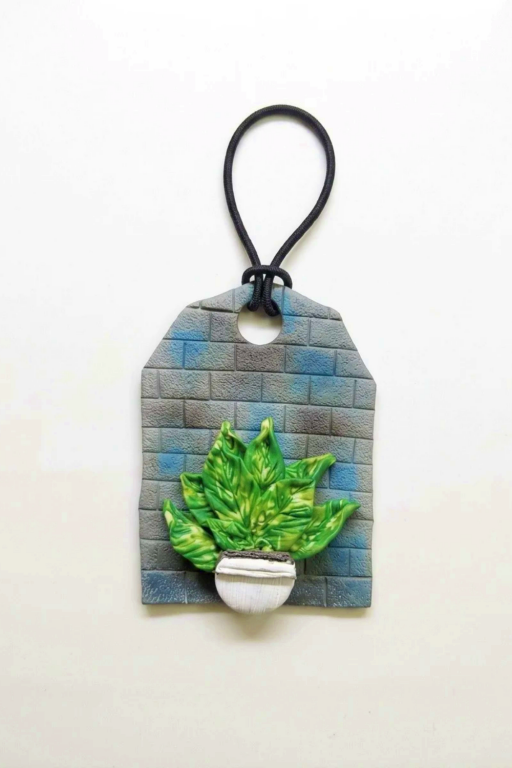
Make stunning Polymer Clay Wall Decor Designs with easy methods to personalize your space and add a touch of charm to any room effortlessly.
Decorating your home can be even more special when you create something with your own hands. This project focuses on crafting unique wall decor using polymer clay, a material that’s easy to mold and bake. Whether you want to design cheerful shapes, abstract patterns, or nature-inspired pieces, polymer clay gives you endless possibilities to customize your space. It’s a fun and creative way to make your room feel cozy and personal, perfect for anyone who enjoys DIY crafts.
Best Polymer Clay Wall Decor Design Ideas for Beginners
The best part of these designs is their flexibility—they can be any size, shape, or style you want. Polymer clay lets you experiment with textures, layering, and colors, so you can create decorations that match your home’s theme or your favorite aesthetic. It’s not only lightweight but also durable, meaning your wall art will last. The steps are simple and beginner-friendly, with room for creative freedom at every stage. Whether you love bold patterns or subtle details, this project allows you to express your creativity and artistic vision.
By following this craft idea, you’ll end up with handmade wall decor that’s entirely your own. These pieces can brighten up a living room, bedroom, or even a gift for someone special. This DIY project is not only easy but also rewarding, giving you a relaxing way to decorate thoughtfully while adding a unique touch to your home!
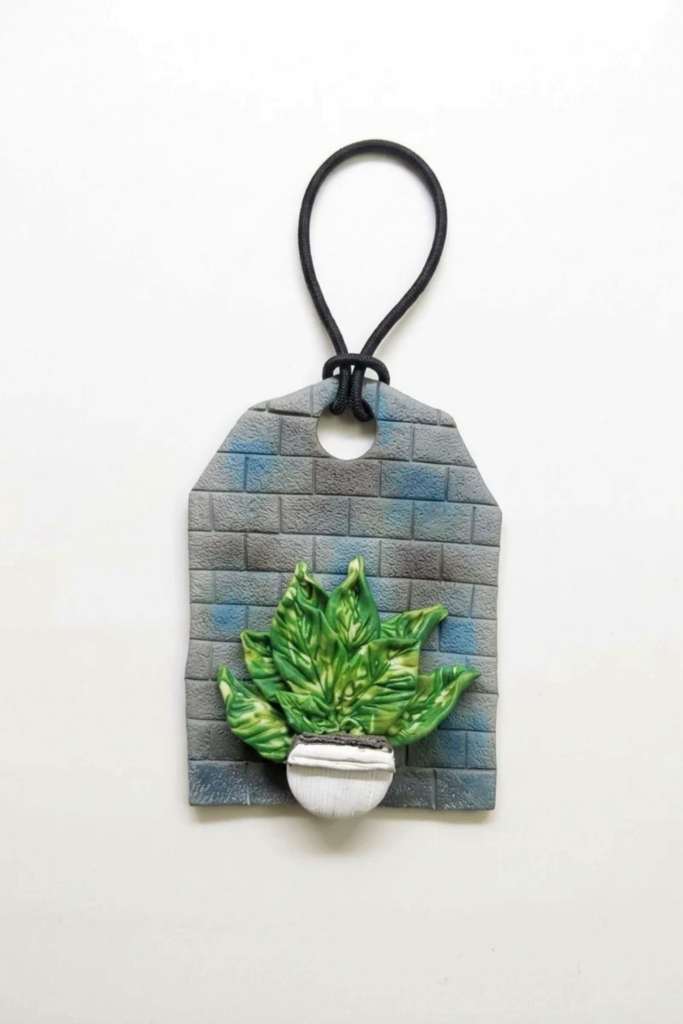
Rustic Wall Plant Pendant (Polymer Clay)
This tutorial guides you through creating a small hanging pendant that mimics a textured rustic wall with a variegated plant growing from a pot. The piece uses gray polymer clay, surface texturing, pastel coloring for an aged algae look, a plant cane made from scrap colors, and simple pot detailing.
Materials and Tools
- Polymer clay in gray, various green scraps, and black or accent colors
- Wet‑dry sandpaper or coarse abrasive
- Small spray bottle with water
- Thin metal scraper or card for texture
- Paper template cut into an arch shape and a regular blade
- Silicone tool and precision knife for detailing
- Soft pastels: sap green, juniper green, black
- Emerald or similar mica powder (optional)
- Small round cutter, ball tool, needle tool
- Steel part or cylindrical mandrel for shaping (optional)
- Scrap paper to work on and a tile or firm board for support
- Gloss or matte varnish and small brush
- Baking oven and oven thermometer
- Jewelry findings or a black band for hanging
Before You Begin
- Condition the clay and roll a medium thickness sheet of gray color. Work on scrap paper to rotate the base as you go and keep tools organized.
- Preheat the oven and clean the charm back or tile so clay will adhere well.
How to Make It
Step 1: Texture the Wall Base
- Spray a little water on the gray sheet and use wet‑dry sandpaper to press texture into the surface; roll gently to transfer the abrasive mark.
- Use a thin metal scraper or stiff card to make long horizontal divisions; press on the surface only so the texture reads like worn mortar rather than deep cuts.
- For a brick motif, use a flat chisel end of a silicon tool and lightly stamp a staggered pattern.
- If preferred, attach the textured sheet to a tile or firm board for easier handling.
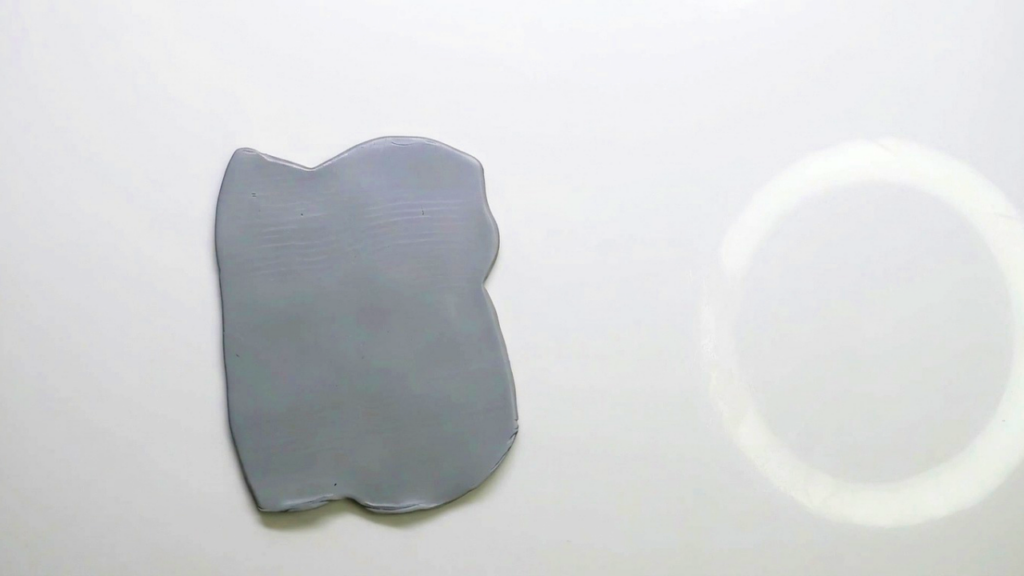
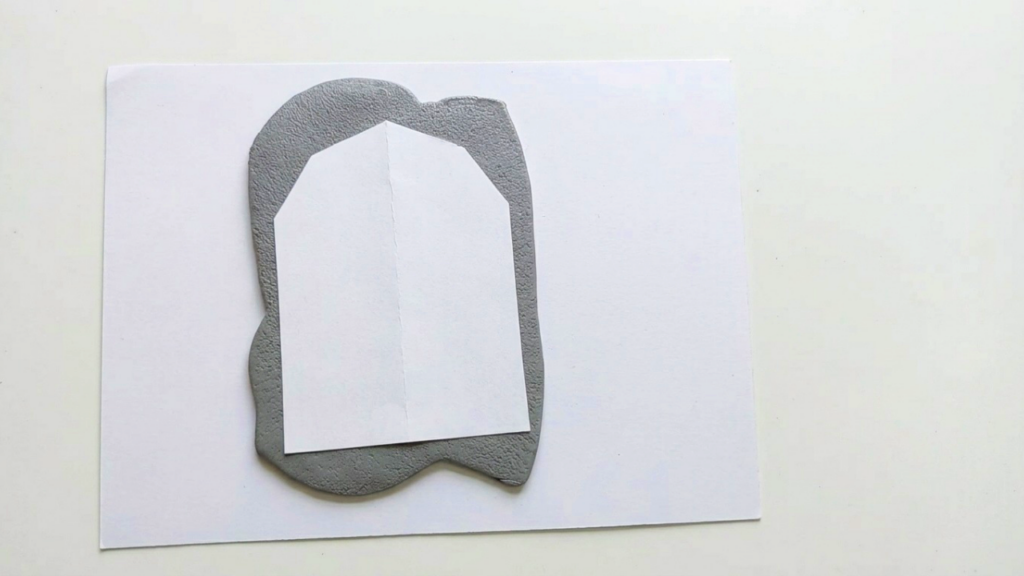
Step 2: Cut the Arch Shape
- Use a paper template cut into a geometric arch to guide trimming; alternatives are simple straight edges for ease.
- Trim the clay with a regular blade following the template; a curvy arch can be used but a geometric shape is faster and cleaner to cut.
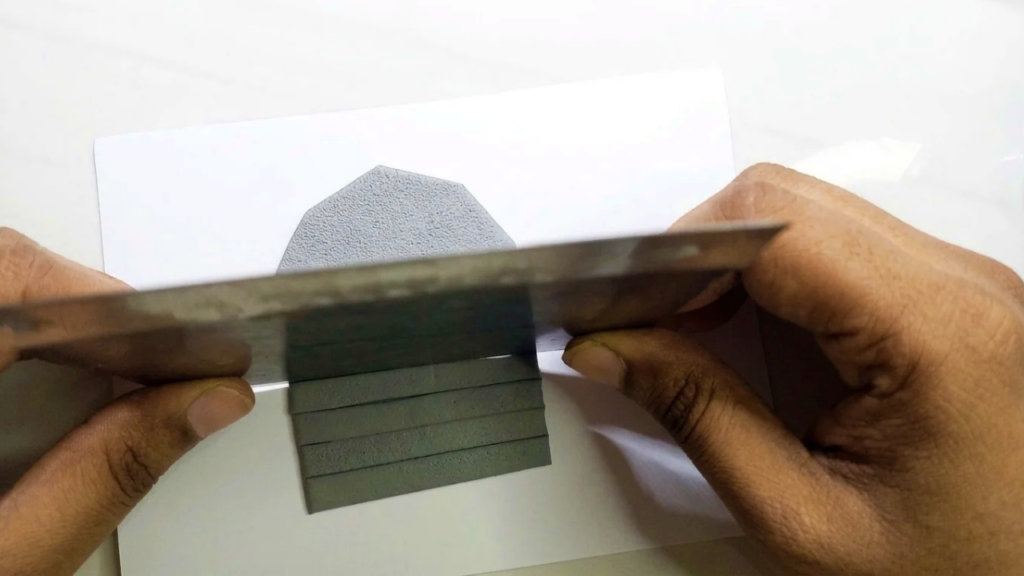
Step 3: Add Horizontal and Algae Texture
- Use the thin metal piece to score subtle horizontal lines across the arch; keep marks shallow.
- Apply soft pastel colors (sap green, juniper, black) with a soft powder brush to emulate algae and aging; apply randomly and blend for natural variation.
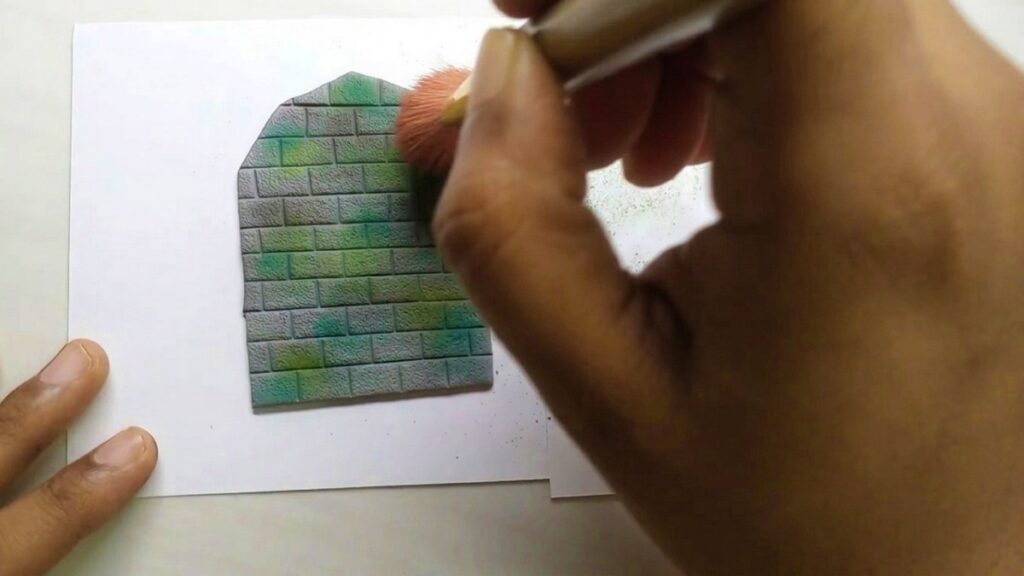
Step 4: Create the Variegated Plant Cane
- Gather green scraps and roll them together to begin a simple plant cane; alternate shades for visual interest.
- Slice the log down the middle, rejoin and twist, then roll again; repeat until you achieve an organic, marbled detail pattern.
- Press the cane flat and slice rounds with a small round cutter to create leaf clusters.
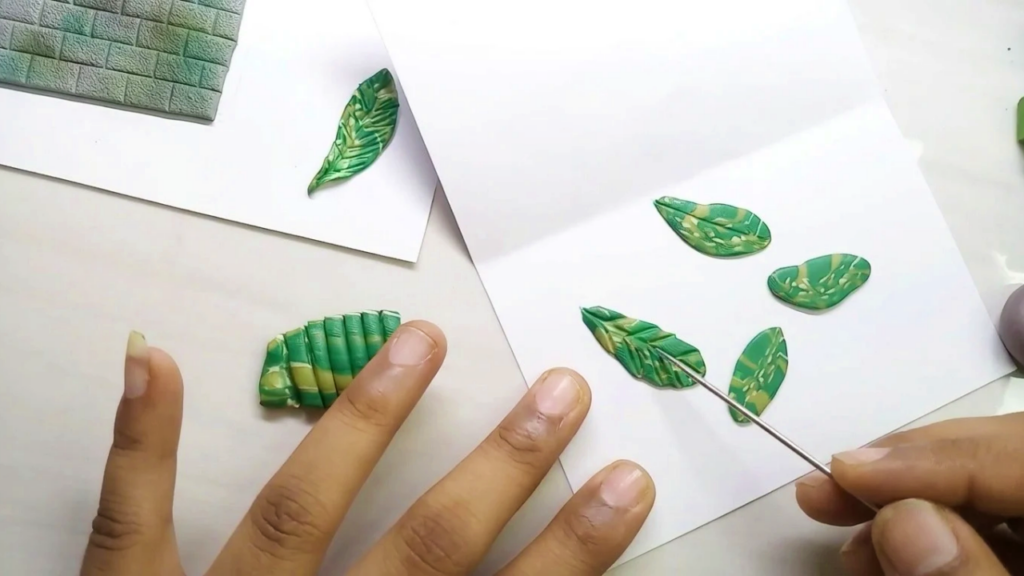
Step 5: Shape and Attach Leaves and Pot
- Use fingers to press and shape each leaf; no need for perfection, slight irregularity reads natural.
- Add vein details with a needle tool and shape corners with the ball tool for realistic edges.
- Attach leaves to the textured wall base using a ball tool to blend bottoms, ensuring secure contact before baking.
- Make a simple pot from scrap round clay, texture with a precision knife, and position beneath the plant.
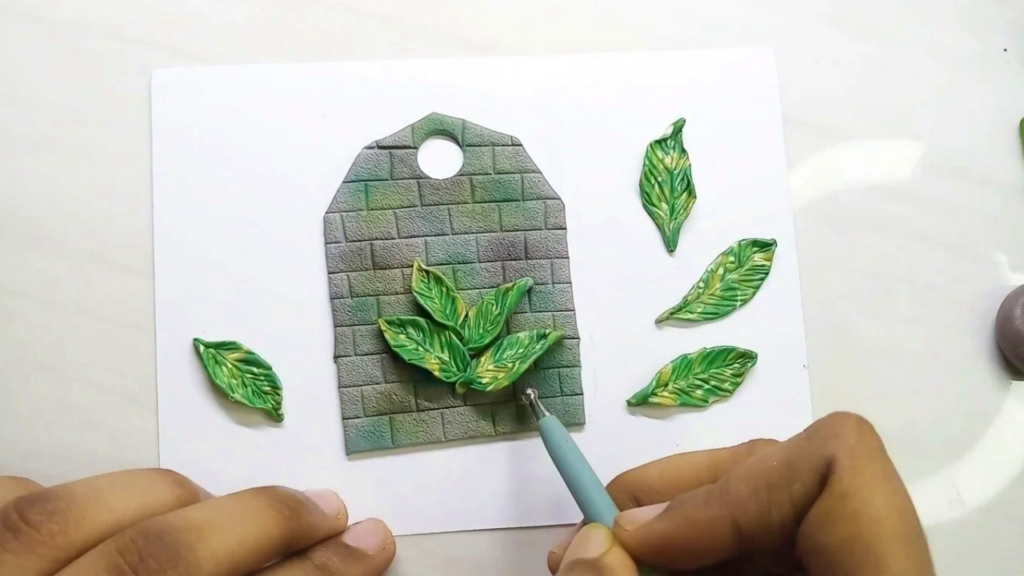
Step 6: Color, Bake, and Finish
- Add mica powder or light pastel highlights to leaves and beads for subtle shimmer, using a soft brush.
- Bake according to the clay manufacturer instructions and allow to cool fully on a flat surface.
- To avoid extensive sanding, attach a backing sheet of clay to the reverse prior to baking or trim gently after cooling.
- Seal the wall with matte varnish and use gloss varnish only on leaves if a shiny waxy look is desired.
- Attach a black band or hardware for hanging after varnish dries.
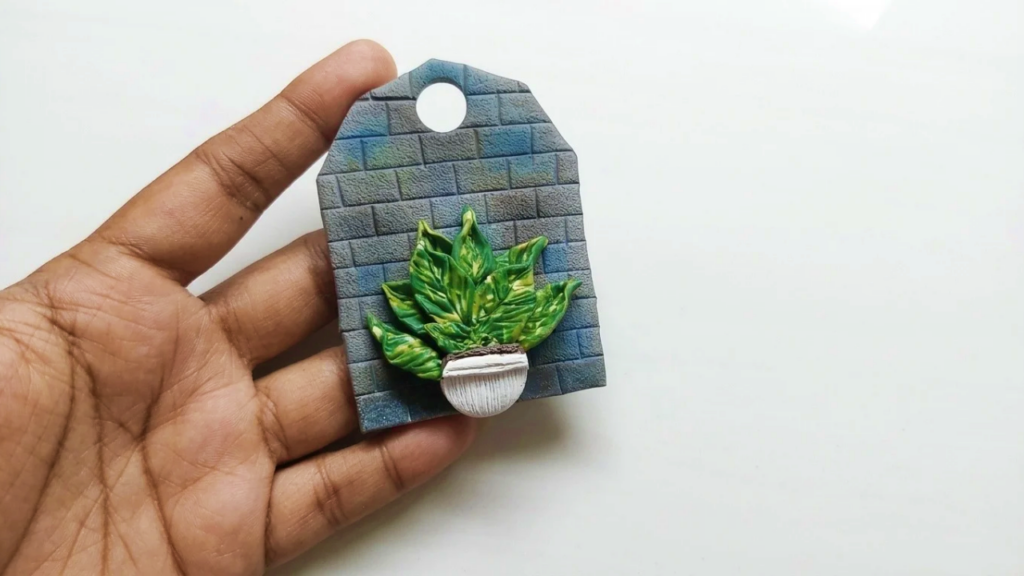
Helpful Tips and Troubleshooting
- Work on paper to rotate the piece without touching the textured surface.
- If clay is sticky, use thin paper between tools and clay or chill briefly to firm it up.
- Imperfections enhance realism; embrace slight asymmetry in leaf shapes and color.
- If leaf edges lift during baking, press more clay from the center into junctions before baking next time.
- For strongly sticky clay, dust minimally with cornstarch to reduce tack but avoid altering pastel adhesion.
- If the pot looks flat, add a thin rolled coil behind it before baking to create depth and a shadow line.
Creative Variations
- Use different base colors, add small flowers, or scale the design for earrings and brooches.
- Experiment with real tile fragments, mica powders, or metallic accents for extra texture.
Measurements and Specifications
- Recommended sheet thickness is 1.5 to 2 mm for the wall base so texture reads clearly without making the pendant too heavy.
- Arch dimensions used here are approximately 30 mm tall by 18 mm wide but scale to your preference for larger or smaller pieces.
Baking and Cure Guidelines
- Use the clay manufacturer’s recommended temperature and time; for Fimo Soft a typical bake is 110°C for 30 minutes per 6 mm of thickness, but verify on the package.
- Always place pieces on a baking tile or ceramic tile in a preheated oven to prevent hot spots and check with an oven thermometer.
Safety and Material Substitutions
- If you lack soft pastels, use PanPastel or powdered pigments at low concentration; alternatively use thinned acrylics sparingly for surface color.
- Substitute mica powder with pearl pigment or a fine dry pigment for shimmer.
Care and Display
- Wipe gently with a soft dry cloth; avoid prolonged water exposure or harsh chemicals.
- Store flat or hang by the black band to prevent bending of thin elements.
Final Remarks
Practice different color mixes and cane steps, note results, and refine your approach for improved marbling and realism over time consistently.