Fun DIY Striped Polymer Clay Caterpillar Sculpture Project

Discover how to craft a stunning DIY Striped Polymer Clay Caterpillar Sculpture with easy steps, perfect for adding a creative touch to your projects.
Turning plain polymer clay into a fun and colorful caterpillar sculpture is a fantastic way to explore your creative side. This project is perfect for anyone who loves playful designs and easy DIY crafts. Using clay, you’ll create a cute caterpillar with striped features that make it pop with personality. The process is simple and doesn’t need any fancy equipment—just your hands, some clay, and a little imagination.
Beginner’s Guide to DIY Striped Polymer Clay Caterpillar Sculpture
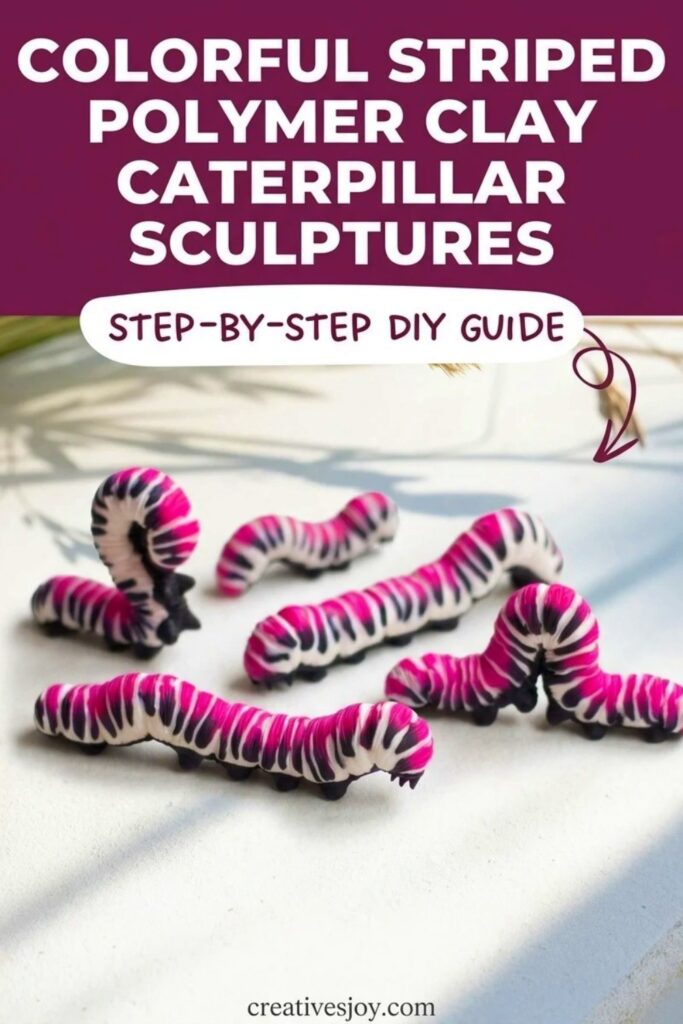
To bring your idea to life, you’ll shape the caterpillar’s body by forming small clay balls for each segment. Each one can be a different color to give it a bright, striped look. After arranging the segments in a curved or straight line, you can add a cheerful face using tiny dots of clay for the eyes and mouth. The design is simple, but the result is incredibly charming. Once you’ve crafted the complete caterpillar, bake it as per the instructions on the clay package, and watch as your cute creation transforms into a solid sculpture.
Making this striped sculpture is such a fun and satisfying activity. It’s easy to personalize by picking your favorite colors or experimenting with designs. Whether you want something quirky to brighten up a desk or are looking for a unique gift idea, this small caterpillar will steal the spotlight. Plus, it’s a great craft to share with kids or friends, turning your creativity into a shared joy.

Colorful Striped Polymer Clay Caterpillar Sculpture
Create a colorful striped polymer-clay caterpillar using a simple cane technique and Skinner blend. This project produces a tactile, organic-looking sculpture with segmented body texture, tiny feet, and a detailed face. It’s ideal for makers who enjoy caning and small-form sculpting.
Materials & Supplies
- Polymer clay in at least three colors (bright pink, black, white; add extra accent colors if desired)
- Liquid clay (for adhering belly color before final finishing)
- Small amounts of clay for feet and mouth details (matching or contrasting colors)
- Optional: gloss varnish (for finished sheen)
Tools & Equipment
- Pasta maker (strongly recommended for Skinner blend) — important
- Sharp blade or craft knife
- Toothpick or potter’s needle (for indents and details)
- Clay shaper or silicone tool (for smoothing feet and belly)
- Small brush (for liquid clay application)
- Oven (for baking polymer clay per manufacturer instructions)
Project Details
- Skill level: Beginner–Intermediate (caning and reducing require some practice)
- Time: 1–3 hours plus baking time (varies with size and number of caterpillars)
- Size: variable — artist made fairly large caterpillars for a collaborative project; reduce cane further for small versions
Preparation
- Condition clay by warming and kneading until pliable.
- Prepare a clean work surface and set tools within reach.
- Plan your color scheme (main stripe colors, base, belly color, feet color).
- If you intend very uniform canes, practice Skinner blends on scrap clay first.
Step-by-Step Detailed
Create a Skinner Blend Cane
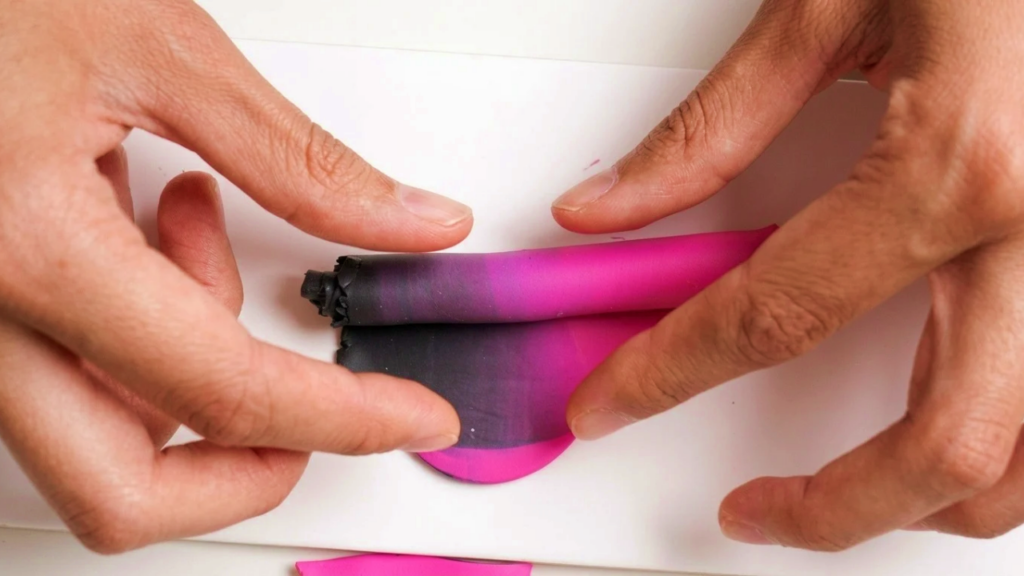
- Cut two colored clay triangles (e.g., bright pink and black).
- Fold and pass them repeatedly through a pasta maker to produce a gradual color transition (Skinner blend).
- Note: a pasta maker yields consistent thin sheets; a rolling pin can work but is less reliable.
- Continue folding and rolling; if length is too short, squish and roll again to increase length.
- Keep fold direction consistent to achieve organic, slightly imperfect blending — this imperfect look suits a natural caterpillar.

Form the Base Cane
- Once blended, roll the sheet into a tight cylinder to create the striped cane.
- Push and round the cylinder to seal it and make a stable base cane.
- Cut the cane in two to check the internal pattern — irregularities are desirable for an organic effect.
- If one color dominates (e.g., too much black), trim excess and recombine until the balance looks good.
- Wrap the cane with a thin layer of white clay if you want a lighter base or more contrast.

Reduce the Cane
- Reduce (compress and stretch) the cane to the desired diameter for your caterpillar slices.
- Larger caterpillars require less reduction; tiny ones need more.
- Roll out a thick snake from the reduced cane and be ready to slice.
Cut Slices & Apply to Body
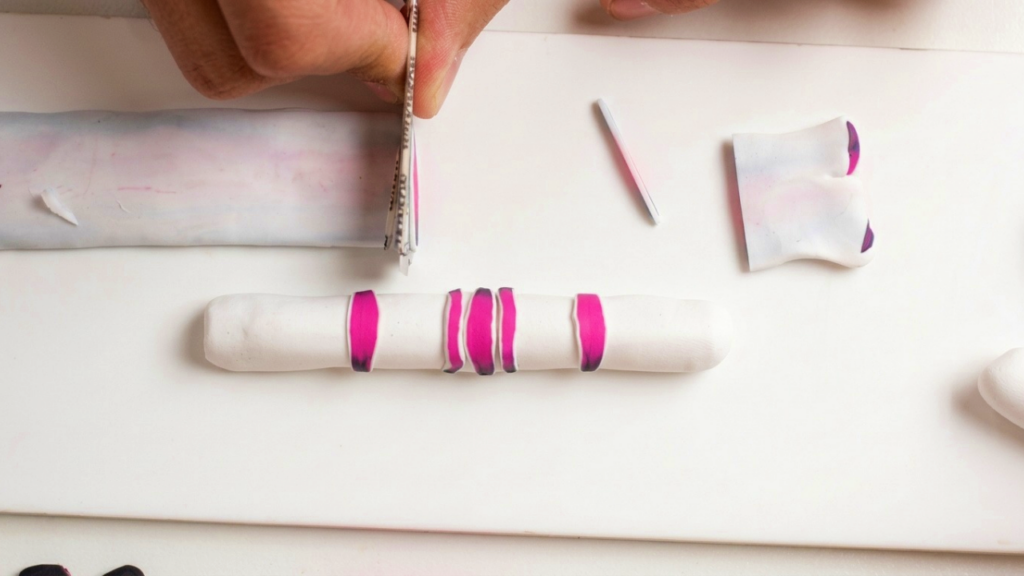
- Cut very thin slices from different parts of the cane; vary slice location to capture color variation.
- Use thicker and thinner slices to create organic variation across the body.
- Place slices onto a pre-formed caterpillar base (rolled thick snake of base color).
- Cover the entire caterpillar body with these slices, overlapping slightly as needed.
- Press and roll gently so slices adhere and conform to the base shape.
Shape the Segments
- Use a toothpick to define the caterpillar’s segments by pushing small separations along the body — caterpillars are made of blobs/segments.
- Decide where the head will be and accentuate that end.
- Round edges and refine the overall silhouette, smoothing joints between slices to integrate them.

Texture the Skin
- Make numerous small indents across the top surface to mimic wrinkly caterpillar skin; use a toothpick or potter’s needle.
- Define tiny segment edges strongly — crisp yet natural gaps look best.
- Optionally add extra tiny bits of white (or another color) to create irregularities and highlights on the skin for more visual interest.
Bake
- Once satisfied with the texture and detail, bake the piece according to polymer clay instructions (temperature and time per manufacturer).
- Bake only after finalizing all top-surface sculpting (feet and belly will be added post-bake as described).
Add Belly & Feet (Post-Bake Finishing)
- After the first bake, apply a layer of liquid clay to the belly area using a brush.
- Carefully add a thin sheet of contrasting color (black, pink, etc.) over the liquid clay and trim excess with a blade; remove surplus and smooth edges.
- Roll tiny balls of clay into small feet shapes; make pairs and attach them along the belly: 4 middle pairs and one pair at the back (artist used five pairs total).
- Smooth the feet into place using a clay shaper and refine belly edges so they match the top’s wrinkly texture; add indents on the belly to echo the top segmentation.

Form the Mouth
- Roll three tiny balls into cones for the mouth piece; position and press to create a small mouth cluster.
- Shape and adjust until desired facial expression is achieved.
Final Smooth & Sign
- Smooth the entire piece, tidy edges, and add any final indents or ridges.
- Optionally sign your piece on the belly or underside with a small incision.
Final Bake
- Bake again if you added uncured clay for belly, feet, or mouth; follow recommended baking instructions.
Finishing Instructions
- Let the sculpture cool completely after final bake.
- Smooth any rough spots with very fine sandpaper if desired, then clean dust off.
- Optionally apply a thin matte or gloss varnish depending on desired look (gloss can highlight color vibrancy).
Tips & Techniques
- Embrace imperfections in canes — organic variation makes the caterpillar more natural.
- Cut slices from various cane positions to get different stripe patterns.
- Work gradually: place and press a few slices at a time to maintain control.
- Use a pasta maker for consistent Skinner blends; hand-rolling is possible but uneven.
Common Problems & Solutions
- Cane collapses while reducing:
- Solution: rewrap with thin white clay and reroll to reinforce structure.
- Slices don’t stick well:
- Solution: gently roll the body to meld slices; use a bit of liquid clay as adhesive on the base before placing slices.
- Feet detach after baking:
- Solution: bake feet separately or use liquid clay to bond then re-bake following recommended cure times.
Creative Ideas & Variations
- Use multi-color canes (rainbow blends) for playful caterpillars.
- Add glitter or translucent clay for a shimmering shell look.
- Create a family set with varying sizes and color schemes.
- Turn caterpillars into magnets or charms by embedding hardware before baking.
Final Result
A tactile, striped caterpillar sculpture with organic cane patterning, textured wrinkled skin, defined segments, tiny feet, and a charming mouth — a customizable miniature ideal for display, collaboration projects, or gifts.