DIY Polymer Clay Toadstool for Fun and Creative Art Projects
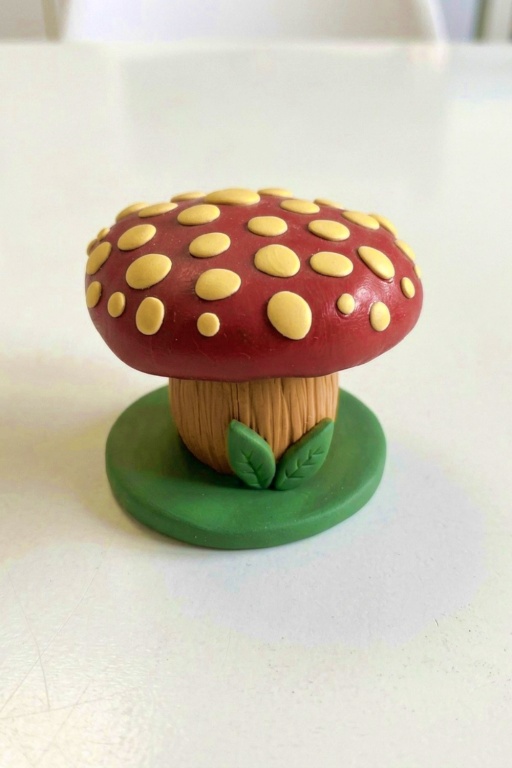
Create a charming DIY Polymer Clay Toadstool with simple steps perfect for crafting whimsical decorations magical gifts or unique handmade art pieces.
Bringing a touch of fairy-tale magic into your home by crafting your very own polymer clay toadstool. This DIY project is enjoyable, creative, and the perfect way to make something special with your own hands. Inspired by the classic mushroom with a bright cap and slim stem, it’s a chance to dive into crafting while creating a whimsical decoration that’s impossible not to love. Whether you’ve worked with polymer clay before or it’s your first time, this project is easy to follow and full of fun possibilities.
DIY Polymer Clay Toadstool for Charming Craft Ideas
What’s so delightful about shaping a toadstool is how much you get to play with the design. You can stick to the traditional red cap with white spots or experiment with exciting colors like pastel pink, deep green, or even golden hues. The clay is soft and easy to work with, making it simple to sculpt every detail. You can add curves, tiny dots, or textures to give your toadstool a unique personality. As you craft, you’ll see it come to life—right in your hands—and that part of the process always feels magical.
Once finished, your cute little mushroom can go anywhere—a shelf, a plant pot, or even a fairy garden. It’s a beautiful accent piece that brings warmth and charm to any setting. You can also gift it to someone special as a handmade surprise. This project is not just about creating—it’s about enjoying the process and ending up with something that makes you smile every time you look at it.
Create a Whimsical Toadstool with Polymer Clay
Create a charming polymer clay toadstool (toadstool/ mushroom) using a foil or built-up core, colored clays for base, trunk and cap, small leaf details, internal craft wire for strength, staged baking, and a glossy glaze finish. The process combines simple cutters and hand-shaping with a few reinforcement steps for a durable miniature model.
Materials & Supplies
- Red polymer clay (cap)
- Green polymer clay (base/ground and leaves)
- Mustard / tan polymer clay (trunk / mid-layer)
- Cream polymer clay (spots on cap)
- Craft wire (thin gauge for internal reinforcement and anchoring trunk)
- Liquid polymer clay or liquid Fimo (optional, for added adhesion)
- Sculpey glaze (or another polymer-safe varnish) — two coats recommended
- Oven-safe baking surface (parchment, ceramic tile)
Tools & Equipment
- Cookie cutter (small round for base and leaf edge tool)
- Needle tool (for adding surface detail)
- Blade / craft knife (for trimming seams and clay)
- Small sculpting tools or smoothing tools
- Oven (follow manufacturer baking temps/times)
- Small brush for glaze application
Project Details
- Difficulty: Beginner–Intermediate (basic shaping, some armature work).
- Time: ~30–60 minutes active sculpting (plus bake & cool time).
- Result: A small sturdy toadstool with glossy cap and leafy base — suitable for display or dioramas.
Preparation
- Condition all clays until soft and pliable.
- Prepare a work area free of dust.
- Cut a small length of craft wire ahead of time to act as the internal connector between trunk and base.
- Preheat oven only when ready to bake; always check your clay brand’s recommended temperature/time.
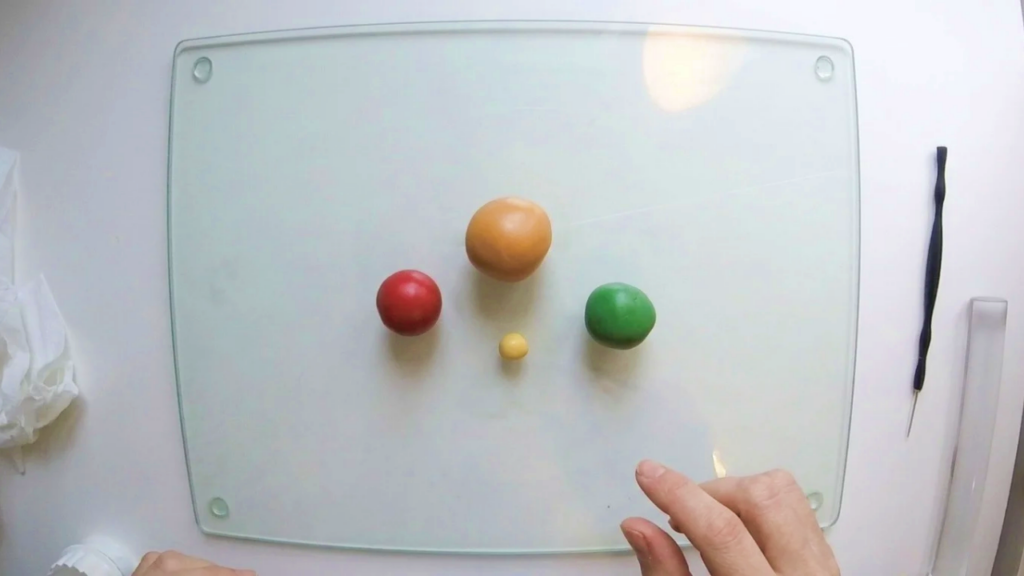
Step-by-Step Detailed
1) Cut & Prepare the Green Base
- Use your cookie cutter to cut a green circular base from rolled green clay.
- Smooth the edges and set the base aside to receive the trunk later.
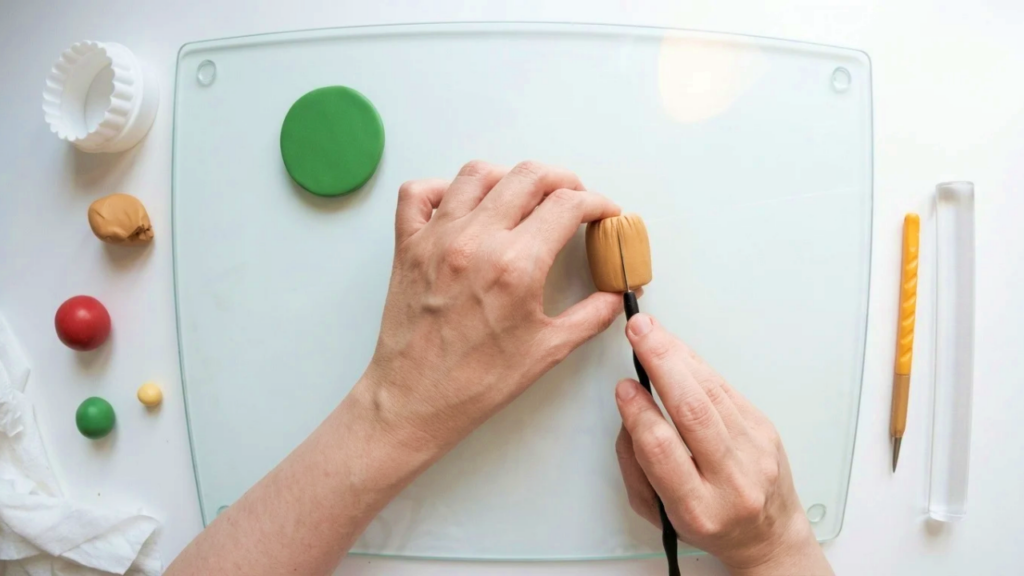
2) Build and Attach the Trunk
- Form the trunk shape from mustard/tan clay and position it on the green base.
- Add detail to the trunk with the needle tool — vertical or bark-like marks add realism.
- Insert craft wire through the trunk down into the base to give structural support and a secure mechanical connection between trunk and base.
- Important: the wire increases durability for display or handling.
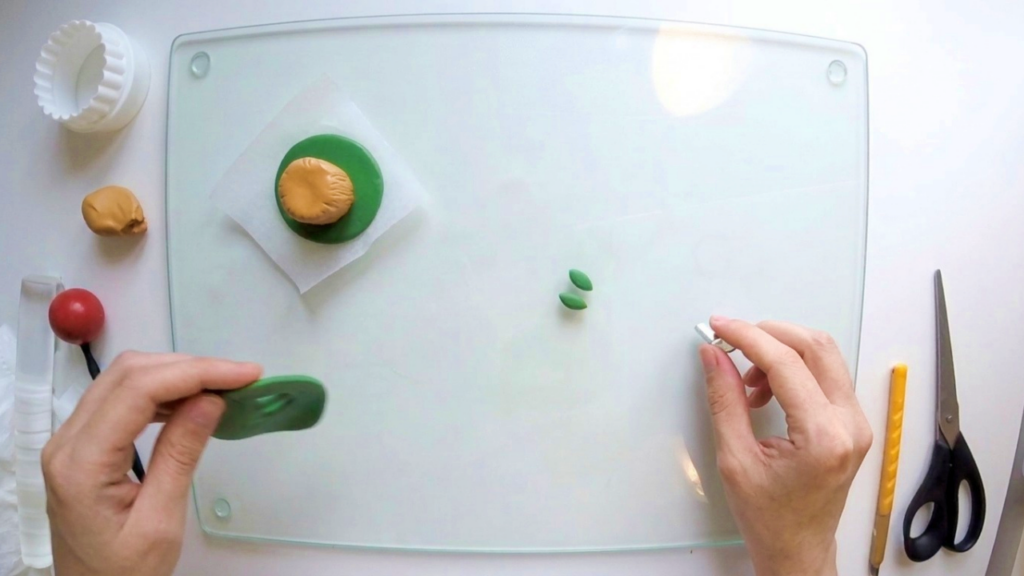
3) Make Small Leaves
- Use the edge of a tiny cookie cutter or a small cutting tool to create leaf shapes from green clay.
- Attach those leaves to the base and around the trunk seam for extra detail and coverage.
- Smooth and blend leaf bases lightly into the base to appear naturally grown.
4) Reinforce with Wire & Bake Base
- Add additional craft wire to the top of the trunk where the cap will connect — this will provide a sturdy anchor point.
- Optionally prebake the base/trunk at the manufacturer-recommended temperature for a short bake: the creator prebaked the base to provide flexibility when fitting the cap later.
- Why prebake: gives more stability and reduces risk of crushing or deforming the trunk while attaching the cap later.
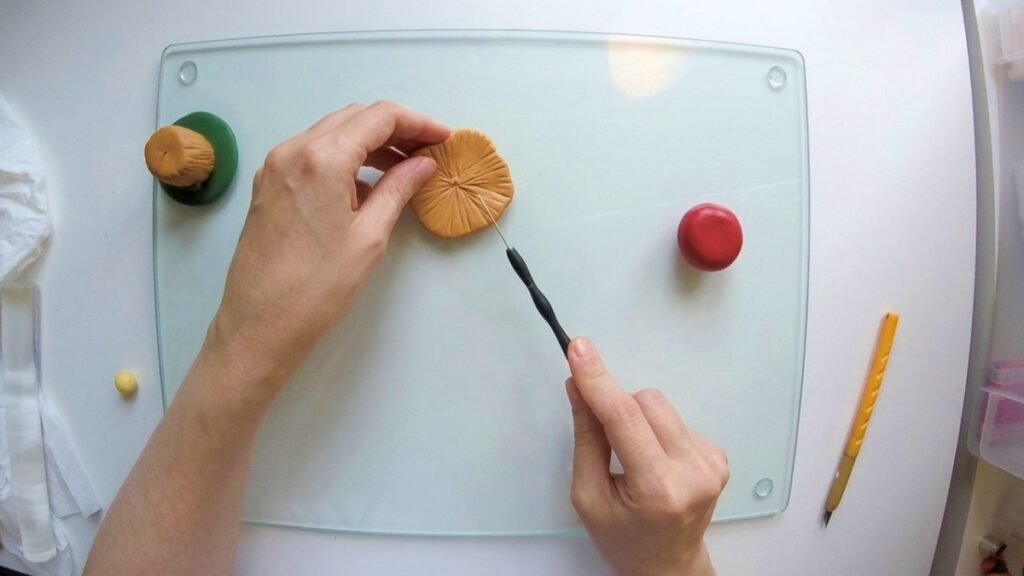
5) Prepare & Detail the Mustard Ring
- Flatten out a mustard-colored circle intended to sit under the cap (a mid-layer ring).
- Add needle tool texture or subtle surface detail for realism even if much of it won’t be visible — it enriches the finished look.
6) Form the Red Cap
- Roll and stretch the red clay to a size slightly larger than the mustard circle so it will wrap and slightly overhang.
- Keep the red cap a bit loose — you’ll fit it over the trunk and mustard ring next.
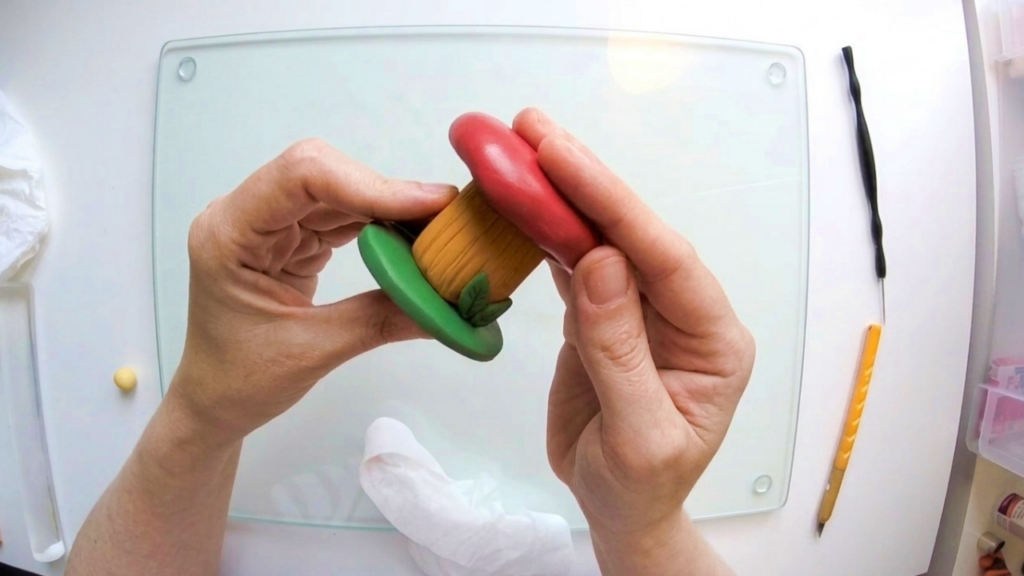
7) Assemble Cap Onto Trunk
- Press the two components together: place the mustard circle on the trunk/base, then position the red cap over it.
- Slightly pull the red clay over the top edge of the mustard layer as needed to create a natural overlap and secure fit.
- Option: apply a small amount of liquid polymer clay (liquid Fimo) between the layers for extra adhesion before final assembly.
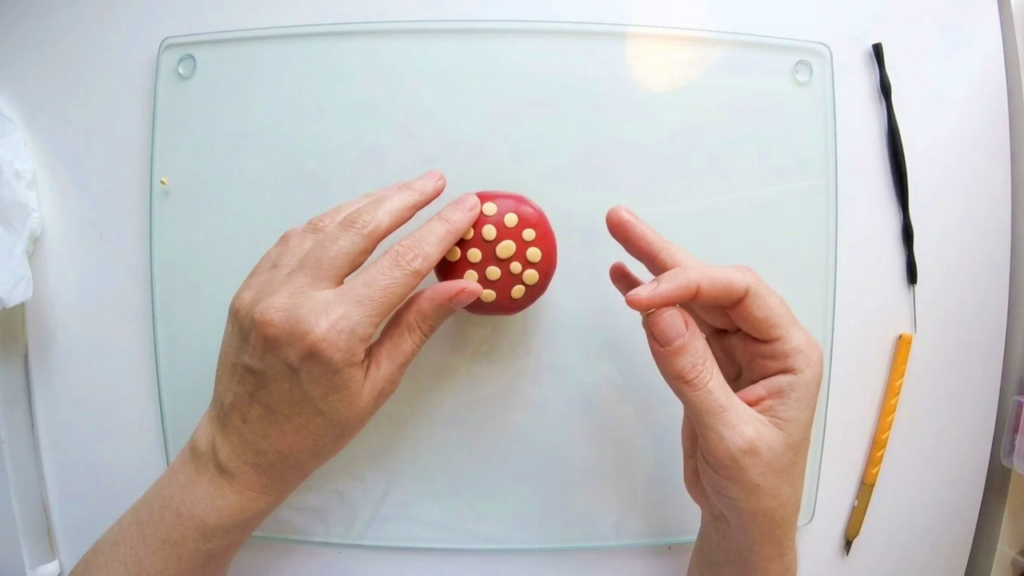
8) Add Cream Spots
- Roll small bits of cream clay into dots and place them on the red cap as spots.
- Space them organically—vary sizes for a natural toadstool pattern.
- Press each dot gently so it adheres and slightly flattens to the cap surface.
9) Final Checks Before Baking
- Inspect seams and blend any visible joins where cap meets trunk or base.
- Clean any fingerprints or excess dust with a soft tool or lightly smooth with a finger or smoothing tool.
- Decide if you want a small character or chrome/metallic element anchored on top — add a small hardened spot or a thin baked tab where you can safely attach it later.
10) Bake
- Bake the finished toadstool following your polymer clay brand’s temperature and time guidelines.
- The creator emphasized following your own brand’s instructions — oven temps vary by brand and color.
Finishing Instructions
- After fully cooling, apply Sculpey glaze across the red and green areas for a vibrant, shiny pop.
- Use two liberal coats of glaze, allowing each coat to dry as recommended by the glaze manufacturer.
- Inspect for any missed areas and reapply if necessary. Two thin coats are better than one overly thick coat.
Tips & Techniques
- Use craft wire inside for strength and to prevent separation between tall components.
- Prebaking the base/trunk makes later handling safer and reduces deformation when assembling the cap.
- Do not overwork red caps — keep organic imperfections for a natural look.
- Small surface textures made with a needle tool go a long way toward realism even if they are subtle.
Common Problems & Solutions
- Cap shifts or detaches after baking:
- Solution: use liquid polymer adhesive at the seam prior to baking, and ensure a solid mechanical anchor (wire) between trunk and base.
- Visible seam lines:
- Solution: blend seams carefully with a smoothing tool or a small amount of liquid clay; prebake to set and then refine before final bake.
- Glaze pooling or tackiness:
- Solution: apply thin even coats, allow full curing time between coats, and follow glaze directions for drying.
Creative Ideas & Variations
- Add a tiny character or chrome/metallic accent on the cap for added charm — create a small baked anchor point before applying the character.
- Vary colors (spotted whites, pastel caps) or make a toadstool family in different sizes for a diorama.
- Use matte varnish instead of gloss for a woodland, less shiny finish.
- Embed tiny glowing elements (LED micro-lights) in a hollowed base for illuminated displays (requires heat-safe planning).
Final Result
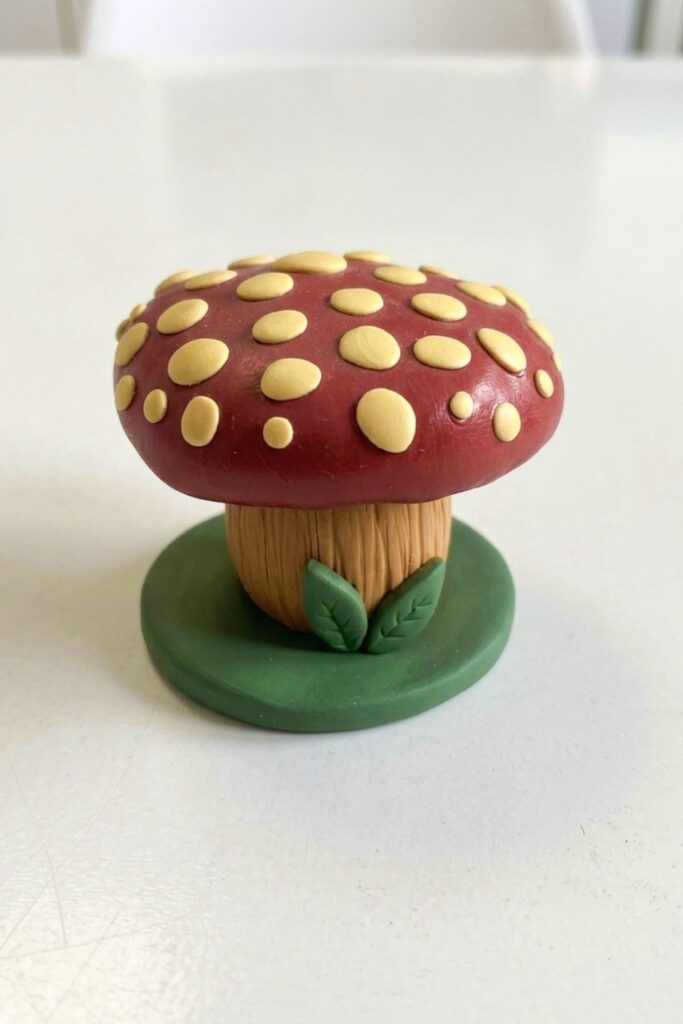
A durable, attractive polymer clay toadstool with a textured trunk, leafy base, and glossy red cap dotted with cream spots. The use of craft wire and optional liquid clay ensures structural integrity, while glaze provides a lively finish — perfect for display, gifts, or miniature scenes.