DIY Polymer Clay Peaches in Syrup with Realistic Details
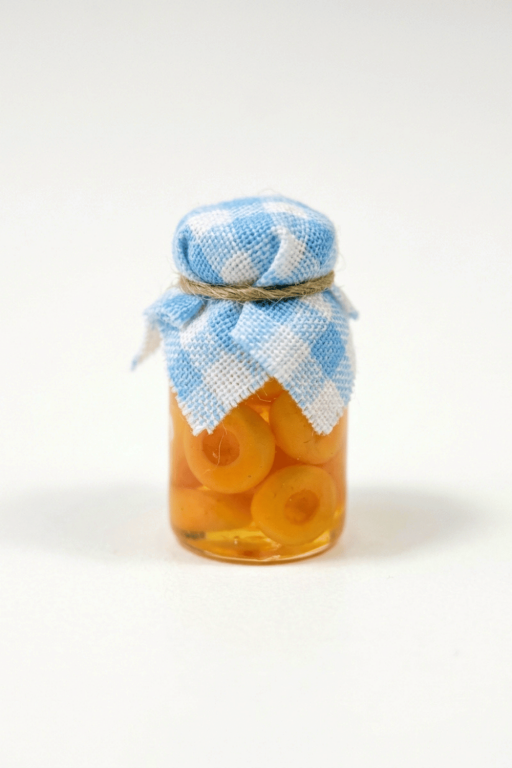
Achieve perfection with lifelike DIY Polymer Clay Peaches in Syrup by following this guide, tailored for beginners and seasoned crafters alike.
Soft peach slices resting in a tiny glass jar look like a sweet treat from a cozy kitchen. DIY Polymer Clay Peaches in Syrup is a beautiful miniature food decoration with warm orange and yellow colors, smooth fruit pieces, and a clear, shiny syrup look. The little jar has a lovely, realistic appearance, almost like real peaches stored in sweet syrup. Its bright colors and cute size give it a cheerful look that easily catches attention. This adorable decoration is a wonderful choice for anyone who loves tiny food items and pretty little things.
Charming DIY Polymer Clay Peaches in Syrup Jar Decor
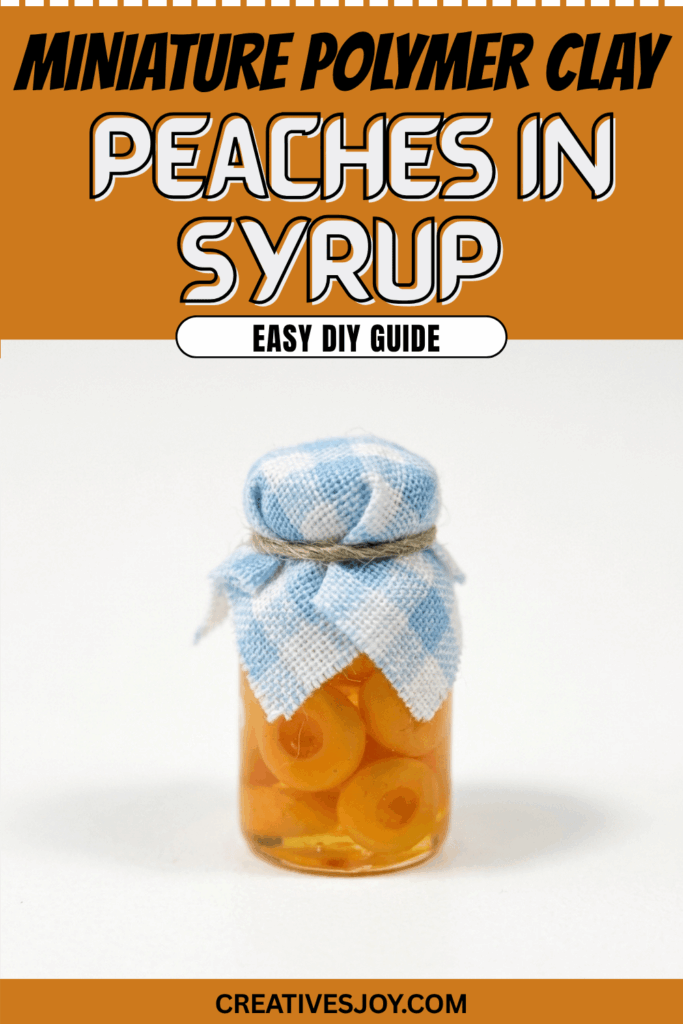
Every detail of this miniature adds to its beauty. The peach slices have gentle curves and natural colors, while the glossy syrup gives them a fresh and juicy appearance. Together, they give the jar a neat and sweet look without being real food. The clear glass also shows the lovely fruit pieces inside, giving this small decoration a realistic style. Its simple design and soft colors remind you of fresh summer peaches and delicious homemade desserts.
This cute little peach jar looks wonderful in a dollhouse kitchen, on a small display shelf, or beside other miniature food decorations. It is also a lovely gift idea for someone who collects tiny items or likes unique home decorations. The warm fruit colors add a happy touch to any small space, while the shiny finish gives it a beautiful appearance. Its sweet and realistic look makes this little jar a charming addition to any miniature collection.
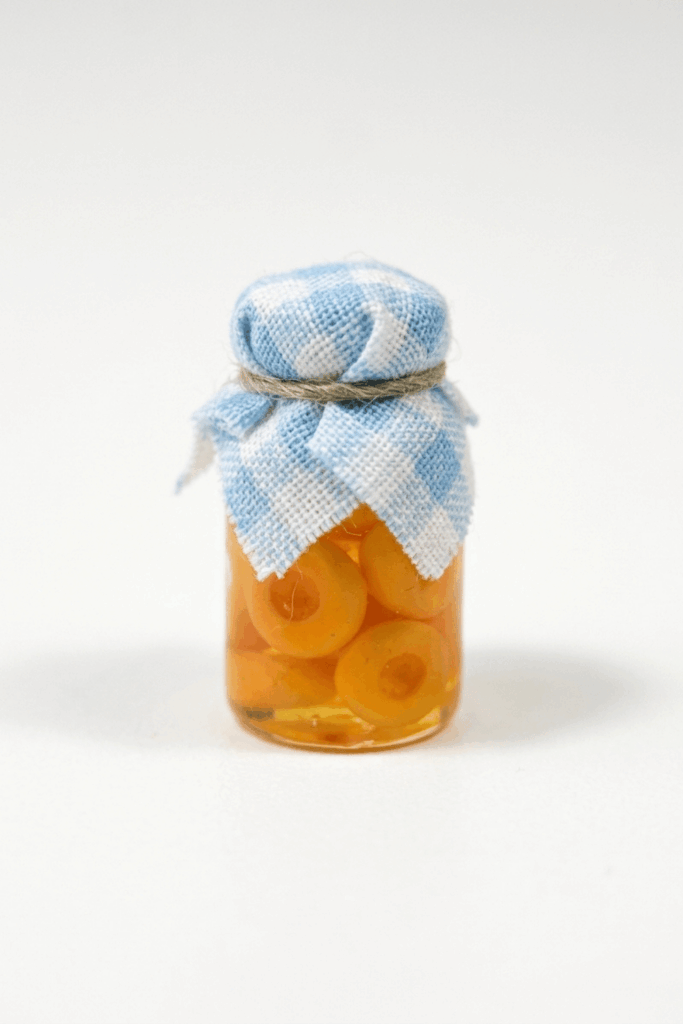
Miniature Peaches in Syrup (Glass Bottle Diorama)
Create a tiny, realistic jar of peaches in syrup using polymer clay peach halves and clear resin in a small glass bottle. The pattern follows a simple sequence: mix an orange clay, form tiny peach halves, add shading, bake and cool, arrange peaches in a bottle, pour resin syrup, secure the cork, and finish with a fabric topper and twine. The result is a charming miniature prop suitable for dollhouse scenes, jewelry, or display.
Project Overview
- Sculpt multiple miniature peach halves from a blended orange polymer clay.
- Shade the peach dimples with brown pastel for realism.
- Bake peach pieces, arrange inside a small glass bottle, and pour clear resin to simulate syrup.
- Trim and insert a cork while resin is still tacky, then finish with a fabric cover and twine.
Materials & Supplies
- Polymer clay: yellow, red, and white (to mix the orange shade).
- Translucent clay (optional, for softer peach tone).
- Small dotting tool or needle tool.
- Small brush for pastel application.
- Brown soft pastel (powder) and applicator brush.
- Tiny glass bottle with cork (available on craft marketplaces).
- Clear casting resin and mixing supplies (cups, stir sticks, disposable gloves).
- Small cutting blade or craft knife and scissors.
- Tiny fabric square and thin twine or baker’s twine.
- Oven and baking surface (tile or tray), oven thermometer recommended.
- Sandpaper or small file (for trimming cork), and paper towels.
Preparation
- Mix an orange clay by blending yellow + red + white until the color matches the peach tone you want. Adjust proportions for warmer or paler shades.
- Condition the clay thoroughly until soft and uniform.
- Gather the tiny glass bottle and check the cork fit; have sandpaper or a blade ready to trim the cork later.
- Prepare your workspace for resin use: ventilated area, disposable surface covering, and resin mixing tools ready.
Step‑by‑Step Detailed
Color mixing & forming peach halves
- Mix the orange color:
- Combine yellow, red, and white clay and knead until smooth and even.
- Optionally mix a small amount of translucent clay for a softer, slightly translucent peach flesh.
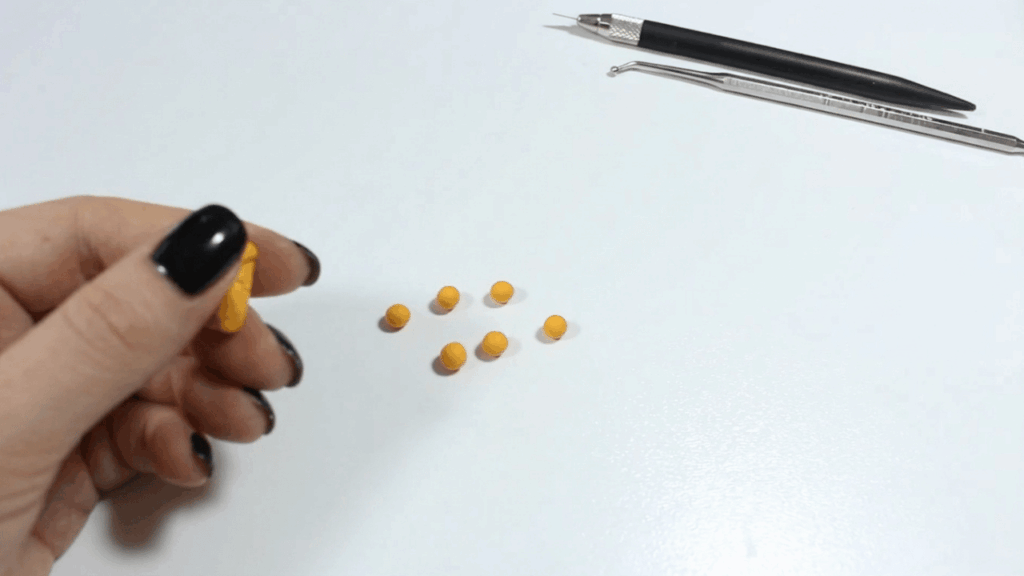
- Form small balls:
- Roll the mixed orange clay into many tiny balls sized to fit your bottle scale.
- Work quickly but carefully to keep the surface smooth and even.

Shaping each peach half
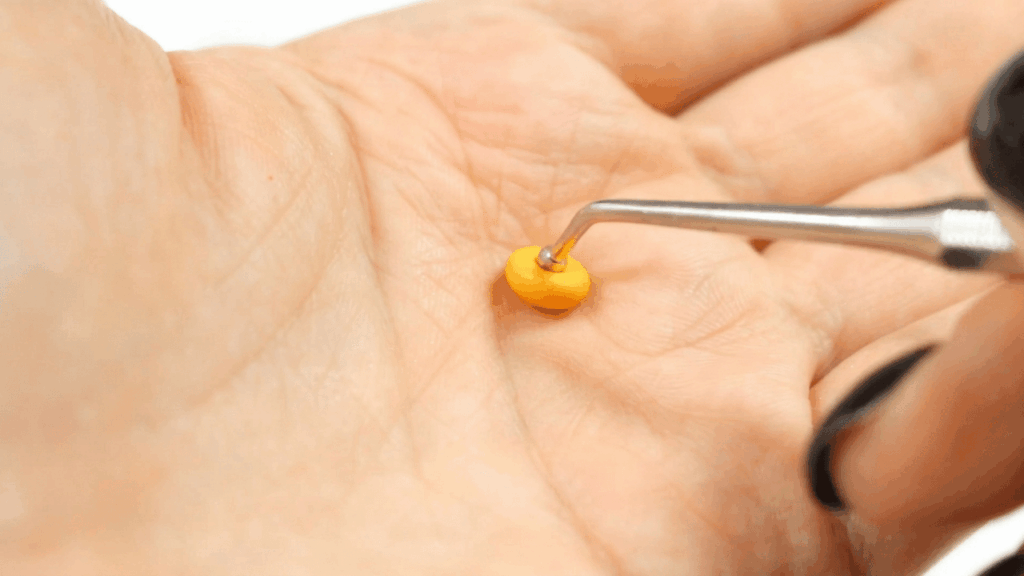
- Flatten and shape each ball:
- Place one ball on a flat surface.
- Gently flatten one side with your finger to create the flat inner surface of a peach half.
- Create the pit dimple:
- Flip the piece so the flattened side faces down and the rounded side is up.
- Use a dotting tool to press a dimple in the center of the rounded face — this simulates the pit indentation.
- Repeat for all peach halves until you have enough to fill the bottle or achieve the desired composition.
Shading and surface detail
- Add subtle shading:
- Use a small brush and brown soft pastel to lightly shade inside each dimple and around the inner edge for depth.
- Apply very gently; less is more — you can always darken later.
- Blend the pastel softly to avoid sharp marks, creating a natural pit shadow.
Baking the peaches
- Bake the clay pieces:
- Bake according to the polymer clay manufacturer’s instructions, using an oven thermometer if available to ensure correct temperature.
- Arrange pieces on an oven-safe tile or tray and bake for the recommended time relative to their size.
- Cool completely:
- Remove from oven and allow the peach halves to cool fully before handling to avoid deformation or fingerprints.
Arranging peaches in the jar
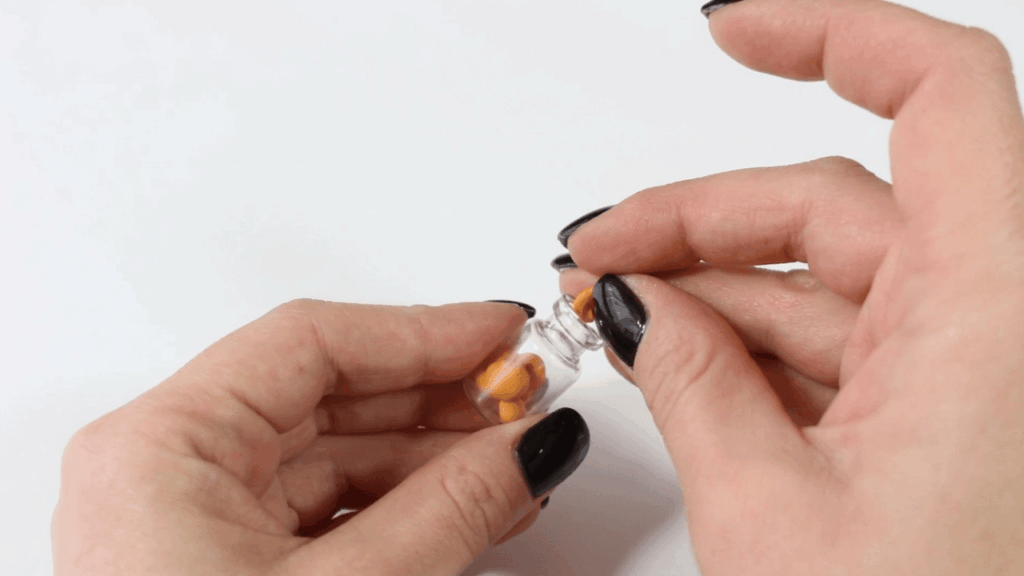
- Place baked peach halves into the tiny glass bottle:
- Arrange them with the dimpled sides oriented as desired to mimic a realistic canned arrangement.
- Stack or bunch pieces based on your aesthetic — some clusters may overlap for a natural packed look.
Preparing and pouring resin (syrup)
- Mix clear resin per product instructions:
- Measure resin and hardener precisely and stir slowly to reduce bubbles.
- Work in a well‑ventilated area and wear gloves.
- Pour resin into the jar:
- Pour carefully to cover the peach halves, ensuring all pieces are submerged and avoiding overfilling.
- Use a toothpick to coax bubbles to the surface if needed.
- Allow resin to become slightly tacky:
- Follow cure times; the cork is inserted while the resin is still sticky enough to hold it but not so liquid that it displaces peaches.

Cork trimming and insertion
- Trim cork to fit:
- Test fit and trim the cork with sandpaper or a craft blade so it seats snugly in the jar opening.
- Insert cork while resin is tacky:
- Place the cork into the bottle while resin is still slightly sticky, ensuring a secure seal and that the cork adheres as resin cures.
- Avoid pushing cork too deep and disturbing the peaches.
Final finishing touches
- Fabric cover and twine:
- Cut a tiny fabric square slightly larger than the jar lid.
- Place it over the cork and secure with a small piece of twine, tying a neat knot or bow for a canned look.
- Cure fully:
- Allow the resin to harden completely per manufacturer instructions before touching or packaging.
Finishing Instructions
- Confirm resin is fully cured and the cork is secure.
- Trim any excess resin flash around the bottle lip with a craft blade and smooth with fine sandpaper if needed.
- Optionally buff the glass or add a label for authenticity.
- Store the finished miniature in a dust‑free display case or box.
Tips & Techniques
- Make peaches slightly different sizes for a natural packed look.
- Lightly sand the cork rather than excessively trimming to preserve a snug fit.
- If resin bubbles form, use a small torch or heat gun at a distance to pop bubbles immediately after pouring.
- Use translucent clay sparingly in the mix to avoid an overly pale or washed look.
- Work in small batches if many peach halves are needed to maintain consistent detail.
Common Problems & Solutions
- Peach halves deform during baking: ensure pieces are fully conditioned and bake on a flat, heat‑resistant surface; do not over‑handle while warm.
- Resin shifts peaches: pour slowly and stabilize pieces with a toothpick if necessary until resin thickens; pour in stages if helpful.
- Cork doesn’t stick or resin leaks: trim cork for a proper fit and insert while resin is tacky to help adhesion; if leakage occurs, seal with a tiny bead of cured resin or clear silicone after curing.
- Pastel smudges during handling: fix pastel with a very light spray fixative or bake the pastel lightly on a low heat if compatible with the clay and pastel (test first).
Creative Ideas & Variations
- Make other canned fruits (pears, cherries) by adjusting clay color and size.
- Add a tiny label by printing or handwriting a miniature sticker for the jar.
- Use colored resin tints for syrup variants (light amber for peach syrup, pale yellow for pear).
- Create a matching set of miniature pantry jars in different sizes and fruit types.
Final Result
A detailed miniature jar of peaches in syrup featuring hand‑sculpted peach halves shaded for realism, set in clear resin syrup, sealed with a cork, and finished with fabric and twine. The miniature is durable, display‑ready, and customizable for dioramas, jewelry, or collector displays.