How to Sculpt a DIY Realistic Eastern Dragon With Clay
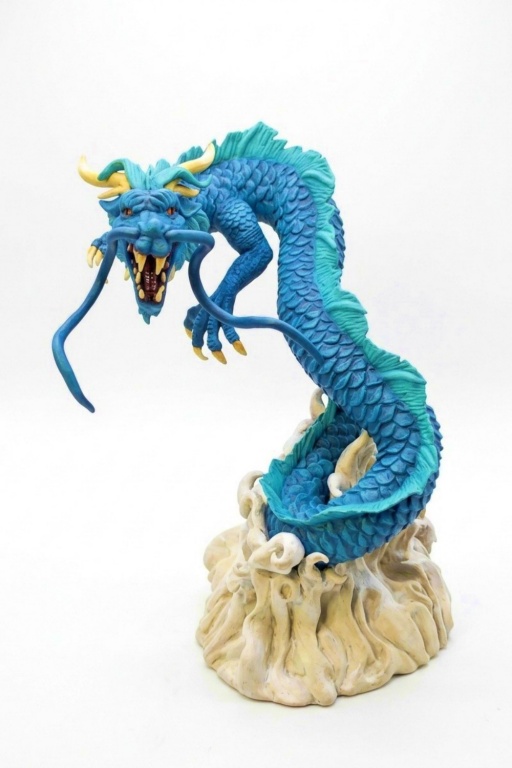
Craft a stunning DIY Realistic Eastern Dragon in Clay with intricate details perfect for showcasing your sculpting skills or as a unique decor piece.
Bring a legendary creature to life with a creative and hands-on project inspired by the beauty of Eastern dragons. This DIY craft lets you create a stunning dragon sculpture in clay that captures the elegance and mystique of these creatures. It’s perfect for anyone who loves mythology, art, or just enjoys unique and detailed projects.
Craft a Beautiful DIY Realistic Eastern Dragon in Clay

The design of Eastern dragons is truly magical—they are known for their long, serpentine bodies, delicate features, and flowing details that symbolize power and wisdom. Sculpting one allows you to explore those details, like intricate scales, whiskers, horns, or swirling patterns. The process is all about shaping and adding personality to your dragon, making it as lifelike and striking as you’d like. Watching each feature come together brings a sense of excitement and accomplishment.
Creating a realistic Eastern dragon in clay is a chance to show off your creative side while working on something truly unforgettable. Whether it’s displayed proudly in your home or gifted to someone who appreciates mythical art, your dragon is sure to impress. Plus, it’s an opportunity to immerse yourself in the magic of crafting, turning a lump of clay into something enchanting and full of life.
Sculpting a Realistic Eastern Dragon in Clay
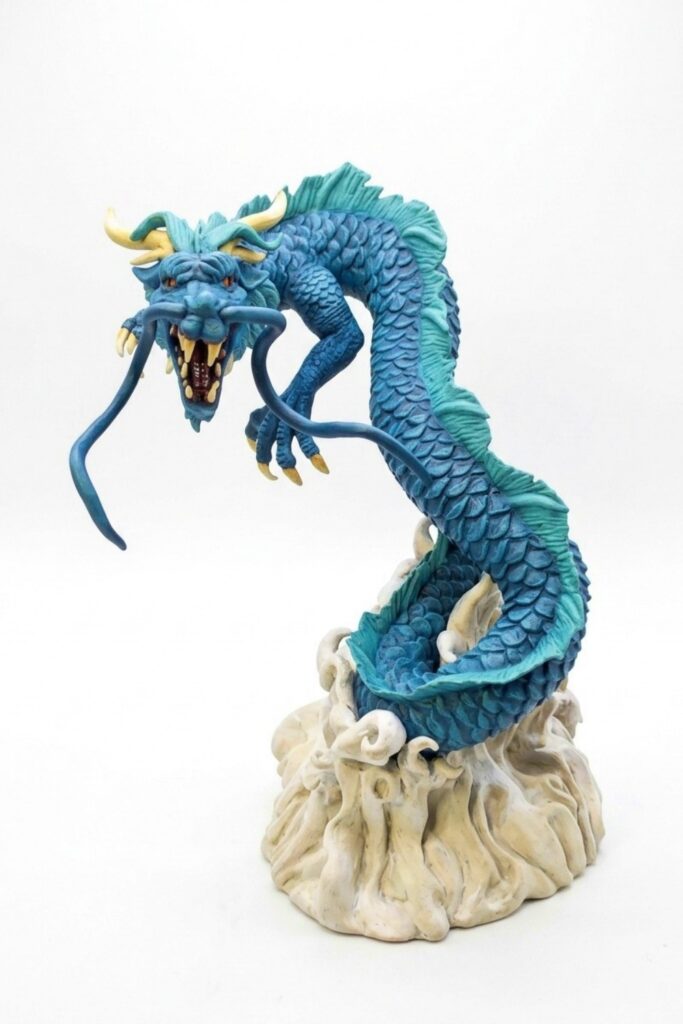
Create a detailed, textured polymer-clay Chinese-style dragon sculpture mounted on a swirly cloud base. The process uses a wire-and-foil armature to save clay and add strength, staged sculpting (legs, underbelly, mane, scales, facial features), prebaked elements for repeatable details, and layered painting and glazing to finish.
Materials & Supplies
- Polymer clay (gray, beige, red/blue selections as desired)
- Aluminum foil (for bulking armature)
- Craft wire (for armature, legs, whiskers)
- Pre-baked spikes/eyeballs (made from clay and prebaked)
- Isopropyl alcohol (for smoothing)
- Acrylic paints (dark blue, lighter drybrush colors, yellowish beige, gray, white, orange)
- UV resin (for glossy eyeballs)
- Superglue (for final assembly to base)
Tools & Equipment
- Wire cutters and pliers (to shape and trim wire)
- Needle tool / sculpting tools (for texturing and carving)
- Rolling tools / blades (for cutting clay strips)
- Oven (for baking clay and prebaked elements)
- Brushes for painting and dry-brushing
- Small spatulas or scrapers for cloud shaping
Project Details
- Difficulty: Advanced (dense detailing — hundreds of scales).
- Time: Several sessions; sculpting and texturing are time-intensive.
- Size/Scale: Flexible — based on wire armature length and foil bulk.
- Style: Snake-like Chinese dragon with flowing mane and cloud base.
Preparation
- Plan your dragon pose and bend craft wire into the skeleton shape to define head, neck, body, tail, and legs.
- Bulk the armature with aluminum foil to reduce clay usage and adjust mass.
- Wrap additional wire around foil for extra rigidity and to create anchor points for legs.
- Prebake small decorative elements (spikes, eyeballs, teeth) if you plan to press them into soft clay later.
Step-by-Step Detailed
Building the Armature
- Bend wire into the dragon’s basic silhouette (head, spine curve, tail).
- Bulk with foil where mass is needed (body, thighs, tail).
- Wrap wire around the foil to add structural grip for clay and to attach leg wires.
- Add separate wires for leg armatures and position them so claws will sit correctly on the base.

Sculpting the Legs
- Cover the armature with polymer clay and refine major forms (thighs, lower legs).
- Mix clay colors if running low (e.g., gray + beige) to get workable consistency and desired tone.
- Sculpt legs first because they will be difficult to access later.
- Add claws and begin surface texture: use a needle tool and various stamps.
- Create texture reference pieces (poke holes in scrap clay, bake, then press those onto the leg) to speed consistent texturing.
- Smooth surfaces with isopropyl alcohol for clean transitions.

Sculpting a Simple Head
- Attach a head form with pre-baked eyeballs inserted.
- Block in general head volume but postpone fine facial detail to avoid accidental damage during body work.
Sculpting the Underbelly
- Sculpt the underbelly separately; choose a scale shape (video uses sharp pentagon-shaped scales).
- Apply the underbelly panel carefully so it integrates into the body without disrupting surrounding textures.

Adding Spikes & Mane
- Attach pre-baked spikes along the spine/top of body for consistent shapes.
- Fill gaps with rolled clay strips and texture them to integrate with spikes.
- Cut and remove bits to make the mane uneven and natural; smooth details with alcohol.
Adding Facial Features
- Add horns, ears, and teeth (teeth can be made from pre-baked spikes pressed into the mouth).
- Texture the face using fine clay tools; keep features proportionate to head shape.
- Return to facial detailing once surrounding areas are stable.
Scale Application (Scale Galore)
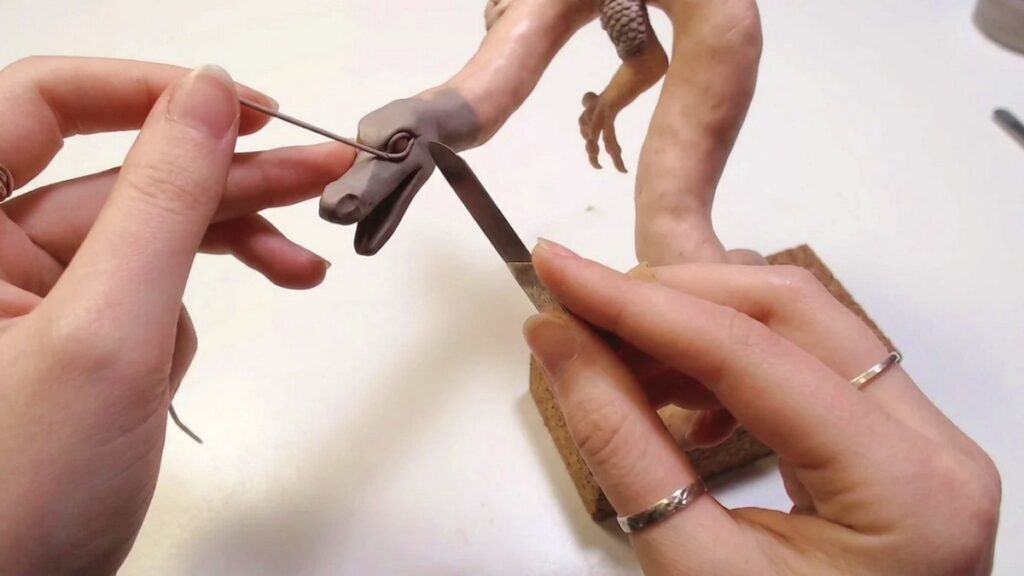
- Draw scale guides on the body, scrape away clay, and refine each scale shape manually.
- Expect this to be the most time-consuming step — hundreds of scales may be needed.
- Frequently wash or wipe with isopropyl alcohol to remove debris and smooth scale edges.
- Add a few clay strips as facial hair and beard once scales are complete.

Sculpting the Cloud Base
- Create a base armature from foil & paper tape, then cover with clay.
- Sculpt swirling cloud forms, scraping and adding clay to shape motion; add top swirls to hide dragon’s lower support.

Prebake / Final Baking
- Bake prebaked elements (spikes, eyeballs) ahead and the assembled sculpture per your clay brand’s instructions.
- Ensure oven temps and times match manufacturer guidelines to avoid over/under-baking.
Finishing Instructions
- Paint cloud: white base, then a gray wash to bring out recesses; clean highlights with white.
- Paint dragon: start with dark blue base, then drybrush progressively lighter tones to emphasize scales.
- Paint mane/hair: choose a contrasting color and apply lighter highlights.
- Paint underbelly, horns, claws, and teeth with yellowish beige, then highlight/darken edges for depth.
- Paint eyeballs orange and cure a thin layer of UV resin for glossy, realistic shine.
- Create whiskers from wire covered with clay, attach, and finalize pose.
- Glue the dragon to the cloud base with superglue and allow cure time.

Tips & Techniques
- Use foil bulk + wire wrap to reduce clay use and increase structural strength.
- Prebake repetitive small parts (spikes, eyeballs, teeth) to speed assembly and ensure uniformity.
- Work from hardest-to-reach areas outward: legs → underbelly → body → head → mane → scales.
- Use isopropyl alcohol frequently to smooth and refine surfaces without losing detail.
- Drybrushing in multiple light layers yields natural highlights without obscuring texture.
Common Problems & Solutions
- Clay sagging or deforming:
- Solution: ensure wire armature is secure and prebake the base forms if necessary.
- Cracking between layers or seams:
- Solution: blend seams thoroughly and consider thin layers or added mechanical anchors (wire).
- Inconsistent scales:
- Solution: make a small stamp or prebake a texture tool for repeated patterns.
- Dull eyeballs:
- Solution: use UV resin for high-gloss, durable shine.
Creative Ideas & Variations
- Color variations: emerald, metallic, or gradient scales for different moods.
- Add LED lighting beneath the cloud for a glowing effect.
- Create a suite of dragons in different poses for diorama storytelling.
- Experiment with mixed media: metal accents, glass beads for eyes, or mica powders for shimmer.
Final Result
A richly textured, poseable Chinese-style dragon with handcrafted scales, flowing mane, and dynamic cloud base. The combined use of wire/foil armature, prebaked elements, meticulous texturing, and layered painting produces a durable, display-ready sculpture with strong visual impact.