DIY Celestial Sun & Moon Earrings for Cosmic Jewelry Lovers
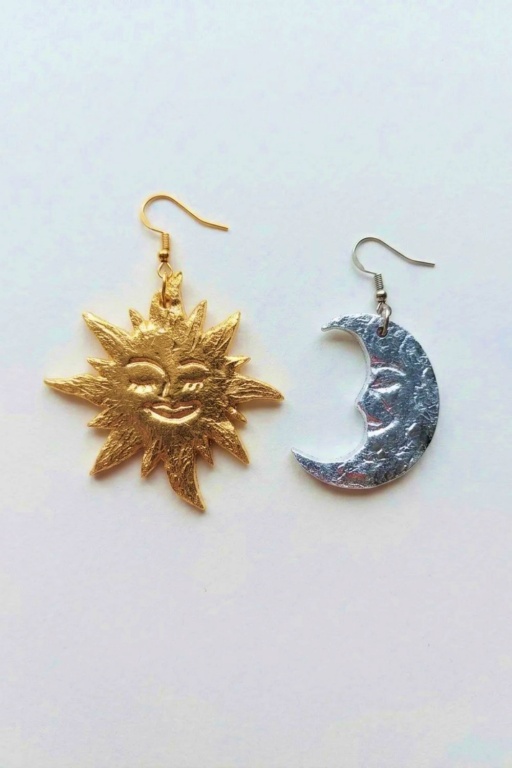
Design beautiful DIY Celestial Sun & Moon Earrings with beginner-friendly techniques and create professional-quality accessories inspired by the stars!
Jewelry inspired by the celestial beauty of the sun and moon offers a unique way to express yourself, all while bringing a touch of the universe to your style. This DIY project guides you through designing your own lightweight and stunning earrings that feature both the sun’s brilliance and the moon’s calm glow. It’s an artistic and rewarding activity that blends creativity with a sense of connection to the cosmos.
Custom DIY Celestial Sun & Moon Earrings Craft Project

With polymer clay as your main material, these earrings can be molded into intricate sun rays and soft crescent moon shapes. The clay is versatile, making it easy to shape, carve, and personalize your designs. By adding details like craters, swirls, or even slight texture for a cosmic effect, you’ll elevate the look of the pieces. Once baked to set, the jewelry turns into durable yet delicate-feeling accessories, perfect for adding metallic touches like gold or silver paint.
Every pair of these sun and moon earrings carries its own sense of wonder, making them more than just accessories—they’re wearable works of art. Whether you keep them as a personal treasure or share them as a handmade gift, the experience of creating and wearing something so meaningful adds extra value. These earrings aren’t just beautiful; they’re a reflection of your creativity and a little nod to the magic of the universe.

DIY Celestial Sun and Moon Earrings
This guide walks you step‑by‑step through making the sun & moon earrings exactly as shown in the Marjaana video. Every stage from template to assembly is included. Important actions and items are bolded.
Project Requirements
Materials
- Polymer clay (color(s) of your choice)
- Acrylic paint: gold (for sun) and silver (for moon)
- Gilding glue (adhesive specific for gold/silver leaf)
- Gold leaf and silver leaf sheets (gilding flakes)
- Acrylic lacquer (varnish) — for sealing (two coats recommended)
- Jewelry findings: jump rings (large + small), earring hooks (gold tone for sun, silver tone for moon)
- Optional: thin wire for drying painted pieces
Tools
- Paper, pencil, ruler
- Nail polish bottle (or any 2 cm diameter circular object for tracing)
- 3.5 cm round mold (or object to trace crescent)
- Sharp cutting tool / craft knife
- Rolling pin or acrylic roller
- Guide sticks (optional) to get even thickness
- Sharp tool (needle/point stylus) for tracing facial features
- Sandpaper or sanding sponge
- A stick or dowel and a glass/bowl (for hanging while drying)
- Small brush for paint and gilding glue
- Soft brush for brushing off excess leaf
- Pliers (for opening/closing jump rings)
- Clean cloth for wiping dust
Measurements
- Sun circle diameter: 2 cm (traced from a 2 cm bottle)
- Crescent base: traced from a 3.5 cm round mold to form moon shape
- Clay thickness: about 3 mm
Preparation
Workspace Prep
- Prepare a clean work surface and lay out tools and materials.
- Have paper templates ready (see Stage 1).
Clay Prep
- Roll clay to approximately 3 mm thickness using guide sticks or by eye.
- Keep clay pieces covered when not working so they don’t dry out.
Making Process
Stage 1: Create Paper Templates
- On paper, draw a 2 cm diameter circle (use the nail polish bottle as a round template).
- Using a ruler, mark eight even points around the circle so the sunbeams will be symmetrical.
- For the moon, trace a 3.5 cm round mold, then cut a crescent from that circle. Add a small nose shape to the crescent drawing to give character.
- Draw facial features on the paper templates if you want faces on your pieces — this will be used as a guide for carving into clay later.

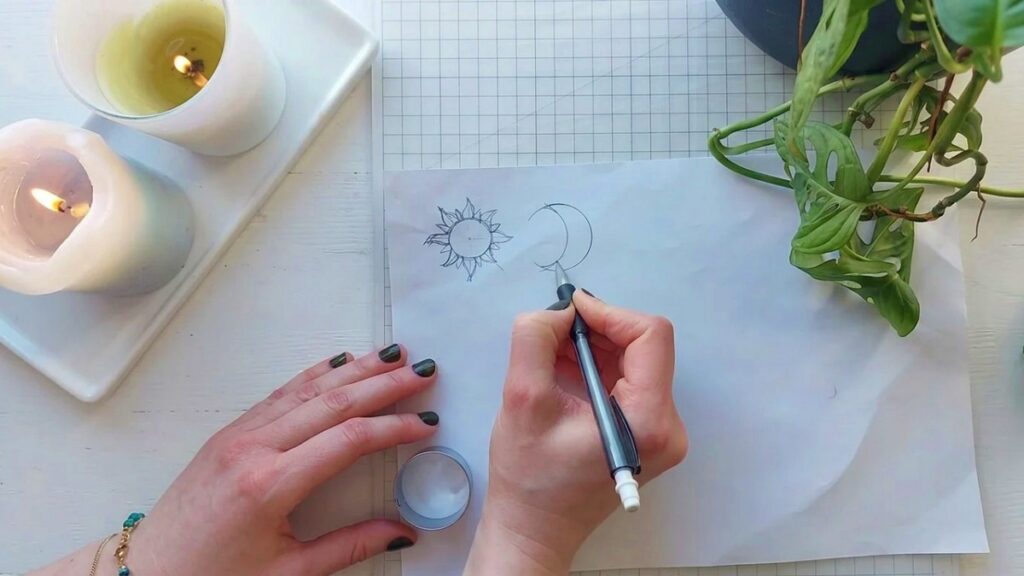
Stage 2: Cut the Sun & Moon Shapes
- Place the paper templates over the rolled clay (3 mm thick).
- Cut the sun shape from the clay following your template, including the rays guided by the eight marks.
- Cut the moon crescent from the clay using the moon template.
- Keep the cut pieces on a flat surface ready for detailing.
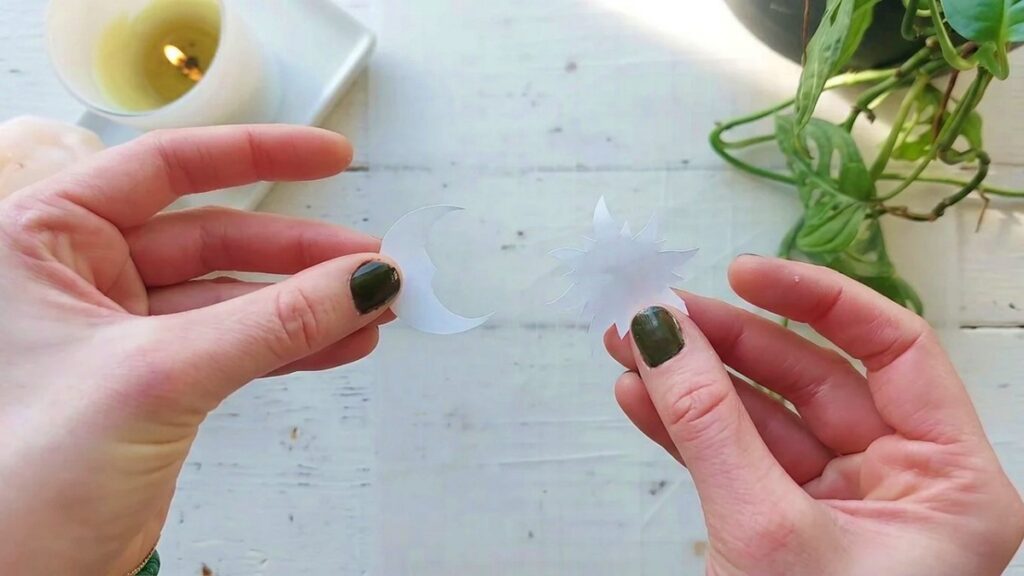
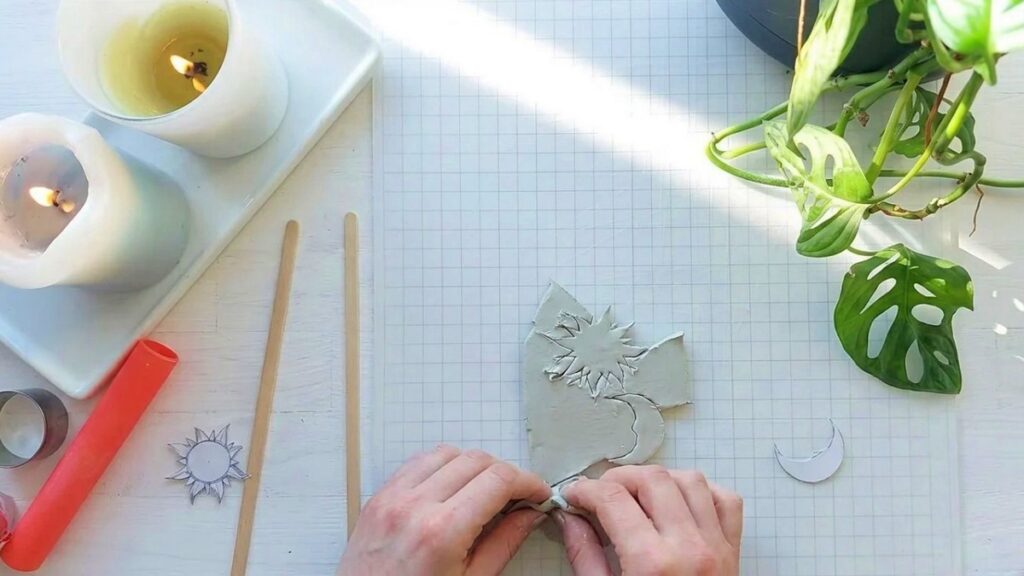
Stage 3: Add Facial Features
- Place the paper template with faces on top of the clay piece.
- Using a sharp tool, trace the facial outlines through the paper into the clay so the features transfer.
- Remove the paper and refine the facial features by defining lines, eyes, nose, mouth with the sharp tool.
- Make holes for the earring hooks at this stage — pierce a small hole in each piece where jump rings/hooks will attach. Ensure hole placement matches how the earring should hang.
Stage 4: Sand the Edges Smooth
- Once the clay pieces are fully dry/cured (follow your clay’s drying or baking instructions), gently sand the edges to smooth them.
- Be careful not to sand over the facial features — sand the outer edges only.
- After sanding, wipe away all dust with a soft cloth or brush.
Stage 5: Paint with Acrylics
- Paint the sun piece with gold acrylic paint and the moon piece with silver acrylic paint.
- For even coverage, apply three coats of paint, letting each coat dry between layers.
- Pro tip from the video: thread a wire through the hole and hang the earring on a stick over a glass or bowl so the painted piece can dry freely without touching any surfaces.

Stage 6: Add Gilding Flakes
- After paint is dry, apply gilding glue where you want leaf to stick. The creator used an approach intending to gild the edges but the leaf adhered more broadly — either is fine depending on the look you want.
- Let the gilding glue sit briefly according to glue instructions so it becomes tacky.
- Lay gold leaf on the sun and silver leaf on the moon (or mix if desired).
- Once the glue is completely dry, brush away the excess leaf gently with a soft brush.
- Note: gilding glue can create texture; this can accentuate features (rays/craters) and look intentional. Avoid placing glue directly over facial lines if you want them untextured.
Stage 7: Seal with Varnish
- To protect paint and gilding, apply two coats of acrylic lacquer/varnish.
- Let each coat dry fully before applying the next.
- Ensure varnish is compatible with your gilding and paints.
Stage 8: Assemble the Earrings
- Choose matching jump rings and hooks: gold-toned for the sun, silver-toned for the moon to coordinate with finishes.
- Use one larger jump ring and one smaller jump ring in the chain before attaching the earring hook (as shown in the video).
- Thread the small/large jump rings through the pre-made hole, close securely with pliers, and attach the earring hook.
- Double-check all closures are tight so findings won’t come loose.
Assembly Process
- Arrange findings in the desired order (large jump ring → small jump ring → hook).
- Use pliers to open/close rings cleanly — twist open instead of pulling to preserve ring shape.
- Hang assembled earrings to ensure they hang correctly and balance visually.
Decorative Details
- Faces are hand-etched for character; keep facial lines clear before gilding if you want them distinct.
- Gilding glue can be applied in patterns to create ray/crater effects when leaf adheres thickly.
- Paint three coats for opacity, and consider minimal overpainting of facial features to keep them visible.
Final Finishing
- After varnish cure, inspect edges and hardware. If needed, do final touch‑up paint or varnish.
- Polish gently if you want a higher shine (compatible with varnish used).
- Ensure all parts are dry and secure before wearing.
Tips for Success
- Trace facial features through paper to get consistent faces across pairs.
- Hang painted pieces to dry to avoid brush marks or sticking.
- If leaf sticks too broadly, consider applying glue only to thin lines or edges.
- Let each layer (paint, glue, varnish) dry fully before the next step to avoid smudging or lifting.
- Use matching metal tones for findings to complement the gilding (gold for sun, silver for moon).
Customization Options
- Swap the color palette: paint the moon in pastel blues and the sun in warm yellows.
- Use different metals for leaf (rose gold, copper) for varied effects.
- Add tiny rhinestones or mica powder to eyes for sparkle.
- Adjust sizes: scale templates up or down to create studs, drops, or a set of matching pieces.
Care and Maintenance
- Avoid soaking in water; wipe gently with a damp cloth.
- Store flat in a box to prevent scratching of gilding or varnish.
- Reapply varnish if gilding begins to lift over time.