DIY Polymer Clay Earrings & Bracelets for Personalized Jewelry
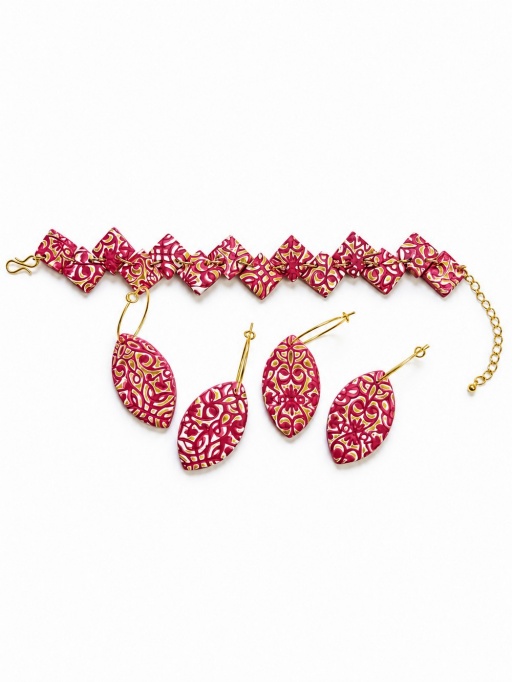
Learn how to design eye-catching DIY Polymer Clay Earrings & Bracelets with simple techniques and create your own unique, wearable art at home.
Making your own jewelry at home is a fun and creative way to express your personal style. With just a bit of polymer clay, you can design earrings and bracelets that are unique, colorful, and completely your own. This project is not only beginner-friendly but also offers endless possibilities for customization. Whether you’re looking for simple designs or bold statement pieces, you’ll love how easy it is to create beautiful accessories.
DIY Polymer Clay Earrings & Bracelets Step-by-Step Guide
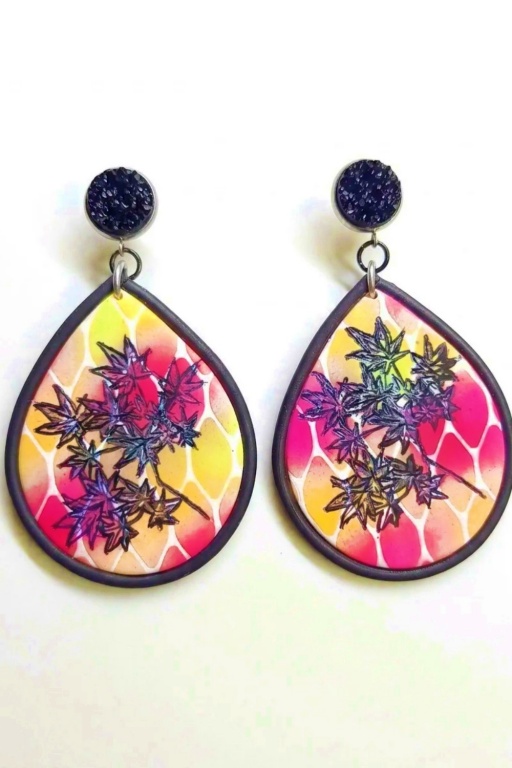
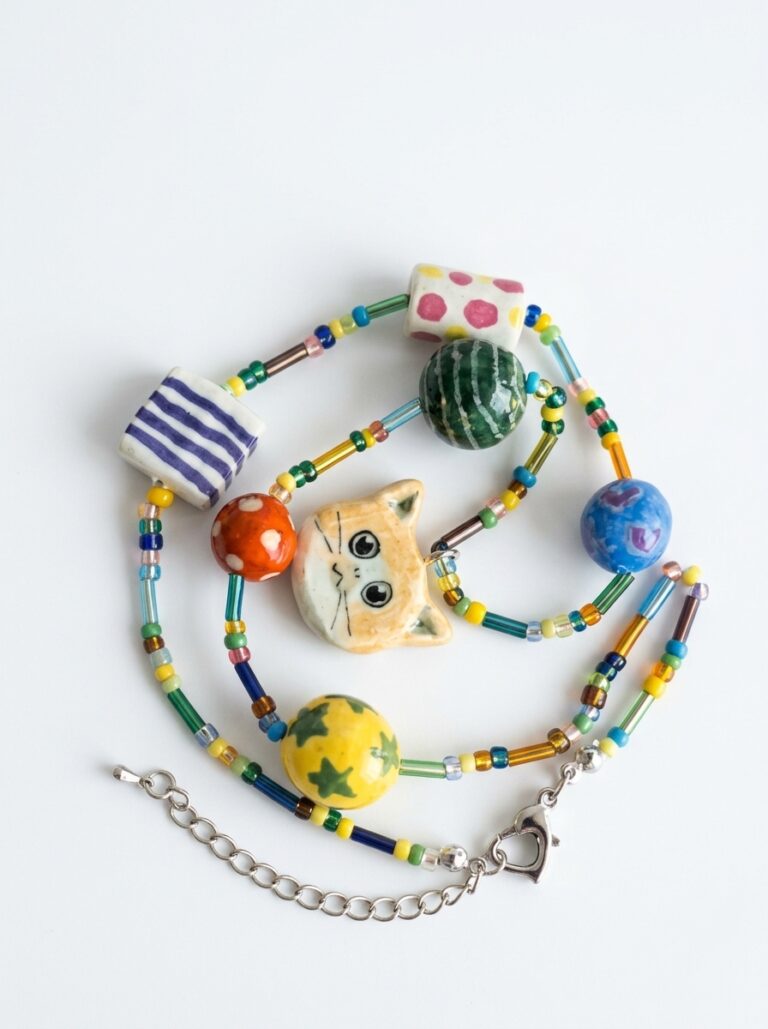
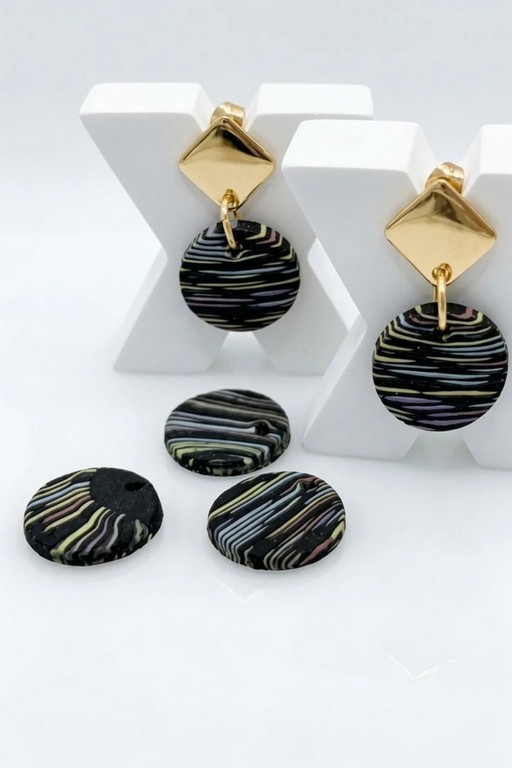
Using polymer clay, you can craft lightweight and eye-catching earrings that come in all shapes, sizes, and colors. From basic shapes like circles to more unique designs like marbled patterns or textured finishes, the clay is easy to mold into whatever you imagine. You can also design bracelet beads that match your earrings for a coordinated look. Once the clay is baked, your jewelry becomes sturdy and ready to wear or gift—perfect for adding a handmade touch to your wardrobe.
These earrings and bracelets are not just accessories; they’re a fun way to explore your creativity. Whether you’re looking to show off your artistic side or make thoughtful gifts for friends and family, creating jewelry like this brings something special to the table. It’s an enjoyable DIY project that allows you to experiment with colors and designs, leaving you with wearable pieces that are both stylish and meaningful.

Mokume Gane Polymer Clay Jewelry
This tutorial shows a complete, step‑by‑step mokume gane technique exactly as in the transcript. Follow each step in order — nothing is skipped. Important actions are bolded.
Materials & Supplies
- Several colors of polymer clay with good contrast (translucent/white plus two or more colors)
- Scraps of clay saved from trimming
- Water (spray bottle)
- Sandpaper (for base texture and backing)
- Small jump rings, chains, hook findings (for earrings/bracelet)
- Oven (follow clay manufacturer baking instructions)
Tools & Equipment
- Pasta machine
- Acrylic roller
- Two Sculpey blades (one thin, flexible, sharp)
- Texture sheet
- Tile or nonstick work surface
- Paper (for burnishing)
- Clay cutters
- Blade / trimmer
- Tile or flat surface to lift thin sheet from
- Tape (if needed for arranging pieces)
- Small round or square cutters (for shapes)
- Small drill or punch (if making holes for jump rings)
Project Details
- Technique: mokume gane — create layered, carved pattern sheets and transfer to a base sheet
- Typical finished items: earrings, bracelet panels, charms
- Clay thickness references: medium sheet for initial layers, then thinned sheet for surface layer; final cut pieces baked to manufacturer instructions
Preparation
- Choose three colors (or more) with visible contrast so the mokume pattern reads clearly — the transcript used a white sheet at the center to increase contrast.
- Condition the clay thoroughly until soft and pliable before rolling.
Step-by-Step Tutorial
Step 1: Condition, Roll & Stack Layers
- Condition each chosen clay well.
- Roll each color into medium‑thickness sheets on the pasta machine (a medium setting).
- Form a stack of layers with the white sheet placed at the center of the stack (this bright center will enhance contrast in the final pattern).
- Trim the excess near the edges of the stack so edges are neat and even.

Step 2: Reduce the Stack into a Thin Layer
- Put the stack through the pasta machine on a thinner setting (transcript: “rolled into a thin layer in a pasta machine on a high thickness” — interpret as passing the stack through to reduce into a thin sheet; choose a thinner setting appropriate for your brand).
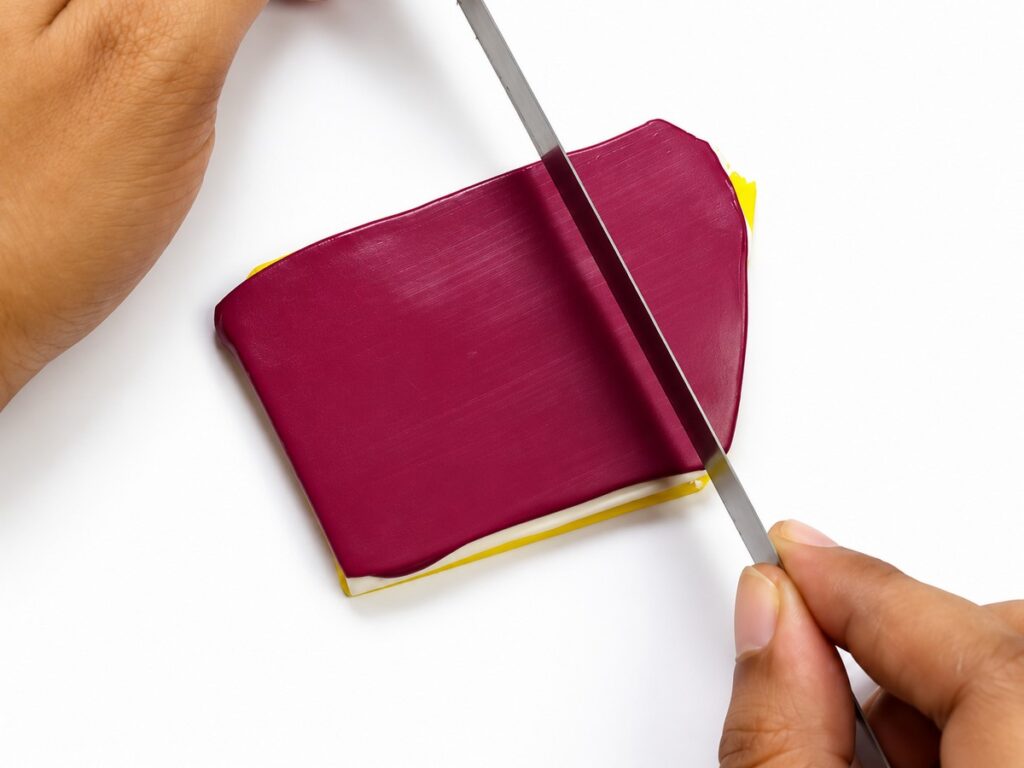
- After reducing, divide that thin sheet into two pieces.
Step 3: Re‑stack & Re‑roll into Medium Sheet
- Form a new stack by placing the two divided pieces together (stacking them one on another in the pattern you want).
- Roll this new stack back into a medium‑thickness sheet (so you regain a workable sheet thickness while keeping the layered pattern).
Step 4: Prepare Texture Sheet & Release
- Select the texture sheet you want to impress into the mokume surface.
- Lightly spritz the texture sheet with water to help prevent clay from sticking inside small crevices (this reduces clay leaving behind residues and helps release).
- Place the texture sheet onto your clay and use the acrylic roller applying extra pressure so the texture is fully and deeply imprinted.
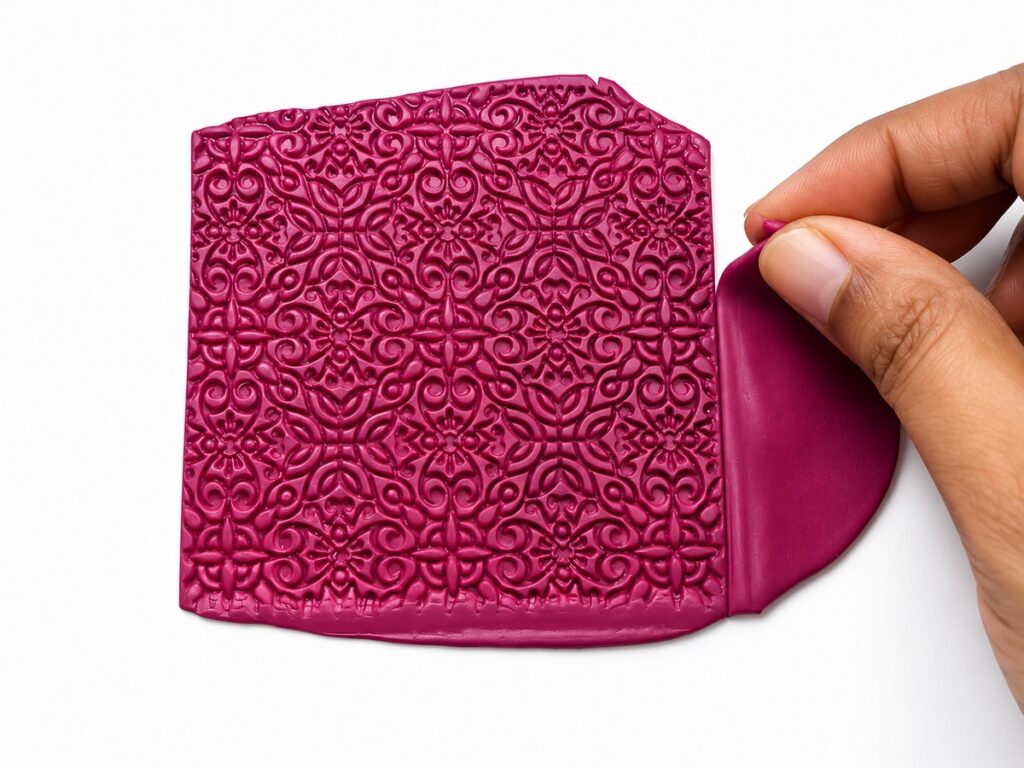
Step 5: Trim Edges & Prepare to Peel Top Layer
- Trim off the excess clay around the textured area to clean up the piece.
- Keep your blades ready: the transcript uses two Sculpey blades, one flexible, sharp and thin — have a flexible thin blade for peeling the top layer.
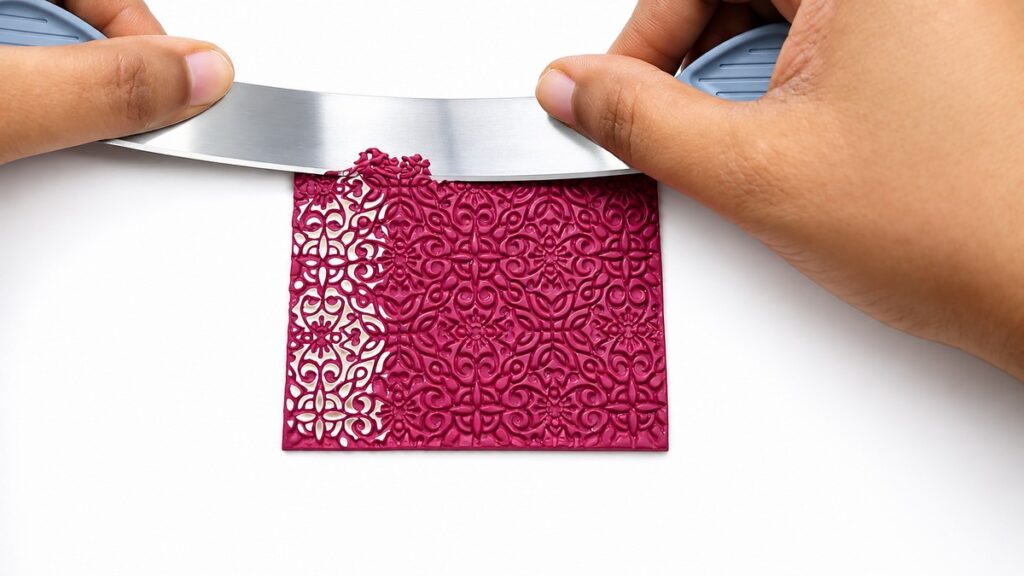
Step 6: Remove the Top Textured Layer (the critical mokume step)
- Slightly bend the flexible blade and place it parallel to the work surface.
- Slowly and patiently remove the top texture layer, shaving off only the thin top layer of clay with the texture impressed. This exposes the layered pattern beneath.
- Be very patient and concentrated during this process — it requires a steady hand.
- Make sure you only remove the top thin layer so you reveal the stacked colors underneath and don’t cut too deep.
- Practice on scraps first — the maker advises they ruined many pieces before mastering this step.
Step 7: Burnish & Lift the Thin Pattern Sheet
- Burnish the thin patterned sheet using paper so the sheet flattens and conforms.
- Lift the thin patterned sheet from the tile carefully — you will later attach this patterned layer onto a thicker clay base so the finished piece has body.
Step 8: Prepare & Texture the Base Sheet
- Choose any base for mounting the patterned sheet (plain or textured) — the transcript used sandpaper to texture the base for nice backing effect.
- Spray water lightly on the base if desired to help transfer or to prevent sticking.
- Mix all the trimmed scraps you saved earlier to make an interesting scrap blend (the transcript mixed scraps into a pink color) — this can be used as the base or an accent.
- Texture the base sheet using the acrylic roller if you want the base to have surface interest.
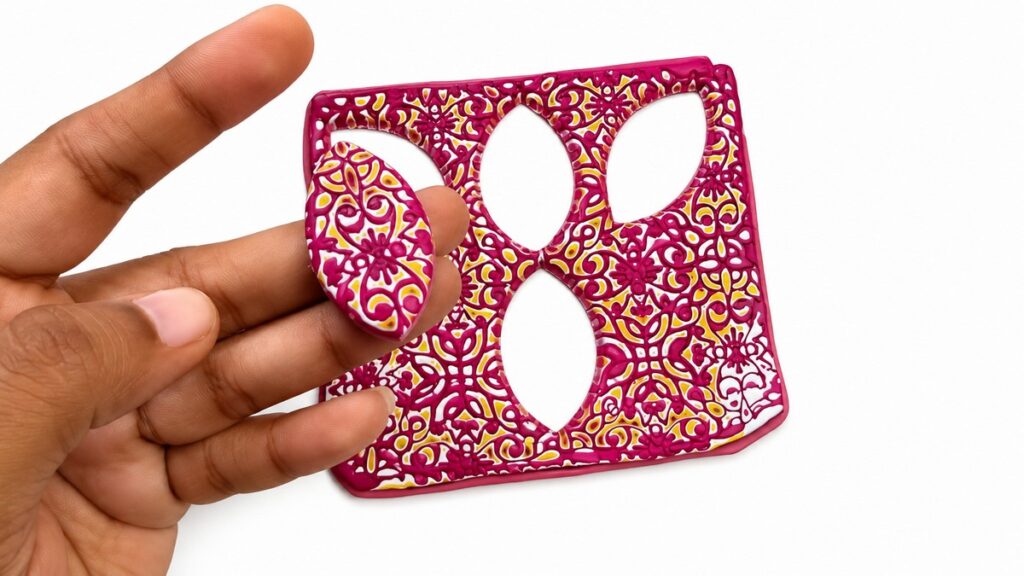
Step 9: Attach the Patterned Sheet to the Base
- Turn over the base sheet, then place the patterned sheet onto it so the patterned side is facing out.
- Burnish gently with paper to press the two layers together, ensuring there are no air gaps between layers.
- Trim off any excess patterned sheet neatly so edges align with the base.
Step 10: Cut & Bake
- Use the clay cutters to cut your final shapes (earring shapes, squares for bracelet tiles, etc.).
- Bake the pieces according to the polymer clay manufacturer’s instructions (temperature and time vary by brand; follow packaging).
- Allow to cool completely after baking.
Step 11: Final Assembly & Findings
- These are your final pieces after baking. Because the mokume pattern is bold, attach simple hook findings or clean minimalist hardware to keep the focus on the pattern.
- The backs are attractive too — the transcript mentions a lovely sandpaper texture on the backs.
- For the bracelet example:
- Use small square pieces arranged like a jigsaw (jig Jack) pattern — lay them out in the order you want.
- Use small jump rings and chains and attach a hook clasp finished under a scrap clay bead at the end for a polished look.
Finishing Instructions
- After attaching findings, inspect edges and clean any rough spots.
- If you like, apply a thin varnish or buff for a satin sheen; the transcript did not varnish, relying on the clay’s finish and textured backs.
- Ensure jump rings and clasp are securely closed.
Tips & Techniques
- Use contrasting colors — a bright or white center layer will make the mokume pattern pop.
- Condition clay thoroughly for even rolls through the pasta machine.
- Spritz texture sheets with water to prevent sticking inside tiny texture hollows.
- Use the flexible thin Sculpey blade held parallel to the work surface to remove only the very top layer — this is crucial.
- Burnish with paper rather than fingers to avoid fingerprints and to flatten the thin pattern sheet evenly.
- Practice the top‑layer removal on scraps until you can consistently lift thin sheets without tearing.
Common Problems & Solutions
- Problem: Thin patterned sheet tears when lifted.
- Solution: Burnish more gently and use paper to support the sheet; practice lifting on scrap pieces to learn the right blade angle and pressure.
- Problem: Texture sticks to the texture sheet.
- Solution: Spritz the texture sheet lightly with water or use a small amount of release (very sparingly); wipe excess moisture before impressing.
- Problem: You cut too deep while removing the top layer.
- Solution: Reduce blade angle, keep blade parallel to surface, and remove smaller amounts. Practice patience; don’t rush.
- Problem: Air gaps between patterned sheet and base.
- Solution: Burnish thoroughly with paper and reapply pressure; ensure both layers are flat and slightly tacky (or use a thin coat of compatible liquid clay if needed before final adhesion and baking).
Creative Ideas & Variations
- Use metallic or pearl clays for one or more layers to add shimmer highlights.
- Make larger panels and slice them into many small matching pieces for coordinated sets (earrings + pendant + bracelet).
- Instead of sandpaper for the back, use a stamped or carved texture for a custom reverse look.
- Layer more than three colors for complicated, marbled mokume patterns.
- Combine with mokume cane slices to create mixed media panels.
Final Result
- The final pieces show bold, multi‑colored mokume patterns on the front and a textured sandpaper back. The bracelet uses small square tiles arranged in a jigsaw layout, joined by jump rings and finished with a hook clasp tucked under a scrap bead.