DIY Baymax Polymer Clay Pencil Topper for School Supplies

Learn how to make an adorable DIY Baymax Polymer Clay Pencil Topper with this fun and easy guide, perfect for adding charm to your stationery collection.
Turning a simple pencil into a cute and friendly desk buddy is easy with polymer clay. In this project, you create a tiny topper shaped like Baymax, the lovable robot. It sits on top of your pencil and adds a bit of fun to everyday writing or drawing. This idea is great for fans of the character, students who want to brighten up school supplies, or anyone who enjoys small, charming crafts.
Handmade DIY Baymax Polymer Clay Pencil Topper Idea
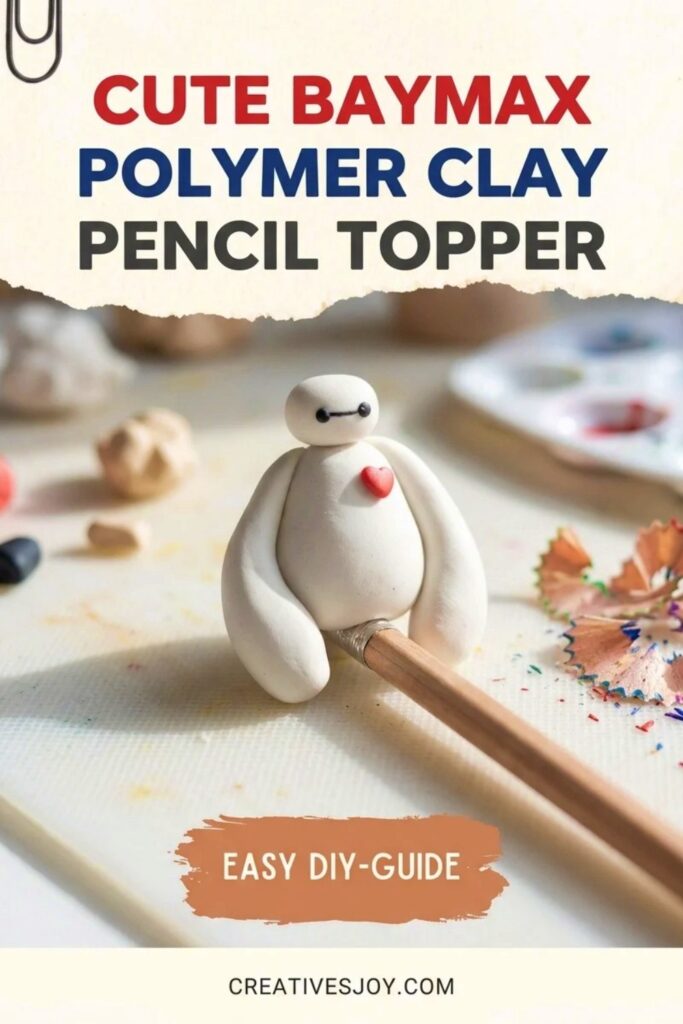
To make the DIY Baymax Polymer Clay Pencil Topper, you start by shaping white clay into a small rounded body and head. Then you add simple details, like his eyes and chest symbol, using black clay or a fine marker after baking. The topper is gently formed around the pencil end, so it fits snugly without falling off. After baking the clay following the package instructions, your Baymax turns firm and ready to use. The steps are simple, and the design is clean, so even beginners can enjoy making it.
This little topper brings personality to your stationery and makes writing more fun. You can create one for yourself or make several as gifts for friends and classmates. It’s also a relaxing project to do on a quiet afternoon, and it doesn’t need many tools or materials. With just some clay, a pencil, and a bit of patience, you get a cute helper sitting on top of your pencil, ready to keep you company while you work or study.

Cute Baymax Polymer Clay Pencil Topper
Create a cute Baymax-inspired pencil topper from polymer clay. This small sculpting project results in a durable, glossy topper that slips onto a pencil and makes a fun desk accessory or gift. The design focuses on simple rounded forms — body, head, arms — with minimal detailing for an easy beginner-friendly build.
Materials & Supplies
- Polymer clay: white (main body), red (heart), black (face details); a small amount of translucent is optional
- Polymer clay glue (eg. Bake ‘n Bond or TLS)
- Gloss varnish (for final shine)
- A standard pencil (for sizing and making the hole)
Tools & Equipment
- Blending tool (or similar stylus) for smoothing and making eye sockets
- Flathead or eye pin (to anchor the head to the body)
- Thin blade or craft knife (for trimming)
- Oven (for baking polymer clay; follow manufacturer instructions)
- Small paintbrush (for glue/varnish)
Project Details
- Skill level: Beginner
- Time: 30–60 minutes (plus bake/cure time)
- Size: pencil-topper scale — fits a standard pencil after you make the hole
- Output: 1 Baymax-style pencil topper (can be adapted for magnets or charms)
Preparation
- Condition your clay by kneading until soft and pliable.
- Divide clay roughly into portions for: body, head, arms, and small detail pieces (heart, eyes, mouth strip).
- Preheat oven per the clay manufacturer’s recommended temperature and time. Use an oven thermometer if possible for accuracy.
- Keep tools and glue within reach.

Step-by-Step Detailed
Form the Body
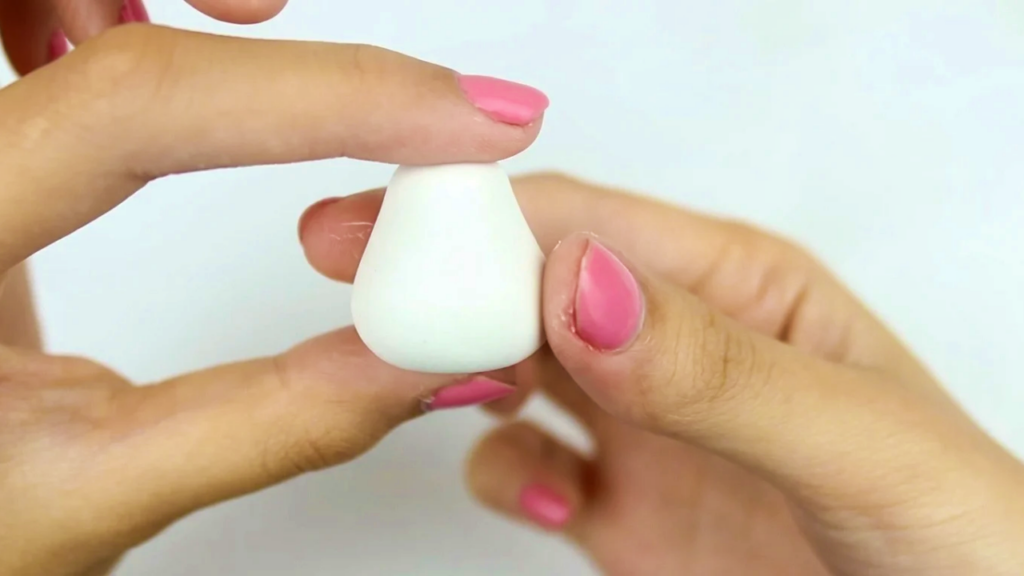
- Roll a larger portion of white clay into a plump, blunt-topped shape (rounded rectangle / fat teardrop).
- Flatten the bottom slightly so the topper will sit neatly on a pencil and not wobble.
- Using your pencil, create a hole at the bottom center — push the pencil in to the desired depth so it fits snugly when finished. Remove and set aside.

Form the Head
- Roll a smaller amount into an oblong “P” (elongated oval) shape.
- Match the head size against the body to ensure proportion — the head should comfortably sit on top of the body.
Add Facial Details
- Use the blending tool or stylus to poke two shallow eye sockets into the head (evenly spaced).
- Roll a thin strip of black clay and position it across the face, between the eye sockets, flatten with your tool or finger to form Baymax’s simple mouth line.
- Roll two tiny black balls and press them into the eye sockets to form the eyes — make sure they sit flush and look even.

Shape and Attach the Arms
- Roll two long, slightly irregular cylindrical shapes for arms (long “weird” shapes as in the demo).
- Attach arms to the sides of the body, pressing and shaping them so they look naturally wrapped or resting on the body. Secure seams by smoothing with the blending tool or your fingers.

Anchor the Head
- Apply a bit of polymer clay glue to the end of the eye pin (or flathead pin).
- Insert the pin into the top center of the body so the pin stem sticks up to receive the head.
- Place more glue on the exposed pin inside the head and press the head onto the pin, ensuring it seats securely. This internal pin provides extra mechanical strength during handling and baking.

Add Heart Detail
- Roll a small bit of red clay into a tiny heart.
- Use a dab of glue (or Bake ‘n Bond) on the back and stick the heart onto the chest area; press gently so it adheres. (Note: Bake ‘n Bond can be used before baking to help hold while curing.)
Final Checks Pre-Bake
- Smooth all visible seams and clean fingerprints.
- Confirm the pencil hole is unobstructed — re-test with the pencil to ensure fit.
- Make sure the head is well-seated on the pin and arms are secure.
Finishing Instructions
- Bake the topper according to the clay manufacturer’s instructions (temperature and time).
- Allow the piece to cool completely before handling.
- Apply gloss varnish sparingly to achieve the shiny Baymax look; let dry thoroughly.
- If any elements feel loose after baking, reapply a small amount of polymer-safe adhesive and let cure.
Tips & Techniques
- Condition clay thoroughly to avoid cracks during baking.
- Use an eye pin for mechanical strength — it prevents the head from popping off with regular use.
- Avoid over-glossing; a thin coat gives a professional finish.
- If you want a snugger pencil fit, test while clay is uncured, then slightly widen or compress the hole as needed.
Common Problems & Solutions
- Head falls off after baking:
- Solution: ensure the eye pin is long enough and glued inside the head before baking; reattach with strong adhesive if needed.
- Hole too tight or too loose:
- Solution: before baking, test fit the pencil — widen with a round tool or compress clay to tighten. After baking, sand with fine sandpaper to adjust.
- Seams visible or fingerprints:
- Solution: smooth seams carefully with the blending tool or fingertip dipped in a tiny amount of mineral oil before baking; sand lightly and re-gloss after bake if needed.
Creative Ideas & Variations
- Make a set in different colors or characters (magnets, keychains).
- Turn the topper into a charm by embedding an eye pin loop or jump ring before baking.
- Add accessories: tiny cape, bow, or pattern details using colored clay or paint.
- Scale up to create small figurines or desk buddies.
Final Result
A compact, glossy Baymax-style pencil topper with a secure head anchor, simple expressive face, and optional heart detail. The finished piece is durable for everyday pencil use and makes a quick, giftable handmade item when glazed and fully cured.