Unique DIY Waffle-Shaped Polymer Clay Ideas for Beginners

Master the art of DIY Waffle Polymer Clay crafts and add a sweet, creative twist to your accessories with simple and fun clay-making tips.
If you’re someone who loves cute and realistic miniatures, this project is sure to catch your attention. Using polymer clay, you can create a fun and lifelike version of a waffle that looks good enough to eat. This simple DIY is a perfect way to express your creativity while making something that can be transformed into keychains, charms, or even decorative magnets. It’s easy, enjoyable, and suitable for all skill levels.
Detailed Guide to Creating Cute DIY Waffles Using Polymer Clay
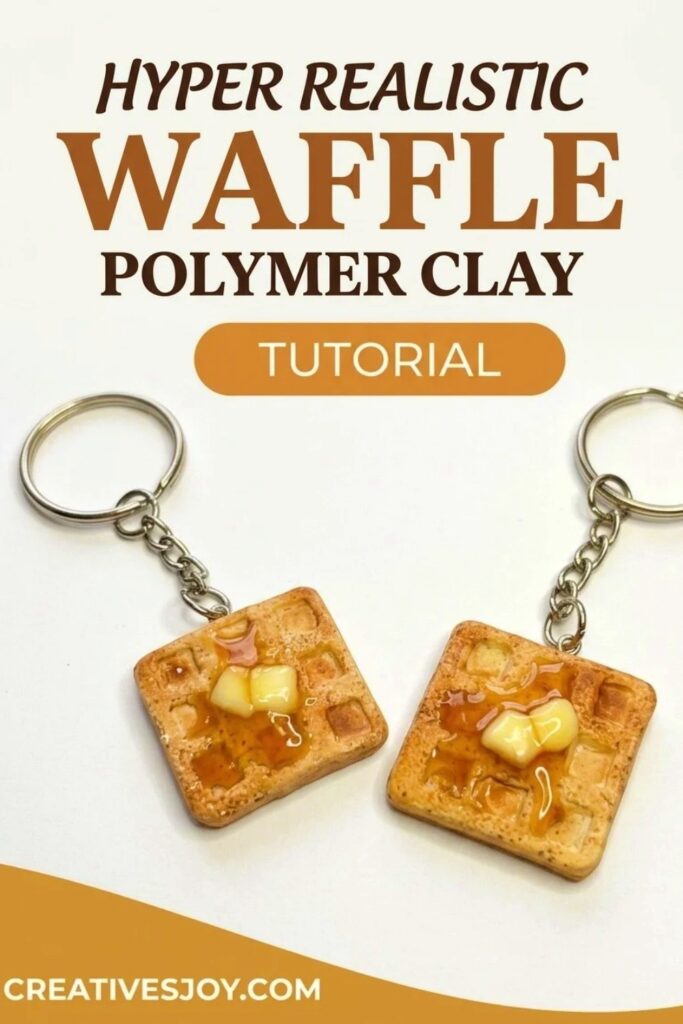
For this project, polymer clay is shaped into a tiny waffle with realistic textures and patterns. You can add vibrant details like syrup, butter, or fruit toppings using different clay colors or paints. Each step is hands-on, giving you the opportunity to customize every feature and make your creation truly unique. Whether you prefer a classic golden waffle or want to try fun colors like chocolate or rainbow hues, the options are endless.
The finished piece is more than just a cute creation—it’s also practical. These adorable mini waffles can brighten up your accessories, be gifted to a friend, or simply add a touch of charm to your craft collection. This project offers the ideal mix of creativity and relaxation, allowing you to design something playful and delightful that is bound to make you smile.
Hyper Realistic Waffle Polymer Clay
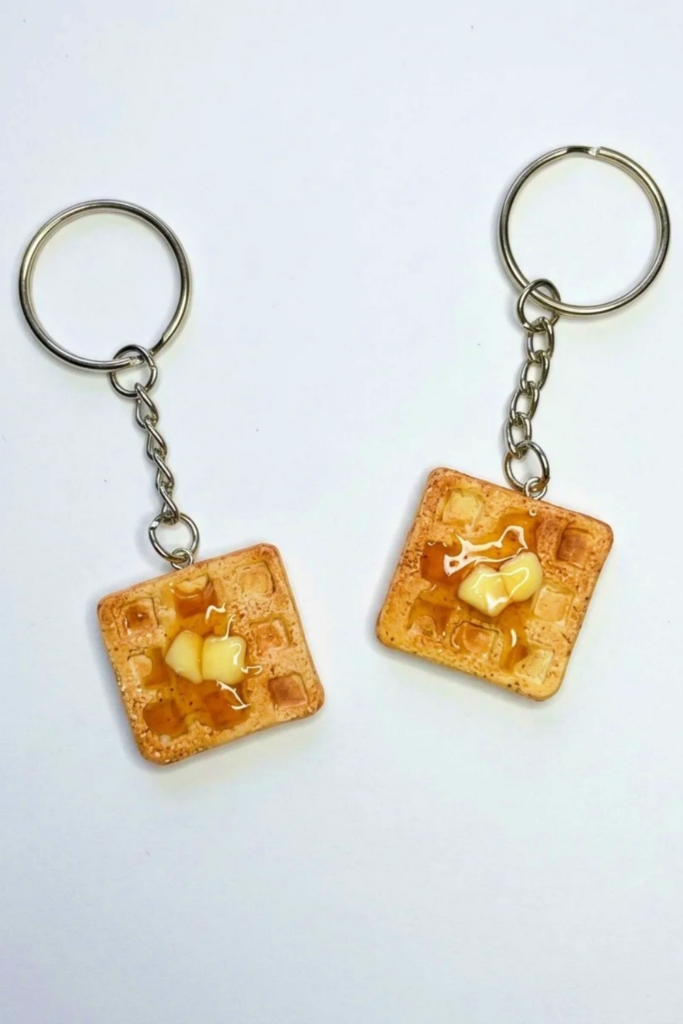
Create realistic, food-themed waffle keychains using textured polymer clay, soft pastel shading, translucent “syrup” from liquid Sculpey, and a glossy UV-resin finish. This tutorial covers stamping, cleanup, texturing, coloring, adding butter and syrup elements, curing, and final assembly so you can produce consistent, sellable charms.
Materials & Supplies
- White polymer clay (Sculpey Soufflé or Primo recommended)
- Liquid translucent Sculpey (for syrup)
- Soft pastel powders in multiple tones (light to dark)
- Yellow and white clay (for butter)
- Small metal findings (jump rings, keyrings, eye pins)
- Copy paper (for baking a syrup sample)
- Optional: small disposable container for mixing larger syrup batches
Tools & Equipment
- Custom waffle stamp (or commercial texture stamp)
- Acrylic roller and flat work surface
- Blade / cutting tool for trimming edges
- Bottle brush tool and needle-like tool for micro-texture
- Small measuring tools for findings
- Oven or toaster oven (for baking clay and syrup test)
- UV resin and UV lamp (for glossy syrup finish)
- Pliers (two) for opening jump rings correctly
Project Details
- Style: Miniature realistic waffle keychains (can adapt to earrings or magnets).
- Output: Two matching waffle keychains per session (or scale as needed).
- Focus: Consistency in stamping, naturalistic shading, secure findings, and lifelike syrup shine.
Preparation
- Condition the clay so it’s soft and workable.
- Roll a clean slab of white clay to your desired thickness for waffles.
- Arrange pastel shades in wells from lightest to darkest for efficient layering.
- Prepare your custom waffle stamp and keep cleanup tools at hand.
- Preheat oven/toaster oven only when ready to bake samples or finished items.
Step-by-Step Detailed
Follow the sequence below; important actions are bolded.
Workspace intro and intent
- Introduce the project briefly if recording: state you make food-themed keychains and today’s project is waffle keychains.
- Show workspace to orient viewers and demonstrate tools and materials.
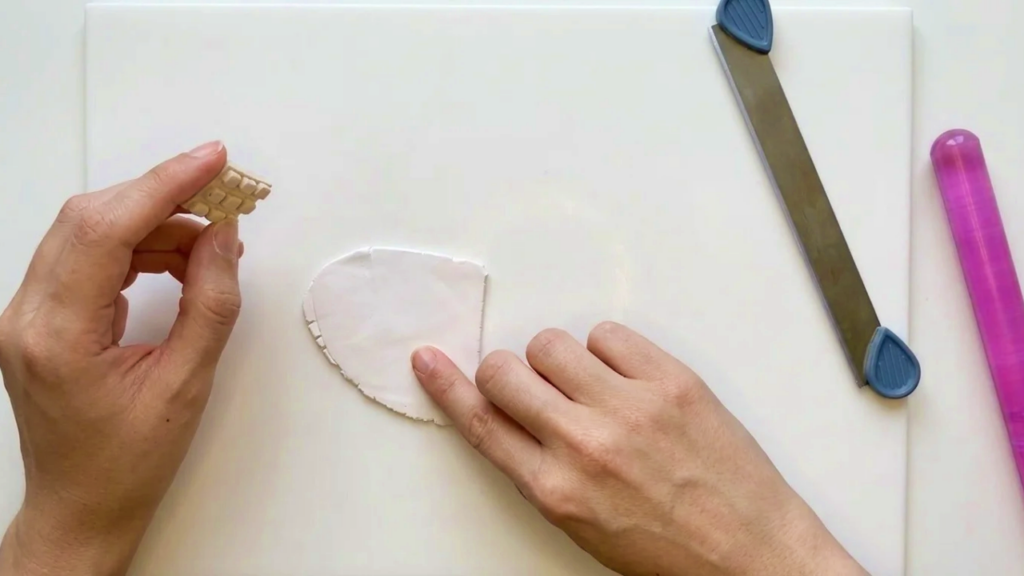
Create waffle impressions
- Start with a clean slab of white clay rolled to uniform thickness.
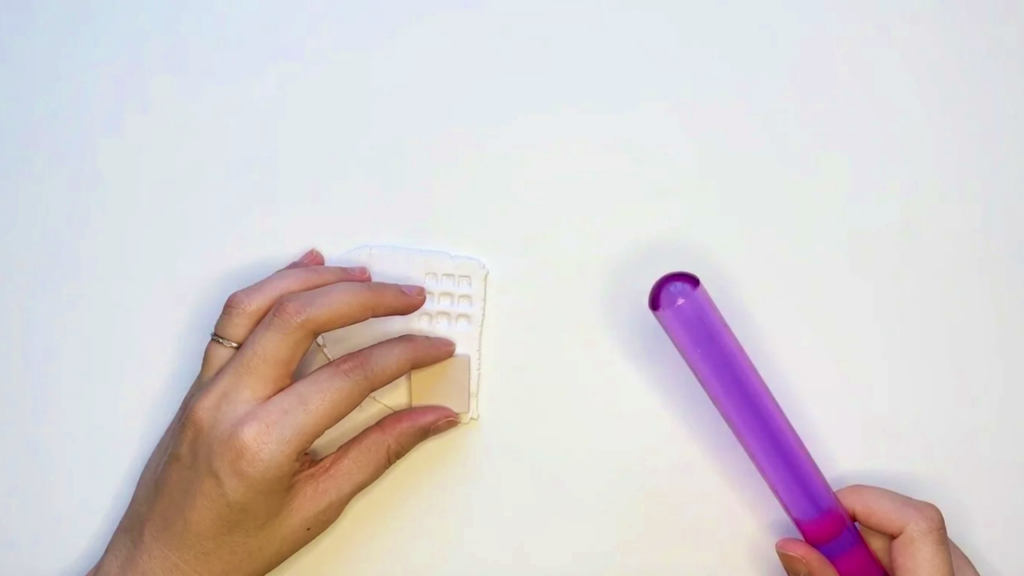
- Press the waffle stamp firmly into the clay to form a consistent grid texture.
- Stamp front and back separately — do not stamp both sides of one piece, as this can ruin the opposite imprint.
- If making pairs, create two front/back sets (four imprints total).
Clean up and trimming
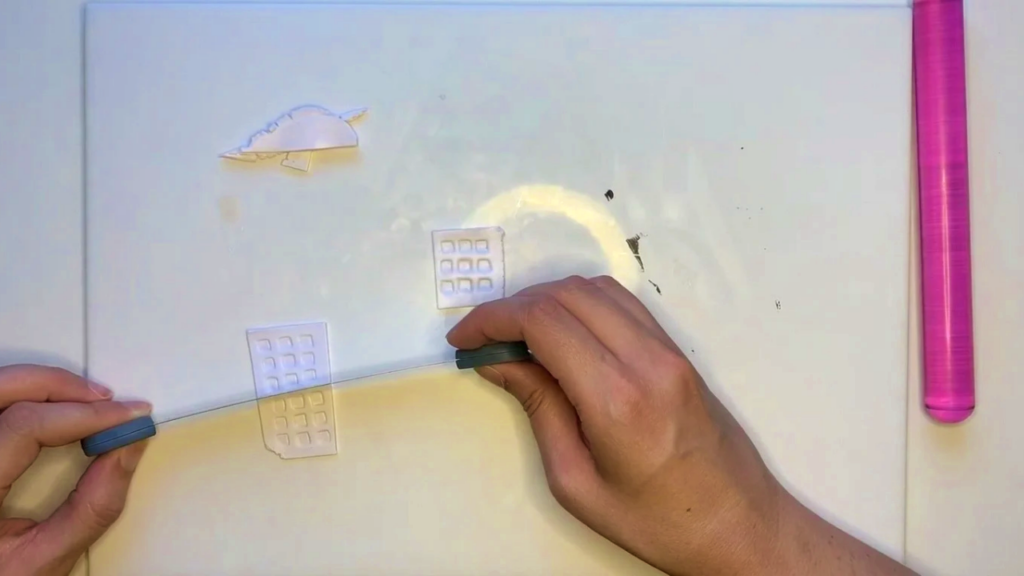
- Clean missed spots where the stamp didn’t hit using a small tool for crisp pattern continuity.
- Trim shapes around the imprints with a blade so both halves will align when sandwiched.
- Match edges so both sides look identical when assembled.
Add additional texture
- Add micro-texture with a bottle brush tool and a needle-like tool to mimic tiny air bubbles and rough waffle surface.
- Reintroduce texture after pastel shading if shading flattened details — you may need a light re-texture step.
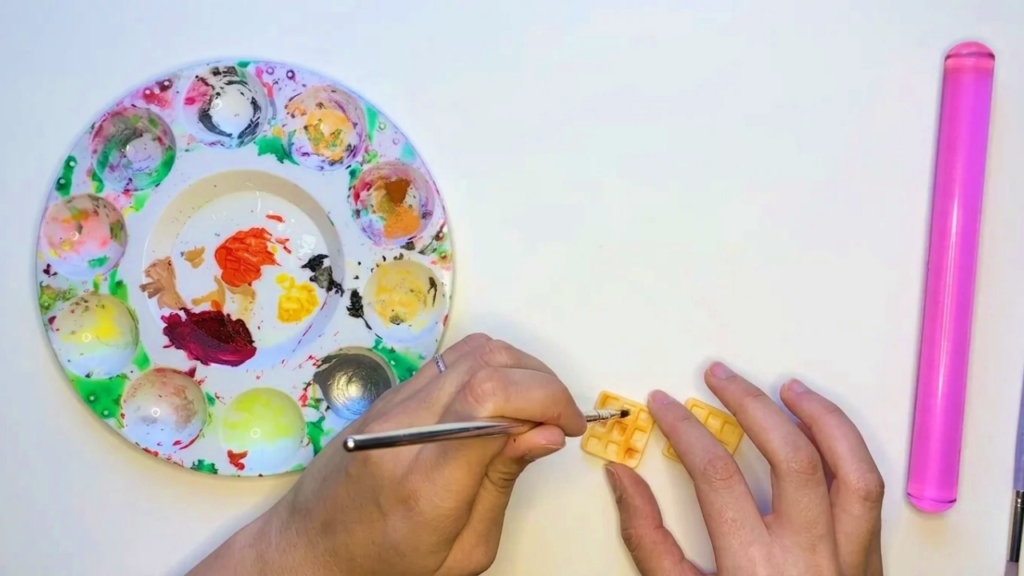
Coloring with soft pastels
- Shave pastels into wells and apply from lightest to darkest because light tones won’t layer well over dark ones.
- Layer gradually to build warmth and dimension, emphasizing raised edges and creases.
- Reapply pastel after any re-texturing to maintain consistent shading.
Form butter and prepare syrup
- Make butter by mixing tiny amounts of yellow and white clay and shaping to scale by eye.
- Mix translucent syrup using liquid Sculpey with orange, brown, mustard yellow and a touch of red to reach an amber tone.
- Bake a test sample of the syrup on copy paper at 275°F for 5 minutes to see final cured color (paper won’t burn).
Prepare and attach findings
- Measure and prepare small findings, adding a slight zigzag or bend to help them sit securely in clay.
- Insert findings into unbaked pieces — do this before baking to set them in place.
- Important: Don’t add findings to partially baked clay; that can cause cracks. If you forget, bake fully then drill and insert jump rings.
Apply syrup and bake
- Apply cured syrup (or pre-mixed/translucent liquid Sculpey if following your product instructions) to the waffle in a natural pour pattern—avoid covering all shading.
- Bake final assembled pieces according to your clay’s recommended temperature and time. Monitor oven and follow brand guidelines.
Gloss finish with UV resin
- Coat syrup areas with UV resin to achieve realistic high-gloss shine, since translucent Sculpey often cures matte.
- Cure resin under a UV lamp using the resin manufacturer’s recommended time and procedures.
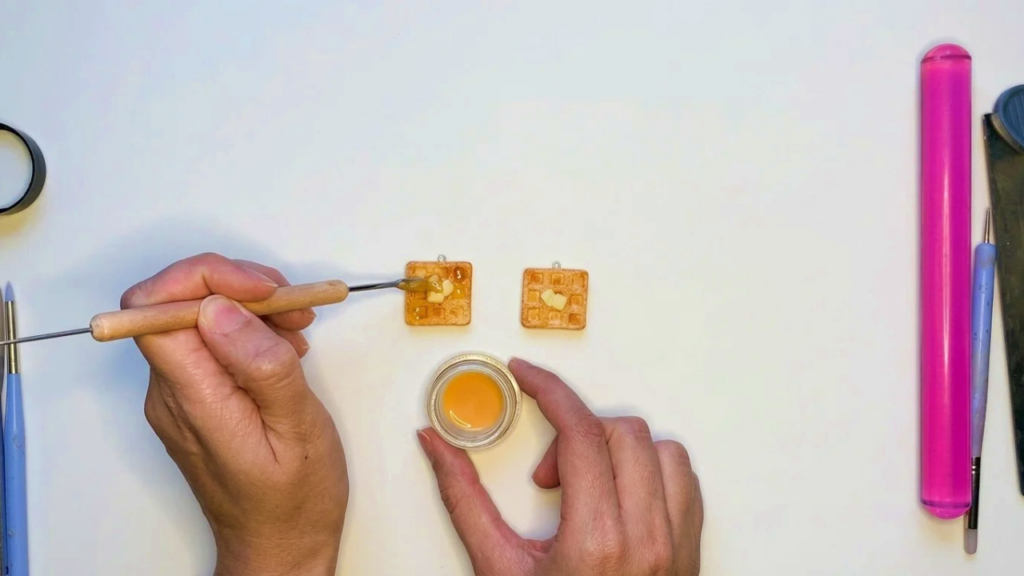
Assemble hardware
- Attach keyring hardware and findings after resin cures.
- Open jump rings correctly: twist side-to-side rather than pulling apart to avoid misshapen rings.
Finishing Instructions
- Inspect for dust or bubbles in resin; sand and recoat if necessary.
- Confirm all findings are secure and allow full curing before sale or wear.
- Optionally add varnish to non-resin areas for uniform protection (avoid applying varnish over glossy resin).
Tips & Techniques
- Work light-to-dark when applying pastels.
- Custom stamp ensures repeatable, consistent waffles.
- Pre-bake syrup sample to anticipate color shifts after curing.
- Use zigzag bends on findings to improve retention.
- Open jump rings side-to-side to keep them round.
Common Problems & Solutions
- Findings cause cracks if added mid-bake: only insert into fully unbaked clay; otherwise drill post-bake.
- Matte syrup: use UV resin to create a realistic glossy finish.
- Post-bake color change: test small samples and adjust pigment mix before committing to the full batch.
Creative Ideas & Variations
- Make waffle earrings, magnets, or mini stacks for diversity.
- Add powdered sugar using mica or soft pastels.
- Vary syrup flavor/colors (maple, blueberry) and butter shapes (cubes, pats).
Final Result
Two realistic, textured waffle keychains with layered pastel shading, lifelike translucent syrup sealed with glossy UV resin, and well-seated hardware—finished pieces ready to wear, gift, or sell.