Make a Cute DIY Flapjack Octopus Figure for Your Collection
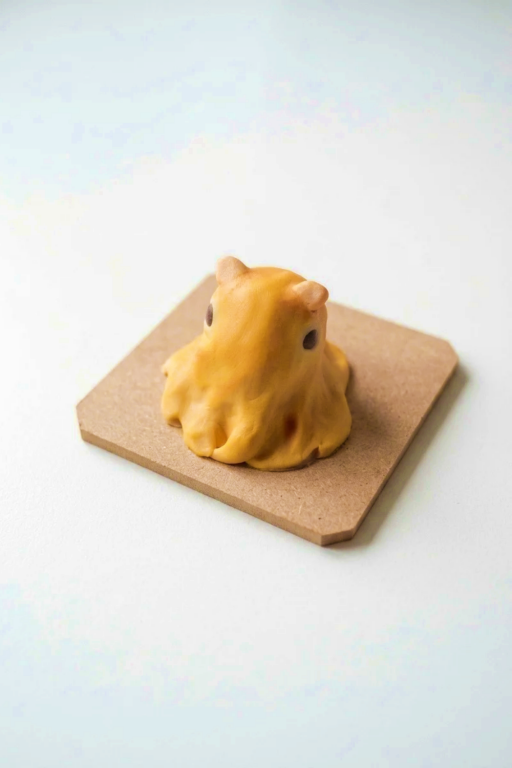
Dive into creativity with a DIY Flapjack Octopus Figure perfect for ocean-inspired decor unique handmade gifts or showcasing your sculpting skills.
Making a cute and tiny octopus figure can be a delightful DIY project for anyone who loves sea creatures or unique decorations. Inspired by the adorable flapjack octopus, this project is as fun as it is rewarding. Using simple materials like clay or similar crafting tools, you can sculpt a sweet little octopus that captures its round, squishy charm and playful personality. It’s a perfect activity for those who enjoy hands-on projects and want to add a whimsical touch to their collection or workspace.
DIY Flapjack Octopus Figure for Miniature Ocean Displays
The best point about making this octopus figure is personalizing the details. Its smooth, rounded body and short tentacles are easy to shape, making the process enjoyable even for beginners. Adding little touches like big, shiny eyes gives it a life-like and cartoony look that’s bound to make people smile. You can also experiment with fun colors to give your flapjack-inspired creation a unique twist. Whether you prefer a realistic ocean vibe or a bright and cheerful version, there’s plenty of room for creativity.
This project is great for decorating shelves, desks, or even as a handmade gift. Its compact size and charming design make it perfect for displaying wherever you like. Working on this figure is a laid-back and enjoyable activity, and the end result is a cute keepsake that brings a touch of ocean fun to your space. Give it a try, and let this cheerful little octopus brighten your day.
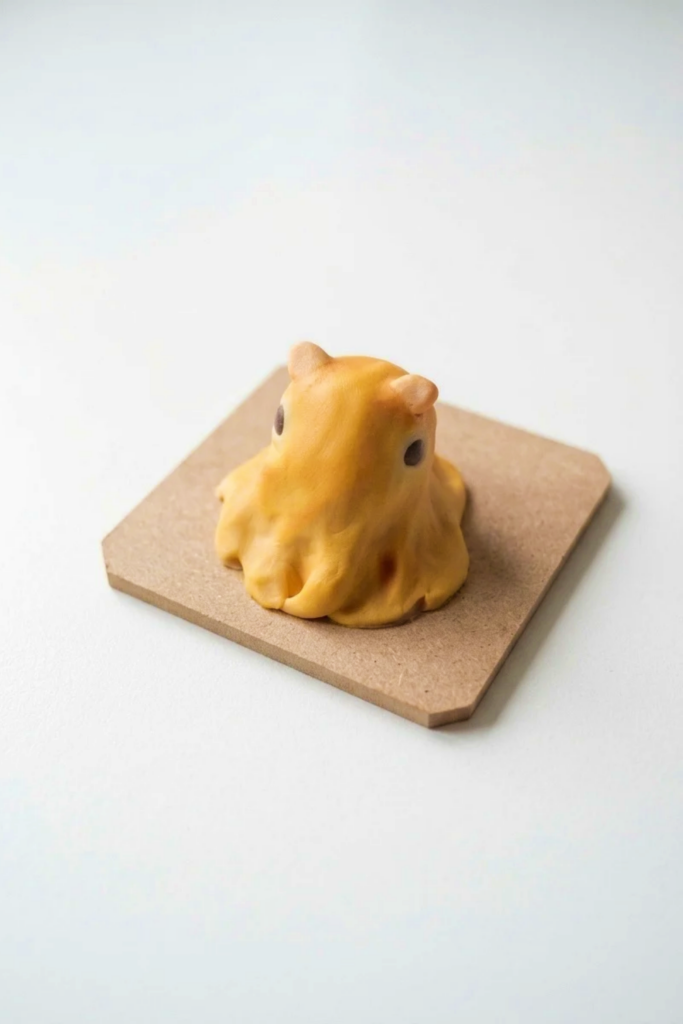
Make an Adorable Flapjack Octopus Figure
Sculpt a cute Adorabilis statue — a small, stylized octopus-like creature — using a foil armature, polymer clay, powder pastels for shading, and a few staged bakes. The process focuses on building a smooth head/body, creating eight tentacles, adding decorative fins, and finishing with pastel shading for a translucent look.
Materials & Supplies
- Polymer clay (main body color; brown for separate element)
- Aluminum foil (for core/armature)
- Powder pastels (four shades of orange used)
- Water and a damp sponge (for cleaning fingerprints)
- Small clay pieces for eyes/fins (matching colors)
- Baking surface (parchment, tile) and oven
Tools & Equipment
- Sculpting tools (ball stylus, shaping tools, blade)
- Small cutting tool or craft knife
- Work surface (smooth, clean)
- Small bowl of water and sponge
- Oven thermometer (recommended)
Project Details
- Difficulty: Beginner–Intermediate (simple forms but repetition for tentacles and finishing)
- Size: Small statuette (scale flexible)
- Time: 1–2 hours active work plus baking/cooling and pastel application
Preparation
- Condition clay until soft and consistent.
- Prepare a flat sheet of clay to create the main body covering.
- Preheat oven if you plan to bake during the session — verify your polymer clay brand’s recommended temperature and time (the original video references baking at 100 degrees; confirm whether that refers to Celsius and the clay manufacturer’s guidance).
- Keep a damp sponge ready to remove fingerprints and dust at several stages.
Step-by-Step Detailed
Build the Core & Initial Covering
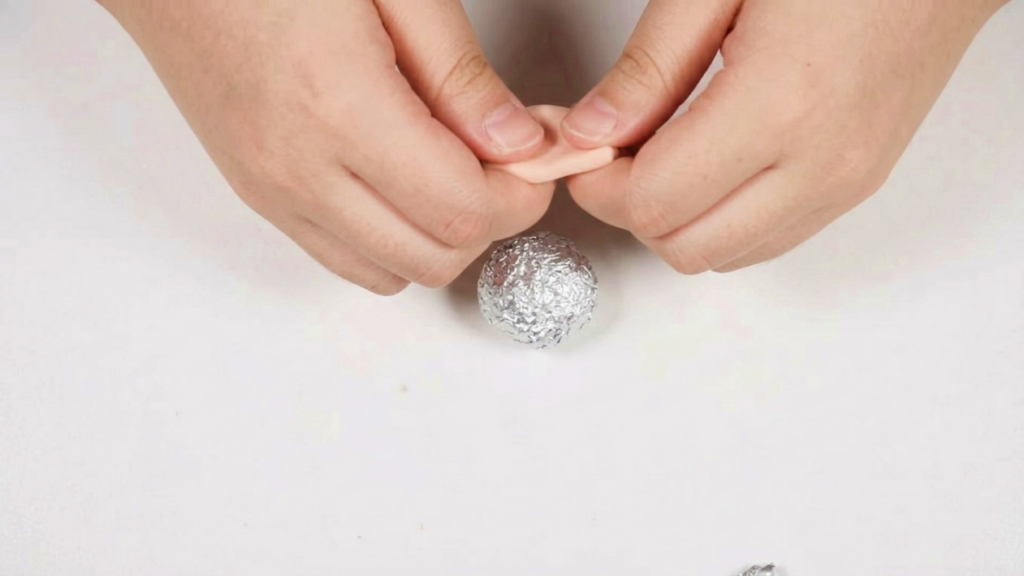
- Make a ball of aluminum foil sized to your desired statue head/body.
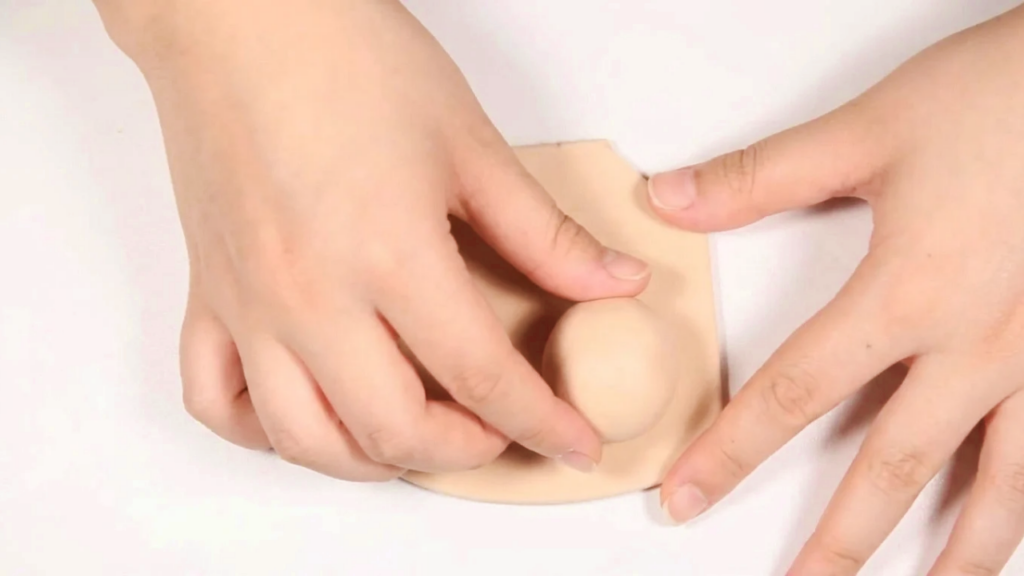
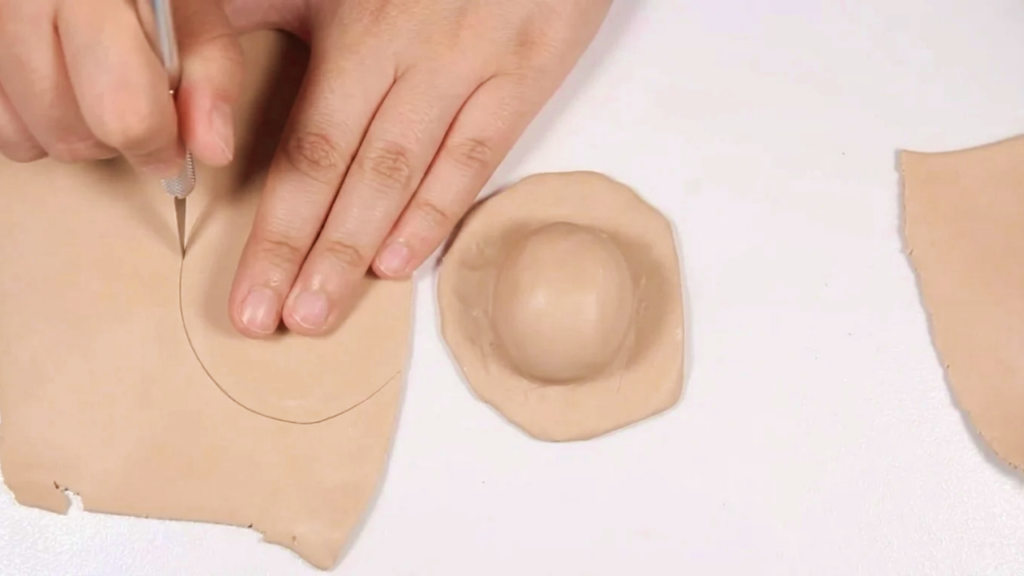
- Coat the foil ball with clay:
- Press a sheet of clay over the foil ball.
- Place the coated ball on top of the opened clay sheet and trim off excess clay around the base for a neat join.
- This creates a smooth interior armature and minimizes clay usage.
Shape Head: Back and Front
- Add clay to one side and shape that area into a bulge — this will become the back of the head.
- Fill gaps on the opposite side with clay and shape into the front of the face.
- Keep forms soft and organic; work symmetry free for character.
Mark Facial Placement
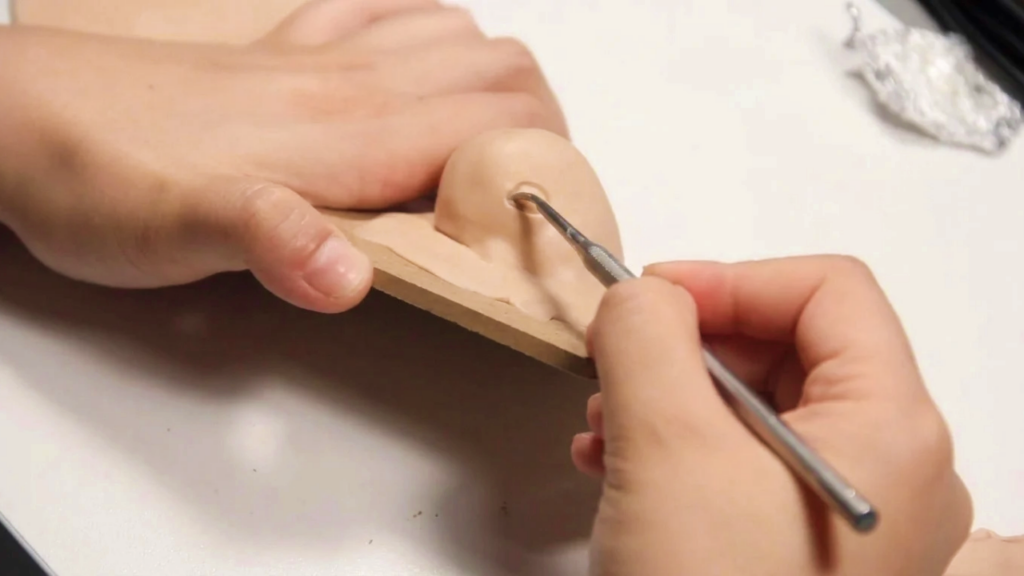
- Mark where the eyes should be:
- Lightly indent or score the clay to give reliable guides for later eye placement.
- These marks help maintain even spacing when adding eyes or finishing details.
Shape Tentacles
- Begin shaping tentacles from clay rolls:
- Create eight individual tentacles — Adorabilis has eight sweet tentacles.
- Use consistent thickness and tapering so tentacles look harmonious.
- Attach tentacles around the lower perimeter of the body:
- Press gently into the body seam and blend the base to secure.
- Use a reference image or imagination for pose variety: some tentacles can curl, some can reach forward.
- Work patiently: tentacle placement defines the statue’s personality.
Prepare Additional Brown Element
- Shape brown clay into an elliptical ball.
- Cut it in half to create a flat-bottomed piece or a shell-like element.
- Bake at 100 degrees for 5 minutes (as per transcription) — if following this, confirm whether this temp is Celsius and appropriate for your clay.
Add Eyes & Cover Edges
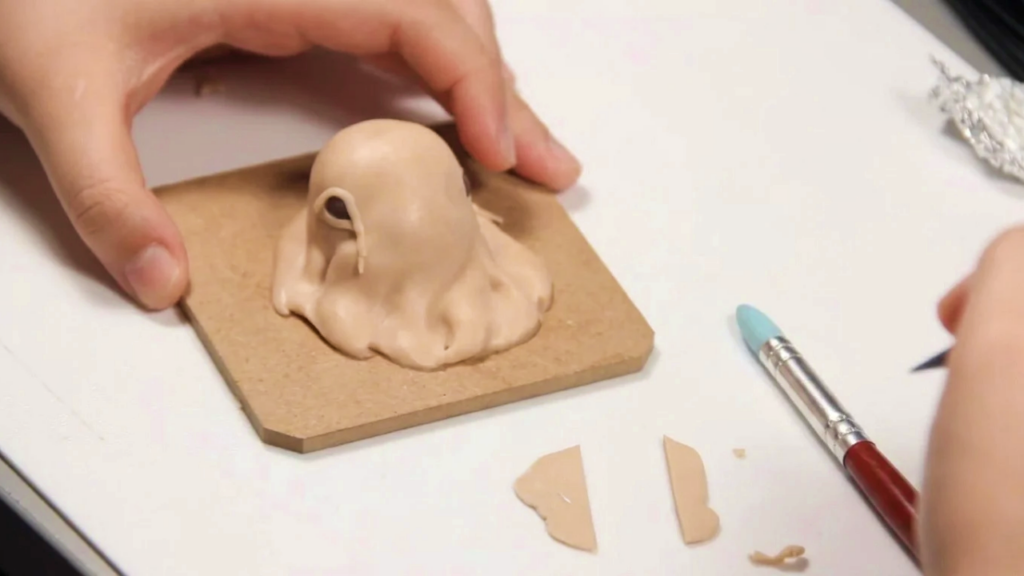
- Place the eye elements into the prepared eye marks.
- Cover edges around eyes with thin clay to blend and make a clean transition.
- Smooth seams carefully to integrate eyes into the face.
Remove Fingerprints & Dust
- Wipe the statue with a damp sponge:
- Do this multiple times during sculpting to remove fingerprints and dust before adding delicate details.
- A damp sponge helps achieve a cleaner surface prior to pastel shading.
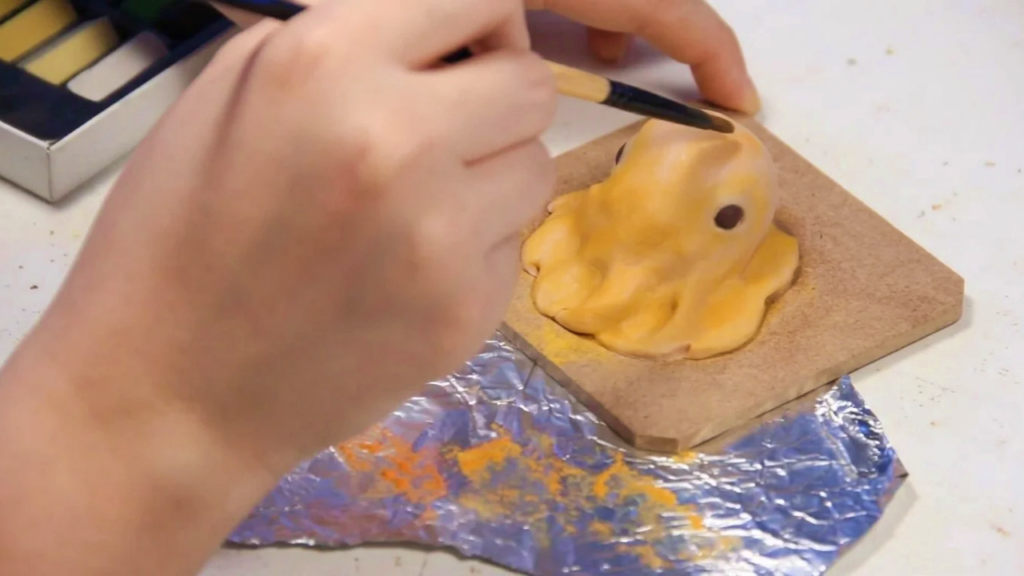
Powder Pastel Shading (Pre-bake)
- Apply powder pastels for shading before baking:
- Use multiple shades (the creator used four shades of orange) to build depth.
- Lightly brush or rub pastels onto forms for a semi-translucent / glazed look.
- Pastels can give a soft, layered color effect that looks almost transparent once baked.
Add Fins (Not Eyes)
- Add small fin shapes on the statue:
- Place them where desired and shade edges with the darkest orange pastel to accentuate depth.
- The video notes a humorous mislabeling — these elements are fins, not eyes.
Bake Final Piece
- Bake the figure at 100 degrees for 15 minutes (per transcription).
- After baking, remove and allow to cool thoroughly.
- Always cross-check these temperatures and times with your clay manufacturer to avoid under- or over-baking.
Finishing Instructions
- Once baked and cooled, perform a final wipe with a damp sponge to remove residual dust.
- Reapply subtle pastel highlights if needed; lightly seal with an appropriate polymer-safe sealant if desired (test on scrap first).
- Mount or display the statue on a small stand or base if preferred.
Tips & Techniques
- Use an aluminum foil core to save clay and speed forming while keeping weight low.
- Work in layers: build form → refine → clean → shade → bake.
- For smoother surfaces, use a slightly damp sponge or finger with alcohol to gently blend seams pre-bake.
- Keep a consistent tentacle count (eight) for canonical Adorabilis charm.
Common Problems & Solutions
- Visible seams where tentacles join:
- Solution: blend with a small tool and smooth with a damp sponge before baking.
- Dust or fingerprints showing after baking:
- Solution: preempt with thorough sponge wiping and use pastels sparingly; post-bake corrections are harder.
- Color fades or uneven pastel application:
- Solution: layer pastels gradually and test on a scrap piece; darker shades at edges enhance depth.
Creative Ideas & Variations
- Make a family of Adorabilis in complementary colors with different pastel palettes.
- Add tiny accessories (a hat, a shell) cut from clay for character variations.
- Embed a small magnet in the base before baking to make fridge-friendly figures.
- Create a diorama with underwater plants or a display stand with LED backlighting to accent pastel translucency.
Final Result
A charming, hand-sculpted Adorabilis statuette with a soft, shaded finish and eight expressive tentacles. The combination of a foil core, careful tentacle work, pastel shading, and staged bakes yields a clean, translucent appearance and a polished miniature ready for display.