Create Bold Lightning Bolt Clay Jewelry for Unique Accessories
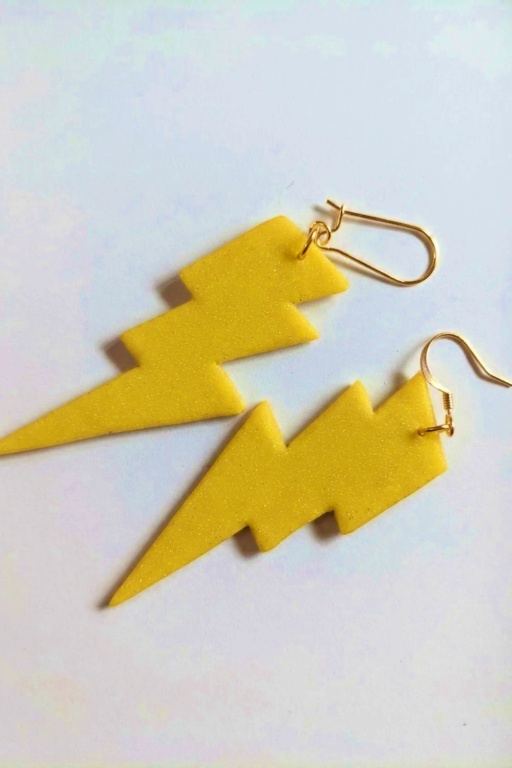
Step up your style with this DIY Bold Lightning Bolt Clay Jewelry Design, perfect for creating striking, eye-catching accessories in no time.
Sometimes, finding accessories that stand out can feel impossible, especially when you want something truly unique. That’s where a bold lightning bolt clay jewelry piece comes in. It solves the problem of generic, mass-produced designs by giving you something striking and personal. With its sharp zigzag shape and dynamic look, this piece instantly catches the eye and adds flair to any outfit without being overcomplicated.
DIY Bold Lightning Bolt Clay Jewelry for Edgy Looks
This lightning bolt jewelry design offers endless possibilities for customizing the colors and textures. If your accessories always feel too plain or repetitive, this is a chance to break out of that cycle. Bright metallic shades like gold or silver can give it a sophisticated shine, while neon colors like yellow bring energy and fun. Matte finishes add sleek simplicity, while glossy or glittery surfaces offer a playful sparkle. These options ensure your jewelry suits your personality.
Finished lightning bolt jewelry does more than solve the issue of uninspired accessories, it becomes a style statement. Whether worn as earrings or as a pendant, its bold shape and custom touches let you express your individuality in a subtle yet powerful way. Lightweight yet visually impactful, this piece effortlessly complements almost any style, making it the perfect solution for anyone looking to add originality to their outfit in a creative and meaningful way.
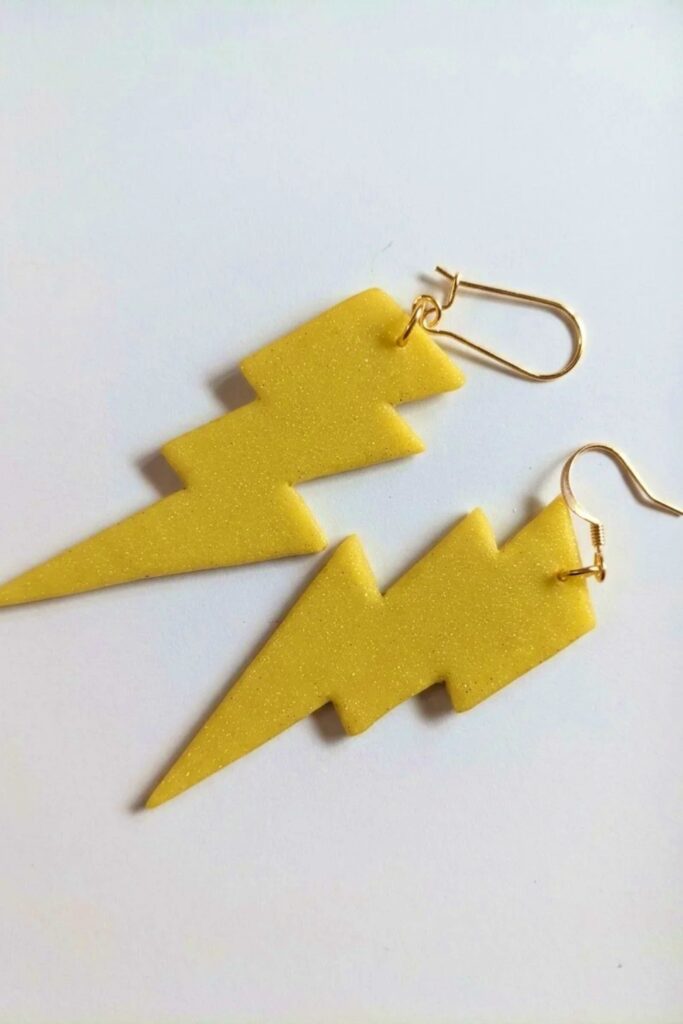
Bold Lightning Bolt Clay Jewelry Designs
Make professional-looking cutter-free polymer clay lightning bolt earrings from start to finish. This tutorial covers template use, cutting techniques, edge finishing, baking, drilling, hardware attachment, and reversible hook tricks so you get clean, durable, and wearable earrings without specialized cutters.
Materials & Supplies
- Polymer clay (Premo recommended for stickiness; any colors wanted)
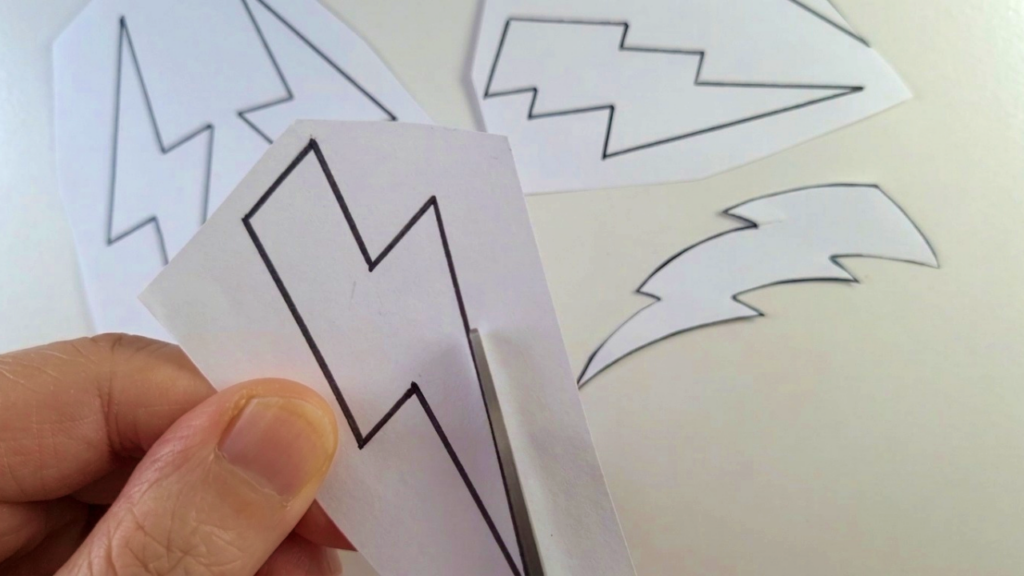
- Printed lightning bolt templates (downloadable/scalable)
- Isopropyl alcohol (or rubbing alcohol) and cotton tips
- P1200 sandpaper and optional polishing papers (400–1200+)
- Aluminum tray or folded paper for oven protection
- Jump rings, kidney hooks and/or standard earring hooks
- Optional: resin and resin supplies for one-sided shine
Tools & Equipment
- Glass or tile work surface (essential — do NOT use paper)
- Pasta machine (optional, for conditioning) and roller
- Cutting knife (X‑Acto) and long slicing blade/rigid slicing tool
- Needle or toothpick for hole placement
- Small hand drill or electric drill and drill bits (cheap and/or upgraded)
- Pliers for jump rings and hardware
Project Details
- Skill level: Beginner to Intermediate (requires steady cutting and hardware work)
- Time: 1–2 hours (plus curing/baking and finishing)
- Outcome: Two-sided (reversible) bolt earrings, finished matte or polished/resined
Preparation
- Print and scale the four bolt templates; decide which design(s) to use.
- Condition clay properly (pasta machine or hand-knead). Fold-test to check for cracks.
- Work on a clean glass or tile surface — clay must stick down to prevent slipping during cutting.
Step-by-Step Detailed
Place clay on glass:
- Put your conditioned clay directly on the glass/tile; press with finger and/or roll lightly to stick it down and achieve desired thickness.
- Avoid paper — it moves and makes cutting fiddly.
Remove air bubbles:
- If you spot air bubbles, cut or poke out with a blade and blend the clay back in using a modeling tool or roller.
Position template and cut:
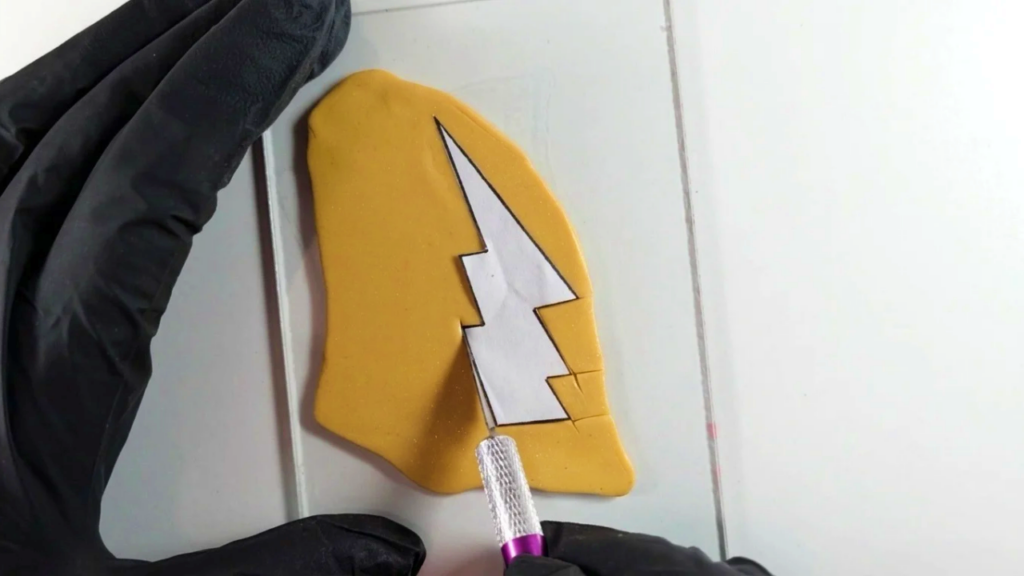
- Lay the printed bolt template on the clay and smooth it down with your finger.
- Use a cutting knife for tight areas and a long slicing blade for long straight sections.
- Employ cross‑cutting: slightly overcut at each corner so cuts cross — this helps lift excess cleanly.
- Take time lining up point ends and corners; cut slowly and steadily.
Cut the opposite side:
- Flip the template and repeat the cutting for the other side of the bolt to ensure symmetry.
Remove excess clay:
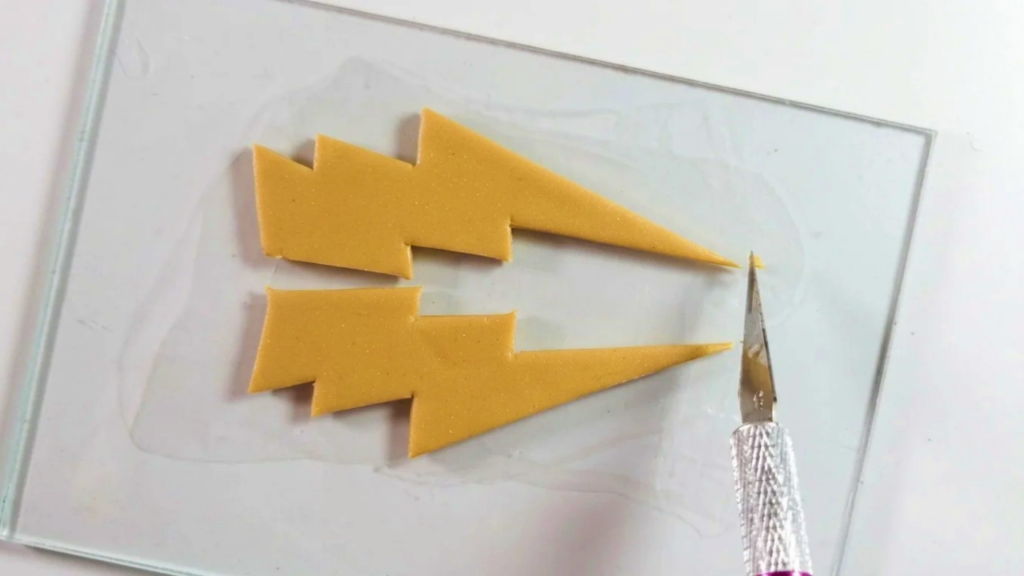
- Pull away leftover clay slowly, teasing little edges up. Recut stubborn sections if needed (especially delicate narrow points).
- Use both cutting knife and slicing blade as appropriate.
Neaten and refine shape:
- Shorten or blunt bottom points slightly for matching lengths.
- Smooth corners and remove cutting marks with a fingertip, silicone shaper, or a brush plus rubbing alcohol.
- Use the slicing blade at 90° to reshape or at 45° to remove burrs where clay met the tile.
Decide on edge style:
- Leave a sharp 90° edge or round the edges by smoothing with finger or isopropyl + cotton tip for a softer look.
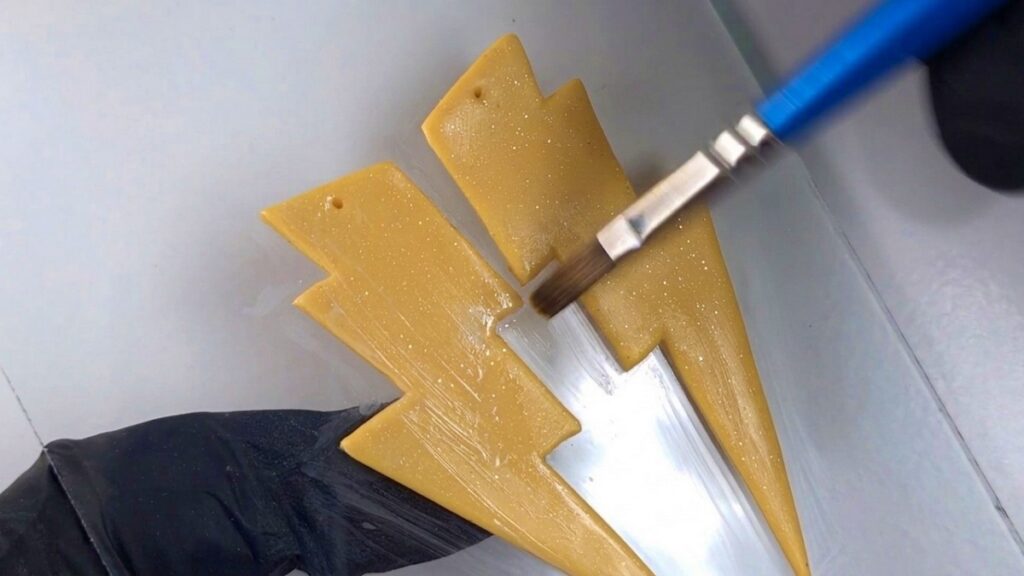
- Brush the whole bolt with isopropyl alcohol for a neat surface.
Mark hole position:
- Use a toothpick or needle tool to make a small indent about 2 mm from the edge where you’ll drill the hardware hole later.
Bake the earrings:
- Place pieces on a tile or glass and cover them (aluminum tray or folded A4 paper can protect them).
- Bake according to your clay manufacturer instructions.
Remove from glass:
- Once baked and cooled slightly, use a slicing blade to pry corners down firmly against glass until the piece lifts cleanly.
Sand and finish surface:
- Sand shiny or uneven spots (from glass contact) with P1200 sandpaper, using even pressure.
- For more polish, use flexible polishing papers (400→1200) to achieve satin or semi‑gloss finishes.
- Lightly clean burrs on the connection side with fingernail, cutting blade, or sandpaper.
Drill hardware holes:
- Use a hand drill, cheap electric drill, or higher‑end rotary tool to drill two holes (or one, per your design).
- Drill carefully to avoid cracking; support the piece and go slowly.
Attach jump rings and hooks:
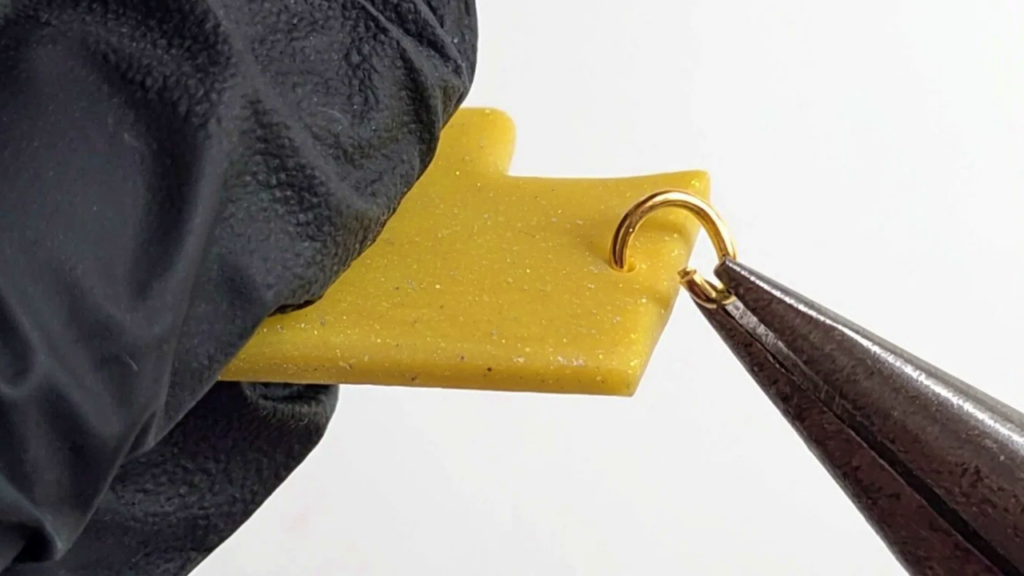
- Open a jump ring by twisting (not pulling) and thread it through the drilled hole, then close by twisting back.
- Squeeze the ring closed fully — no visible gap — to prevent loss. Use pliers to compress the gap and rotate to hide any seam.
- For kidney hooks: add an extra small jump ring so the bolt sits snugly and can be removed/rotated.
- For standard hooks: orient the ring opening so the hook sits facing forward (twist ring if needed) to avoid using a second jump ring.
Make earrings reversible (kidney hook trick):
- Add a very thin clay layer on the back of one side before baking so you have a finished reverse face; when mounted on the small jump ring of a kidney hook, you can unhook, flip, and rethread to wear either side.
Finishing Instructions
- Ensure jump rings are fully closed and hooks are secure.
- Optionally apply resin to one or both sides (cure per resin instructions) for gloss/protection.
- Final polish or buff if desired; store in a dry place.
Tips & Techniques
- Always work on glass or tile — this stabilizes the clay for accurate cuts.
- Cross‑cut corners to make excess clay lift cleanly.
- Use a long slicing blade at varying angles (90° or 45°) to refine edges and remove burrs.
- Mark holes before baking and use the toothpick indent as a drilling guide.
- Close jump rings by twisting and squeezing; check for gaps by holding up to light.
Common Problems & Solutions
- Paper slips during cutting → switch to glass/tile.
- Air bubbles → poke/cut them out and blend with roller.
- Delicate bolt thin points tearing → re‑cut or slightly widen thin bridges; support when removing excess.
- Jump ring gap → re‑squeeze and rotate ring until no light passes; use two rings if needed for security.
- Shiny spots from glass → sand with P1200 and polish papers for a satin finish.
Creative Ideas & Variations
- Make bolts reversible with contrasting colors or textures on each side.
- Resin a side for faux labradorite or glossy effects.
- Mix metal leaf, mica powders, or marbling techniques before cutting for unique patterns.
- Scale templates to make studs, charms, or necklaces.
Final Result
You’ll end up with polished, durable polymer clay lightning bolt earrings—clean edges, precise drilled holes, secure hardware, and the option to wear them reversible. With the cutter‑free method, templates and careful cutting deliver consistent professional results without specialty cutters.