Quick DIY Miniature Polymer Clay Nachos for Fun Projects
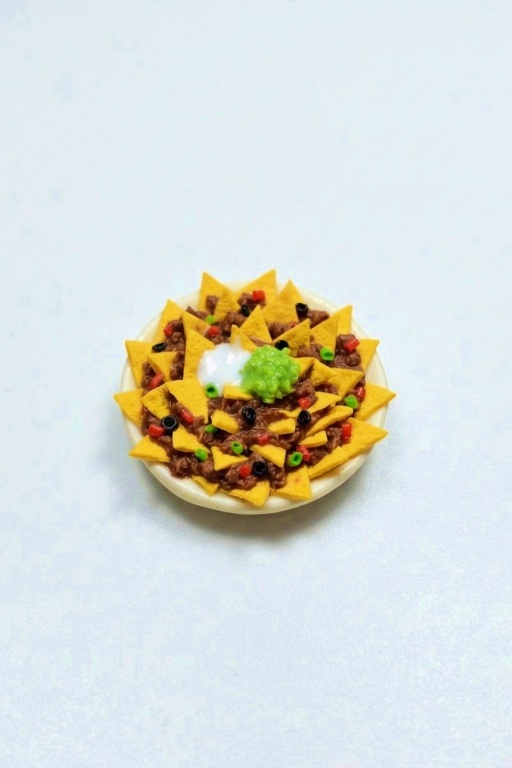
Create a fun bite-sized craft with this DIY Miniature Polymer Clay Nachos project perfect for adding playful charm to your decor or accessories collection.
It might seem impossible to recreate tasty snacks on such a tiny scale, but with polymer clay, you can craft the cutest mini food items! This project lets you design a tiny, detailed dish of nachos—crunchy chips topped with gooey cheese, salsa, and all your favorite toppings. It’s a fun and creative way to bring your love of snacks into the world of miniature crafting.
DIY Miniature Polymer Clay Nachos for Kawaii Accessories
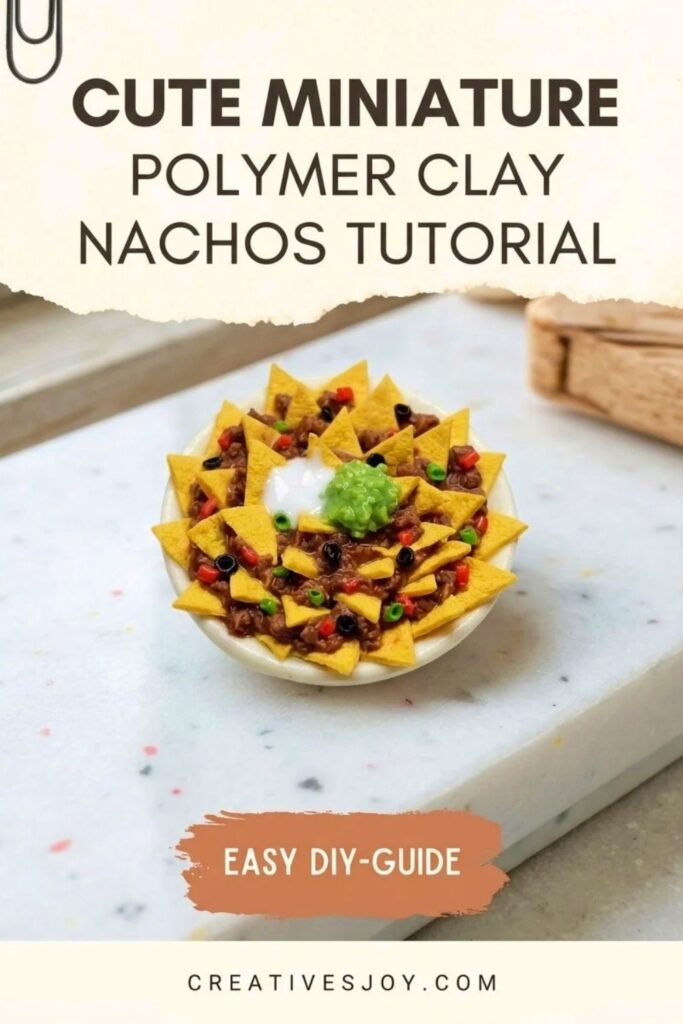
Use polymer clay to handcraft every piece of your mini nacho plate. Each chip can be shaped and colored to look crispy and golden, while the toppings like melted cheese, jalapeños, and a dollop of guacamole add a cheerful pop of color. With a bit of patience and attention to detail, your tiny plate of nachos will look so real, it might make you hungry! Plus, since polymer clay is easy to work with, this project is great for trying new ideas and experimenting with designs.
Once you’ve completed your mini nachos, there are so many ways to use them. Turn them into quirky earrings, a keychain, or a decorative magnet, or simply display them as a fun conversation starter. They also make unique gifts for food lovers. This project is a perfect mix of creativity and fun—it’s all about turning a beloved snack into an adorable piece of art that can bring joy to your day.
Project Overview
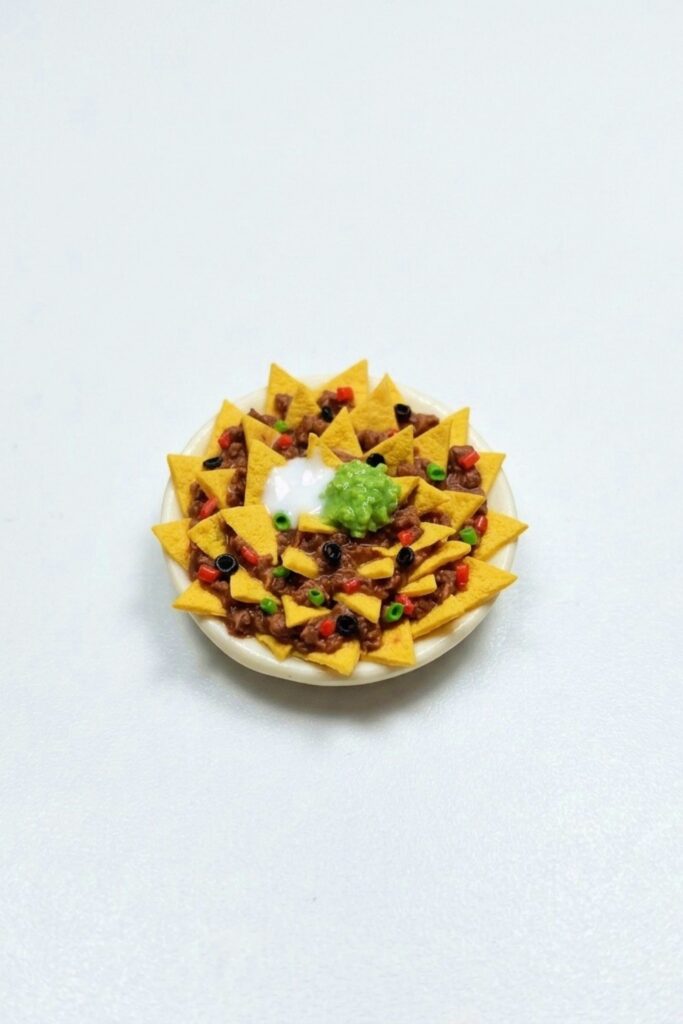
Create realistic miniature polymer-clay nachos on a plate, complete with textured tortilla chips, seasoned ground beef, chopped tomatoes, black olives, chives, guacamole, and sour cream. The tutorial uses simple texturing and layering techniques to build a colorful, lifelike plate suitable for dollhouses, dioramas, or mini-food displays.
Materials & Supplies
- Polymer clay:
- Pale orange base (mix of yellow + red + white clay) for tortilla chips
- Several brown shades for ground beef
- Translucent red + solid red for chopped tomatoes
- Black clay for olives
- Green clay for chives and guacamole
- White clay for sour cream
- Fimo Liquid (or liquid polymer clay) — used as glue and to slightly bind toppings
- Small miniature plate or flat base to assemble nachos on
Tools & Equipment
- Dish sponge (use the harsh/rough side for texture) — key for chip texture
- X‑Acto knife or sharp blade for cutting triangles and small squares
- Needle tool / toothpick (two sizes) for making olive holes and chives
- Small roller or fingers for flattening clay sheets
- Oven (follow polymer clay brand baking instructions)
Project Details
- Difficulty: Beginner–Intermediate — small parts and fine detail work.
- Time: 45–90 minutes active work plus baking/cooling.
- Output: One decorative miniature plate of nachos; scale depends on clay amounts.
Preparation
- Mix the pale orange clay by combining yellow, red, and white until you get a tortilla-like hue.
- Condition all clays until soft and homogeneous.
- Preheat oven only when ready to bake and confirm the temperature/time on your clay package.
Step-by-Step Detailed
Make Tortilla Chips (texture + shape)
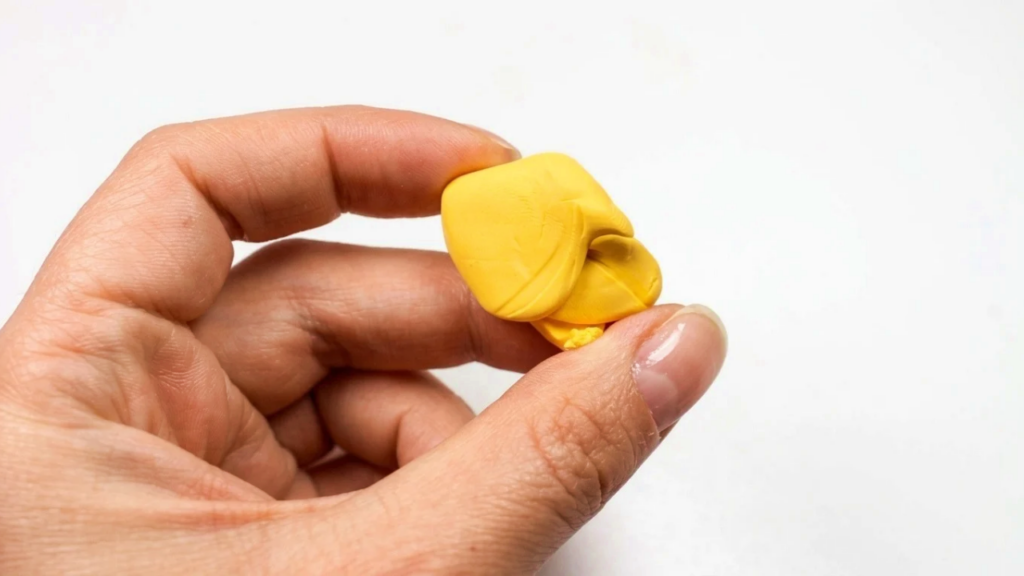
- Prepare a thin sheet of the pale orange clay by flattening and stretching with your fingers or a roller.
- Place the thin sheet onto the harsh side of a dish sponge.
- Fold the sponge in half over the clay and gently squeeze to impress a natural rough texture.
- Remove the textured clay piece from the sponge.
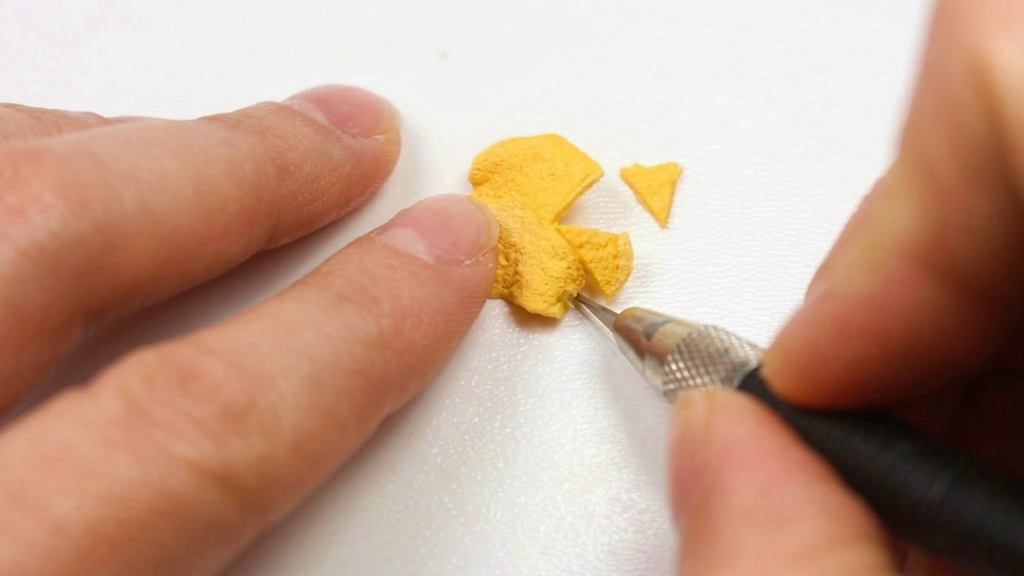
- Use an X‑Acto knife to cut small triangles for chips — size as desired for your miniature plate.
- Prepare as many chips as you want to cover the plate.
- Bake the chips according to your clay’s instructions (recommended so they hold shape for assembly).
Make Ground Beef Topping
- Select three different brown shades of clay; cut them into tiny pieces.
- Mix these pieces slightly with a small amount of Fimo Liquid to bind — do not mix until smooth; keep some texture to mimic minced beef.
- The slightly mixed, chunky consistency gives a more realistic meat appearance.
Assemble Chips & Beef on Plate
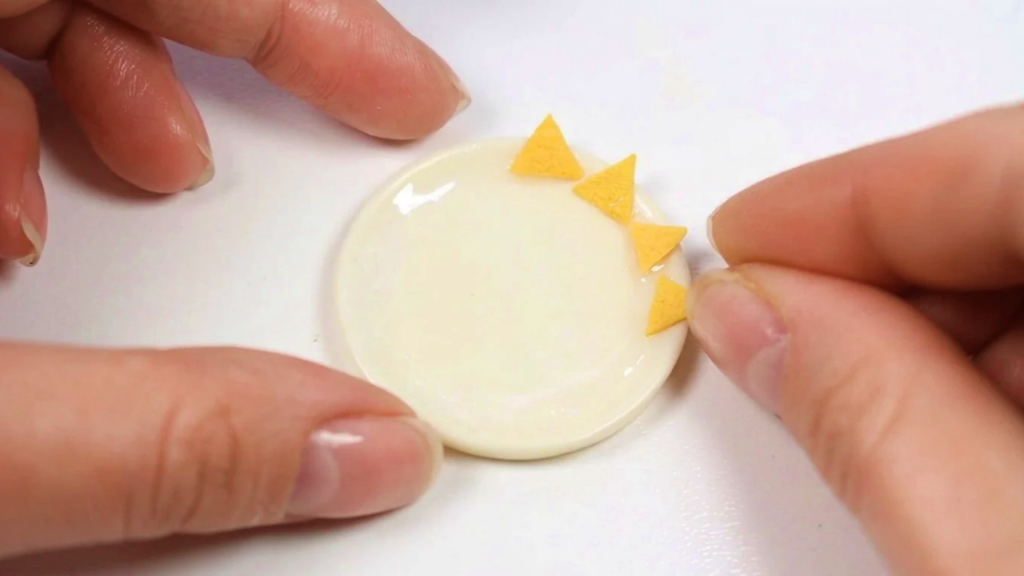
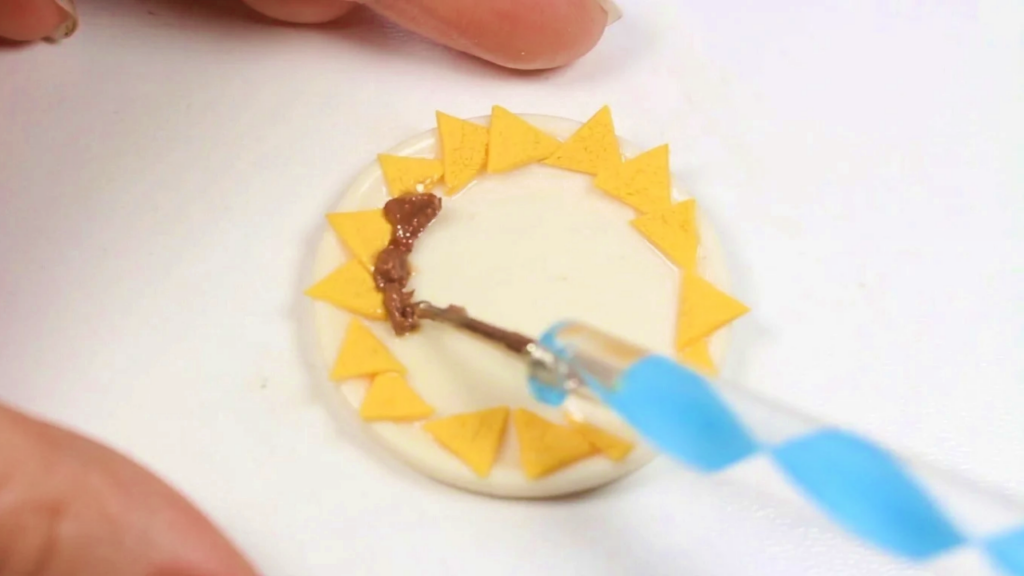
- Spread a thin layer of Fimo Liquid around the plate’s edges where chips will sit (acts as glue).
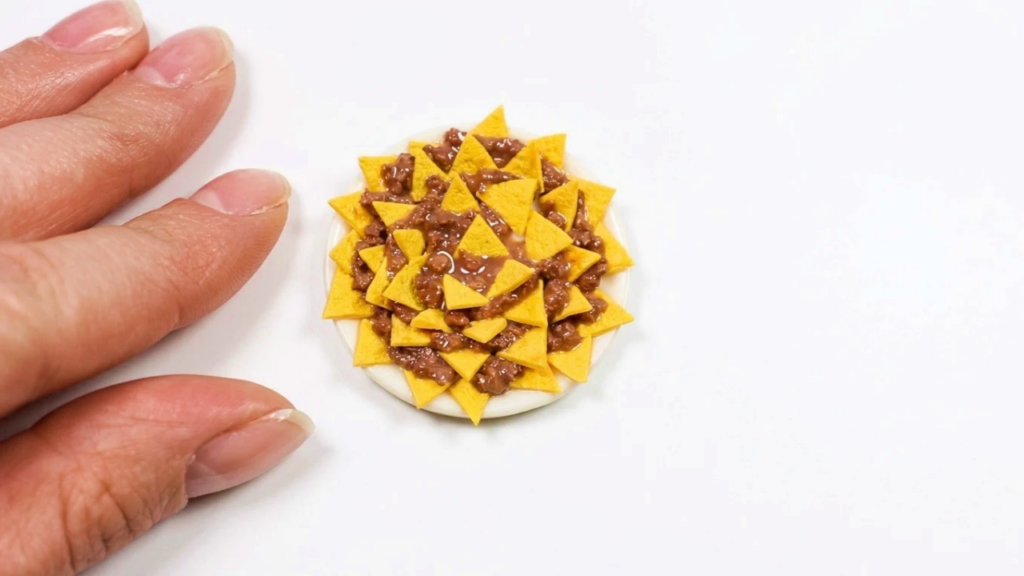
- Arrange the first row of chips, placing pieces next to one another and blending edges so they appear piled.
- After placing a row, scatter some ground beef mixture over those chips.
- Continue arranging rows of chips and adding ground beef until the plate is covered and looks layered and natural.
Make Chopped Tomatoes
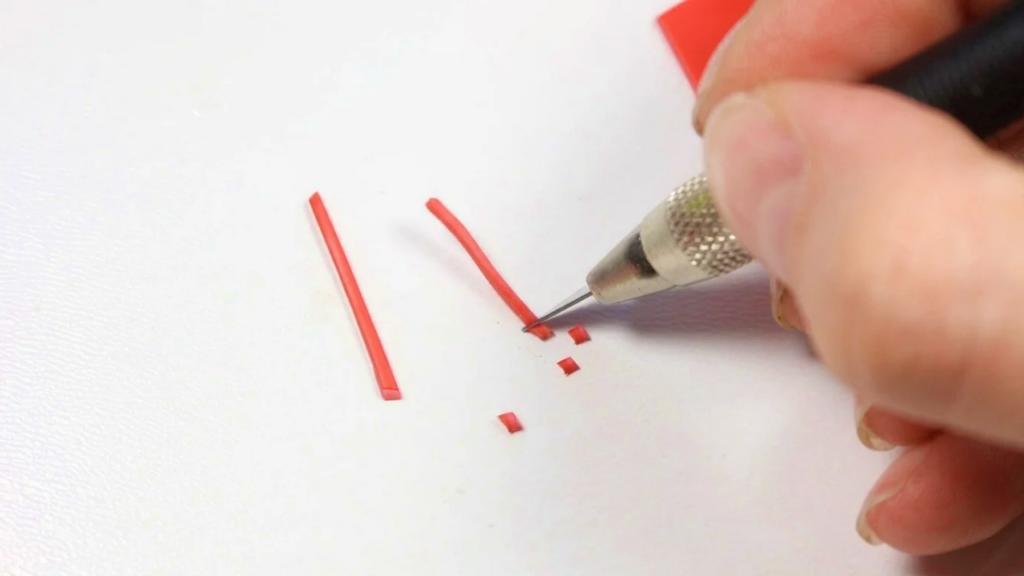
- Take a piece of translucent red clay, flatten/roll it out, and cover with a thin sheet of solid red clay to achieve depth.
- Roll the layered red sheet and cut into tiny squares using a razor or blade to create diced tomato pieces.
- Sprinkle or place chopped tomatoes across the nachos for bright color accents.
Make Black Olives and Chopped Chives
- For olives: roll tiny balls of black clay, then insert a needle tool or toothpick into the center of each to form the sliced olive appearance.
- For chives: use green clay rolled into very small cylinders; use a smaller needle to create chopped ends or cut tiny pieces with a blade.
- Scatter olives and chives across the plate to taste.
Make Guacamole and Sour Cream
- For guacamole: cut small pieces of pale green clay and mix them lightly with a bit of Fimo Liquid (similar to ground beef method) to preserve texture and chunkiness.
- For sour cream: mix white clay with a bit of Fimo Liquid but mix thoroughly to get a smooth, creamy consistency.
- Place a few dollops of guacamole and sour cream on top of the nachos where desired.
Final Bake
- Bake the entire assembled plate according to your polymer clay manufacturer’s instructions.
- Ensure multi-layer items are supported and not prone to sagging prior to baking.
Finishing Instructions
- Allow the plate to cool completely after baking.
- Optionally, seal or varnish selective areas (e.g., sour cream or guacamole) with a compatible gloss or matte varnish if you want a wet or dry look respectively — test on a spare before applying.
Tips & Techniques
- Texture: the dish-sponge method gives a natural grain to chips; press gently to avoid tearing thin clay.
- Realism: keep ground beef chunky — overmixing with Fimo Liquid yields a smooth paste that looks unnatural.
- Needle sizes: use different needle sizes for olives vs. chives for scale realism.
- Layering: build chips and toppings in rows to create depth rather than flattening everything in one layer.
Common Problems & Solutions
- Chips too thick or stiff:
- Solution: roll clay thinner and re-texture on sponge before cutting.
- Beef looks paste-like:
- Solution: reduce Fimo Liquid and mix less — leave some visible bits.
- Toppings fall off after baking:
- Solution: use small amounts of Fimo Liquid as glue during assembly and press toppings slightly into chips so they adhere.
- Clay tears on sponge:
- Solution: work with slightly thicker sheet or press more gently; damp fingertips (if compatible) help smooth without ripping.
Creative Ideas & Variations
- Add nacho cheese sauce: mix yellow clay with a little Fimo Liquid to a pourable consistency and drizzle over chips before baking.
- Make spicier toppings: tiny jalapeño slices (green rings) or diced red peppers.
- Create a full nacho platter with miniature salsa bowls, lime wedges (tiny green triangles), or pico de gallo clusters for extra realism.
Final Result
You’ll finish with a colorful, textured miniature plate of nachos featuring realistic chips, chunky seasoned “beef,” diced tomatoes, olives, chives, guacamole, and smooth sour cream. The combination of texturing, partial mixing, and careful layering produces a convincing tiny food display ready for miniatures collections or dioramas.