Realistic DIY Polymer Clay Dessert Sculptures at Home
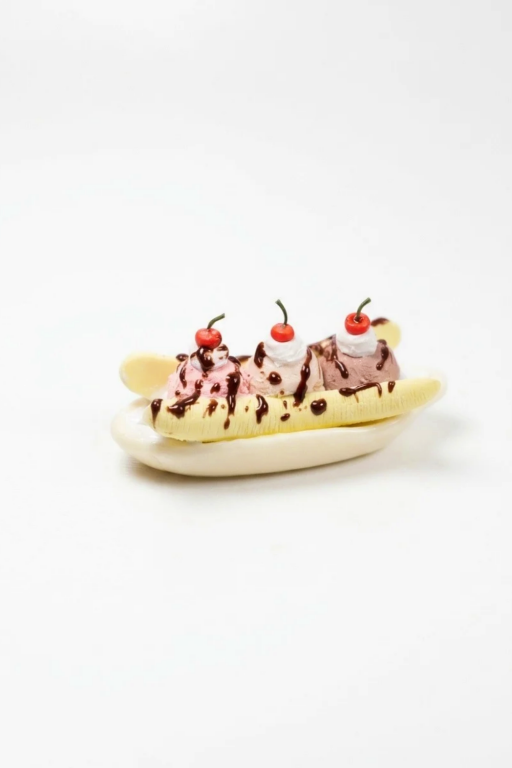
Turn your imagination into charming miniatures with DIY Polymer Clay Dessert ideas that are perfect for decor, jewelry, or thoughtful gifts.
Who doesn’t love miniature versions of delicious desserts? Imagine creating tiny cakes, pies, ice creams, or donuts that look good enough to eat—all using polymer clay! This fun and creative craft project lets you design “dessert” replicas that can be turned into charms, keychains, magnets, or decorations. It’s a playful way to bring your love for treats into your DIY creations, whether for personal enjoyment or unique gifts. Plus, the possibilities are endless, and you don’t have to worry about calories.
Kawaii DIY Polymer Clay Dessert Ideas for Accessories
What makes this project exciting is how easily polymer clay can be shaped into realistic, detailed mini desserts. With just a few tools, you can experiment with textures, colors, and designs to create frosting swirls, berry toppings, or chocolate drizzles. Using techniques like layering clay, adding tiny details, and mixing colors gives your desserts a realistic, eye-catching look. After baking, the clay becomes sturdy, turning your mini masterpieces into durable accessories or decorations.
These DIY polymer clay dessert projects are perfect for all ages and skill levels. Whether you’re a beginner honing your crafting skills or an expert looking to try something new, this project is a delightful choice. It’s affordable, requires minimal materials, and leaves you with charming results that spark joy. Get inspired, start crafting, and watch your clay creations come to life in the form of adorable desserts.
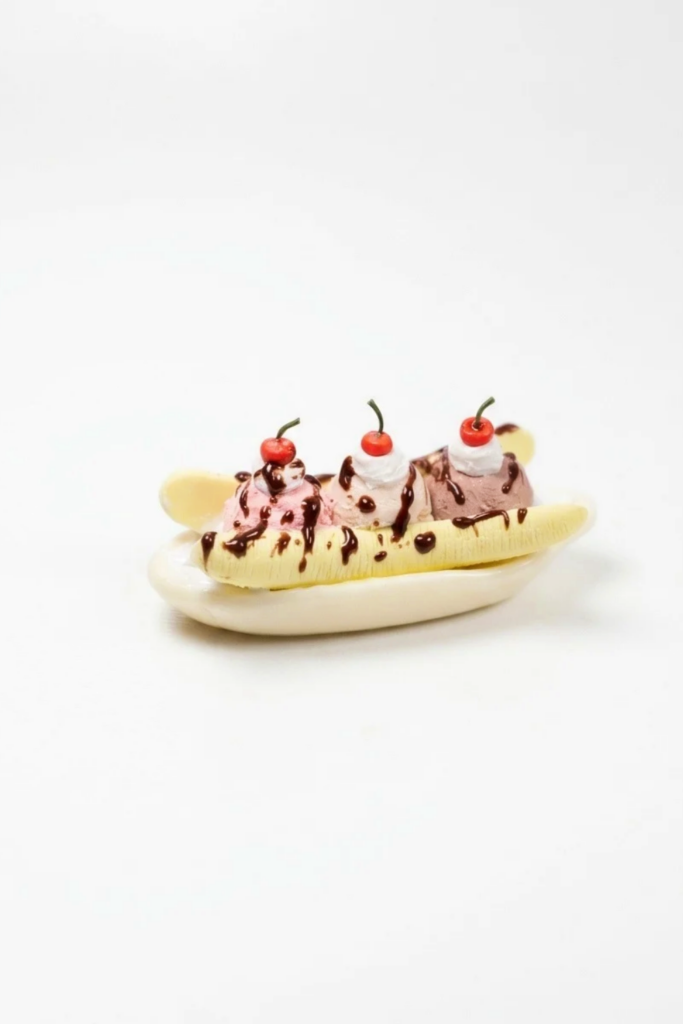
Miniature Polymer Clay Banana Split
- A realistic miniature banana split dessert made from polymer clay: two banana halves, three textured ice‑cream scoops, whipped cream swirls with cherries and stems, a drizzle of chocolate sauce, all arranged on a small plate.
- Finished as a charm, magnet, or miniature food display piece. Baked per clay manufacturer instructions and finished with paint and gloss.
Materials at a Glance
- Pale yellow polymer clay (mix white + a tiny amount of yellow to achieve the banana shade).
- Brown, tan, and pink polymer clays for ice‑cream scoops.
- White polymer clay for the plate (optional) and whipped cream.
- Small amount of green and red clay for cherry stems and cherries.
- Brown clay or painted brown acrylic for chocolate sauce.
- Baby powder or cornstarch (for smoothing).
- Liquid medium: polymer clay liquid (or clay softener/flow medium) to blend whipped cream and chocolate sauce and to help smooth surfaces.
- Gloss varnish for cherries and sauce; brown and dark red acrylic paints for shading.
Tools You’ll Need
- Work surface (tile or glass).
- Razor blade or X‑Acto knife for cutting and scraping texture.
- Needle tool for banana surface lines and holes.
- Dotting tool for whipped cream swirls and shaping cherries.
- Small rolling pin and fingers for shaping.
- Small bowl or leaf‑shaped miniature plate (or make one from white clay).
- Oven and oven thermometer (follow clay brand baking instructions).
- Fine paintbrushes for shading and varnishing.
Things to Know Before Starting
- Condition clay thoroughly before shaping to avoid cracks and to allow fine texture work.
- Baby powder or cornstarch helps remove fingerprints and smooth surfaces, but use sparingly to avoid residue.
- Texture and thin details can distort during baking; maintain consistent thickness and follow the manufacturer’s bake temperature and time.
- Use a tiny amount of liquid clay or softener to create smooth whipped cream and chocolate sauce—test proportions on scrap first.
- Work in small stages: bake banana halves and any elements that should be hardened before assembly, then complete the remainder and final bake as needed.
Let’s Get Started
Step 1: Get Ready
- Condition your clays:
- Knead white and yellow together to get the pale banana color; condition each color you’ll use until soft and even.
- Prepare your workspace:
- Use a clean tile or glass surface; lay out tools and a ruler for scale.
- Decide scale and plate:
- Choose or make a small plate (leaf shape or simple round). If making from clay, roll and shape a thin white plate now and set aside for baking later.
Step 2: Make the Banana Halves
- Form the banana:
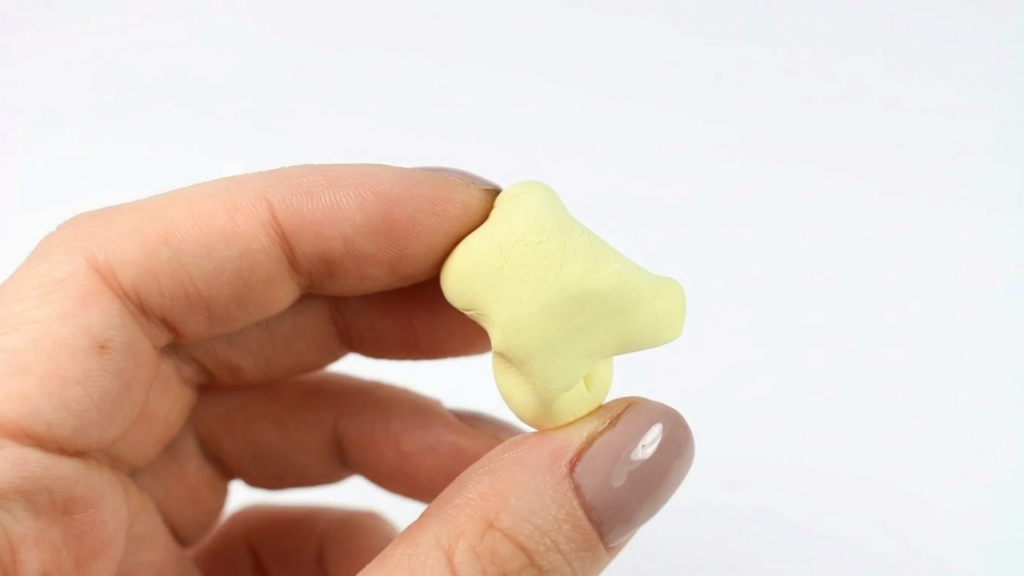
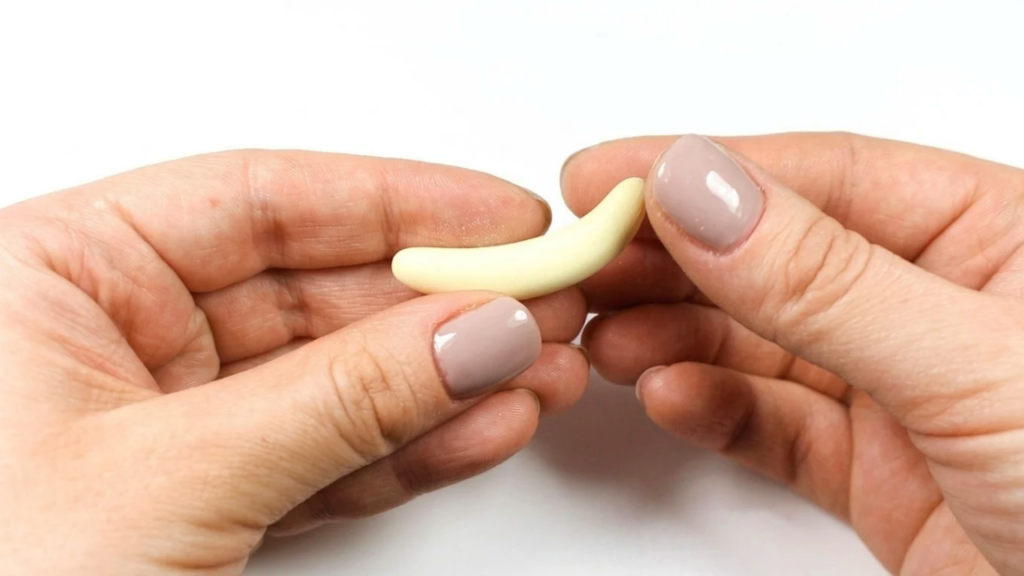
- Roll a small ball of pale yellow clay into a cylinder, tapering and smoothing both ends to create a gentle banana shape.
- Bend the cylinder slightly to create the characteristic curve.
- Smooth and texture:
- Dust lightly with baby powder or cornstarch to remove fingerprints and smooth the surface.
- Use a razor to cut the banana into two halves cleanly. If halves deform slightly, gently reshape the curve again.
- With a needle tool, make shallow, fine cuts all over the banana surface to suggest natural texture. Avoid deep gouges.
- Bake banana halves:
- Bake according to your clay’s instructions (temperature and time vary by brand). Allow to cool completely before handling.
Step 3: Make the Ice‑Cream Scoops
- Prebake or preform scoops:
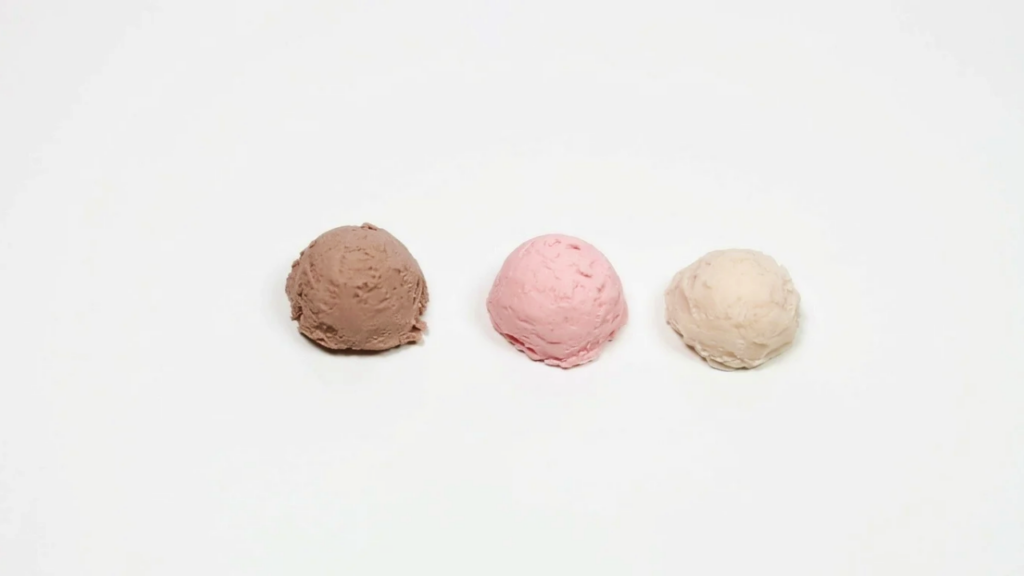
- Condition brown, tan, and pink clays and form into small balls sized for your plate. If desired, prebake these plain or bake them after texturing depending on your assembly plan.
- Texture scoops:
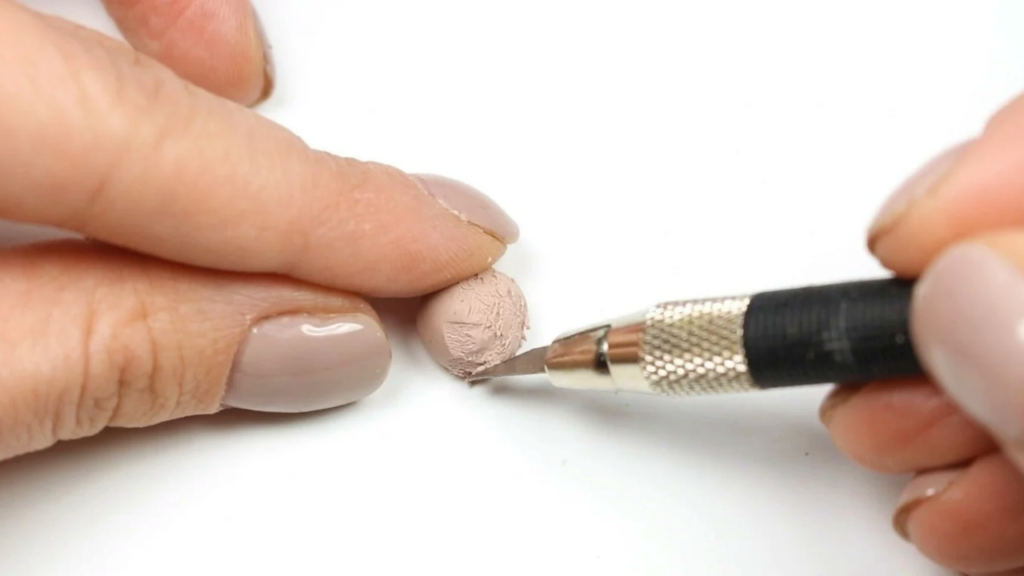
- Use an X‑Acto knife to scrape thin, shallow layers across each scoop to create a frosty, ice‑cream texture (short light strokes across the surface).
- Repeat for each color to maintain consistent texture.
- Set aside:
- Keep scoops ready for placement; if you baked bananas already, you can bake scoops now if your assembly will not include wet white whipped cream (see next steps for combined bake strategy).
Step 4: Create Whipped Cream, Cherries & Stems
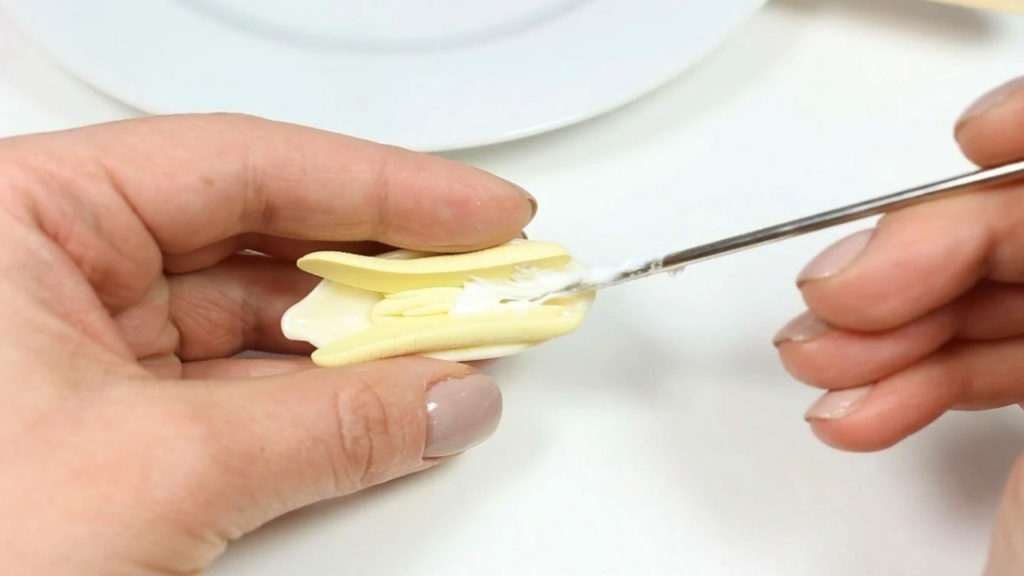
- Make whipped cream:
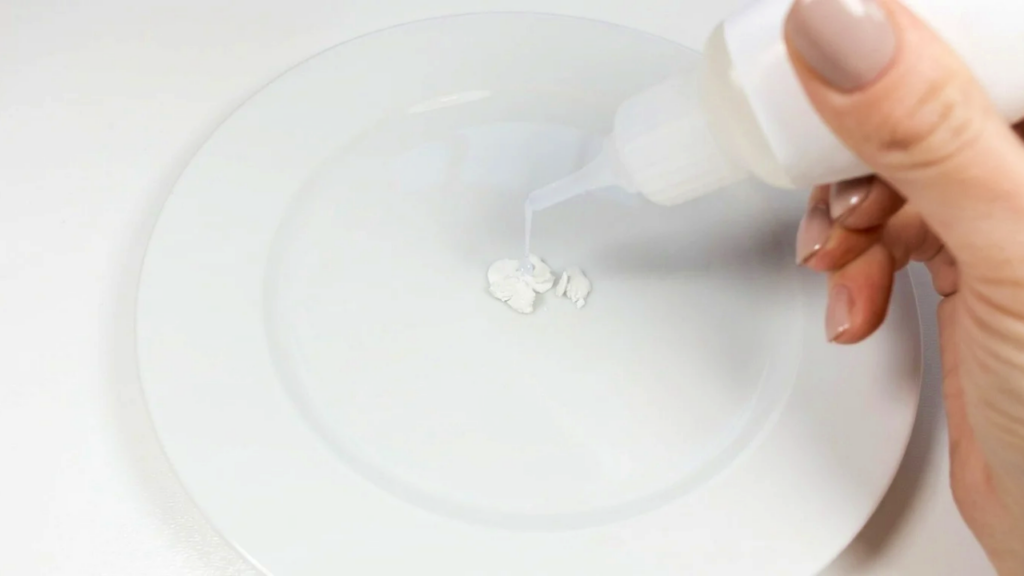
- Mix a small amount of white clay with a few drops of liquid clay/softener until you achieve a smooth, slightly malleable consistency suitable for piping shapes. Test on scrap to get the right firmness.
- Place a small blob between the banana halves to fill gaps and secure scoops.
- Form swirls:
- Place small amounts of the whipped mixture on top of each ice‑cream scoop. Use a dotting tool to swirl and form a small peak, creating a dimple at the top for a cherry.
- Make cherries and stems:
- Roll tiny red balls for cherries; flatten slightly and set atop each whipped swirl.
- Roll a thin green snake for stems, cut short pieces and gently bend into a natural curve. Attach stems to cherries and insert into the whipped cream dimples.
Step 5: Add Chocolate Sauce, Bake & Finish
- Chocolate sauce:
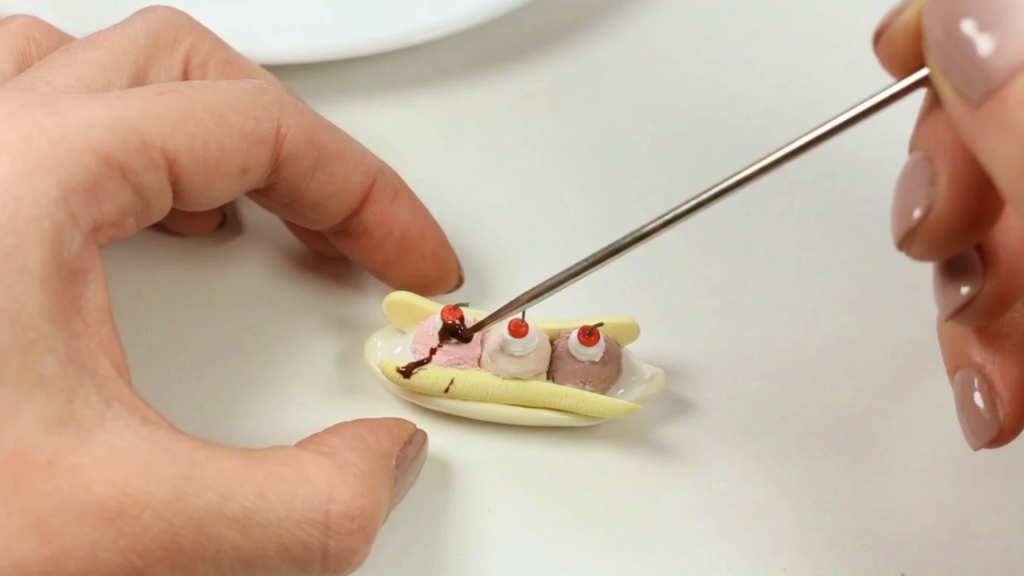
- Mix brown clay with a tiny bit of liquid medium to create a pourable but controllable sauce. Drizzle thin strips over scoops and bananas using a small tool or by rolling thin ropes and flattening them.
- Final assembly and bake:
- Arrange banana halves on the plate, press whipped filler between them, set scoops on top, add whipped swirls with cherries, place branch of chocolate sauce over the dessert.
- If components are unbaked, bake the entire assembled piece following the longest recommended time and temperature for the thickest section—observe manufacturer guidelines and use an oven thermometer. If some pieces are already baked, use a low‑temperature second bake only if recommended by the clay brand; otherwise, assemble with adhesive or baked‑clay‑compatible glue.
- Paint and glaze:
- After cooling, deepen cherry and stem tones with brown/dark red acrylic paint on stem ends and cherry shading. Apply gloss varnish to cherries and chocolate sauce for a realistic shine.
Easy Finishing Tips
- Test small amounts of liquid medium to avoid overly runny whipped cream or sauce.
- Use a clean fingertip or buffing tool to smooth small seams before baking.
- Work on a cool, dust‑free surface to prevent debris embedding in your miniature.
Common Beginner Mistakes
- Over‑using baby powder/cornstarch — too much leaves a dusty residue.
- Deep texturing that weakens thin elements and leads to breakage during baking.
- Trying to assemble all unbaked pieces without checking clay compatibility and bake timing.
Ways to Personalize It
- Swap ice‑cream flavors/colors, add miniature sprinkles (tiny clay dots), or create a waffle piece from textured and painted clay.
- Make seasonal variations: pumpkin‑spice scoops for autumn (orange tones) or pastel sorbets for spring.
Final Look
- The finished miniature banana split should present curved banana halves framing three textured scoops topped with neat whipped swirls, glossy cherries, and a realistic chocolate drizzle, all scaled nicely on your chosen plate. Allow full curing and varnish to set before display or use.