Complete DIY Clay Cat Project for Long-Lasting Keepsakes
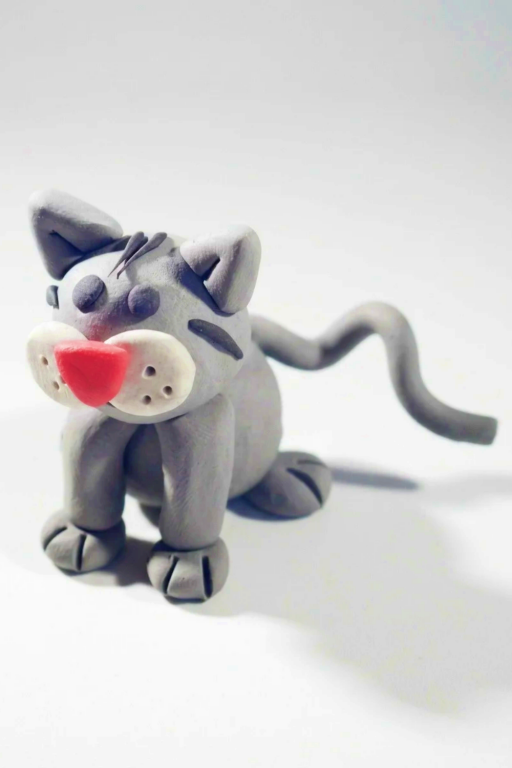
Design a cute and playful DIY Clay Cat, a fun project for all skill levels to make unique decorations or heartfelt handmade gifts.
Creating cute little animal figures is a fun and relaxing way to spend your time, and this project is perfect if you love cats! With just a little bit of polymer clay, some simple crafting tools, and your imagination, you can sculpt an adorable cat that’s completely unique. This activity is perfect for all ages, whether you’re a beginner trying out crafting for the first time or someone who enjoys hands-on creative projects.
Make a Unique DIY Clay Cat Sculpture for Your Collection
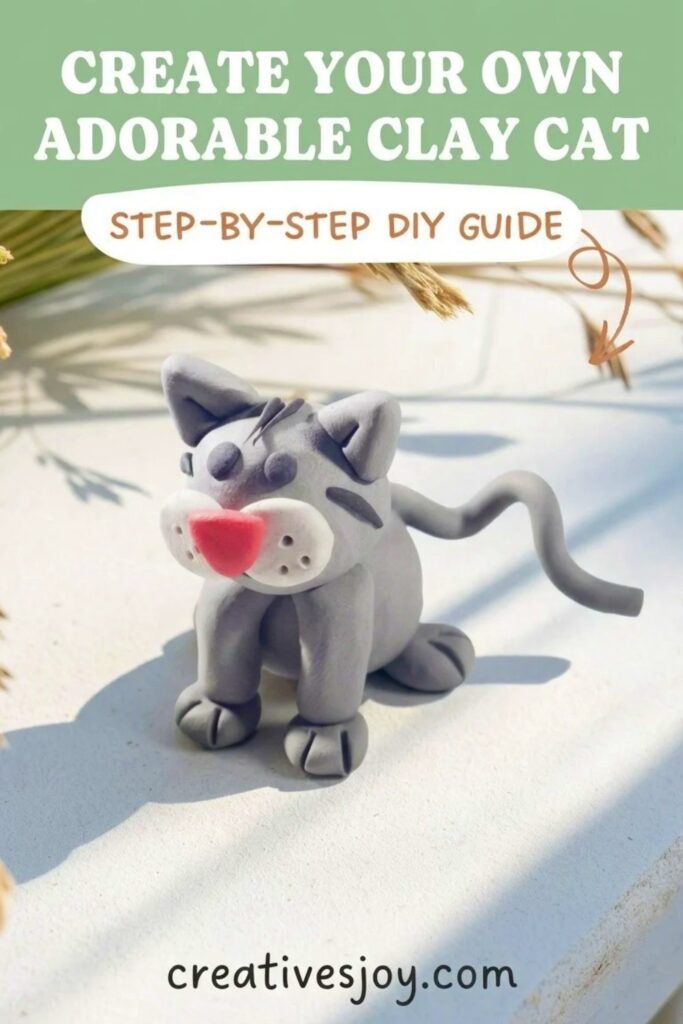
The beauty of this project lies in how customizable it is. You can shape the clay into a curled-up cat, a playful kitten, or even a standing feline proudly showing off its whiskers. Add tiny details like stripes, spots, or cute accessories to give your creation personality. The clay is easy to shape and comes in various colors, so you can make your cat look realistic or play around with fun, colorful designs. Once you’re happy with it, you just need to bake it in the oven to turn it into a solid, long-lasting figure.
Making a DIY cat out of clay is a fun mix of creativity and relaxation. It’s not only a great way to get hands-on but also leaves you with a lovely decorative piece you can display at home or gift to a fellow cat lover. The process is simple, enjoyable, and rewarding, leaving you with a memory and a keepsake you’ll cherish.
Chapter 1: Preparation and Materials
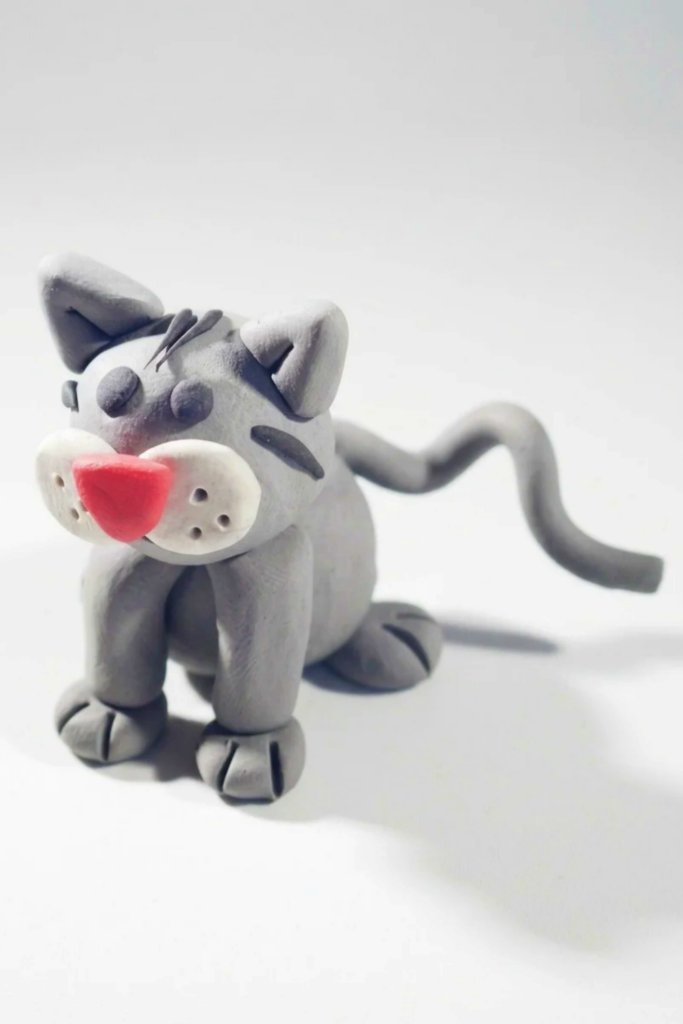
Welcome back. This lesson shows how to make a cute plasticine cat using only a few colors and basic tools. Prepare to work efficiently and follow the video timing so your build matches each stage.
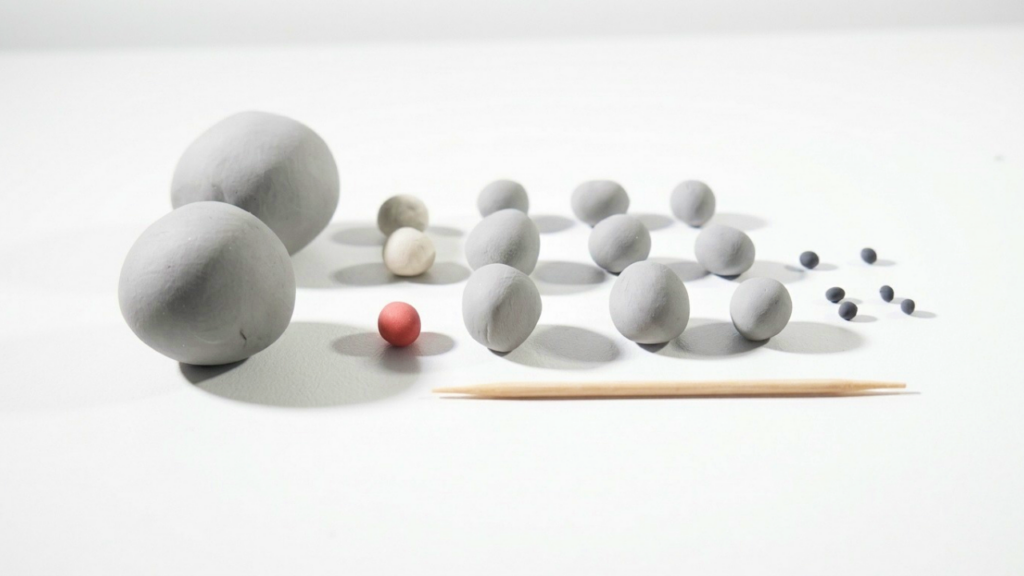
What you need:
- Plasticine in gray, white, black, and red.
- A toothpick or small wooden stick.
- A cutter or small blade for toe lines.
- A clean work surface and paper towel.
Safety and setup:
- Work on a flat, nonstick surface.
- Keep reference images or the video paused at each timestamp to match proportions.
- Divide clay into roughly equal-sized balls before you begin to speed the build.
Chapter 2: Constructing the Body
This chapter shows how to form the body and basic limbs with simple shapes. Follow the timing to create each element in sequence.
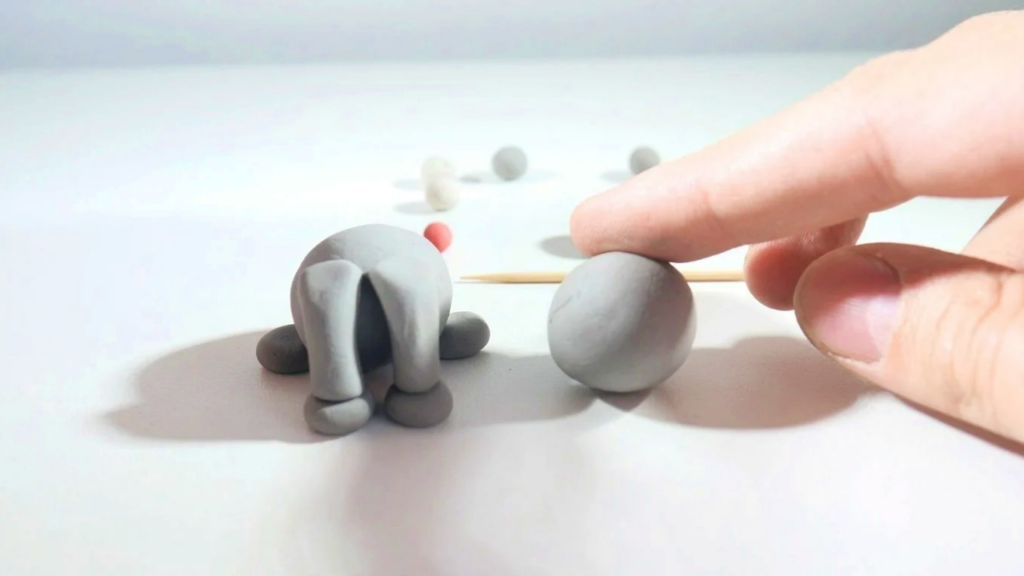
- Take the largest gray ball and center it as the body base.
- Roll two medium gray balls into cylinders for the front legs.
- Make four small flattened balls for feet; flatten with fingers so each reads as a paw pad.
- Position two feet behind and two in front; press lightly so they adhere.
- Place leg cylinders at the front and lightly press at the top to secure them into the body.
Tips during construction:
- Keep the body slightly oval so the head will sit naturally.
- Check the silhouette from the front and side to ensure the cat sits stably.
- If parts slump, chill your workspace briefly or rest the piece upright while adjusting.
Chapter 3: Creating the Face
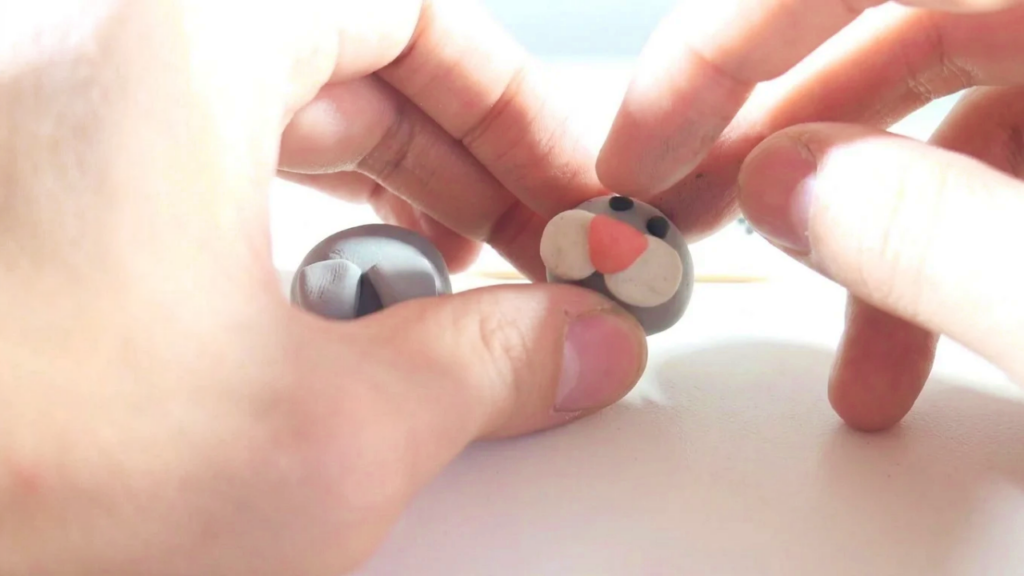
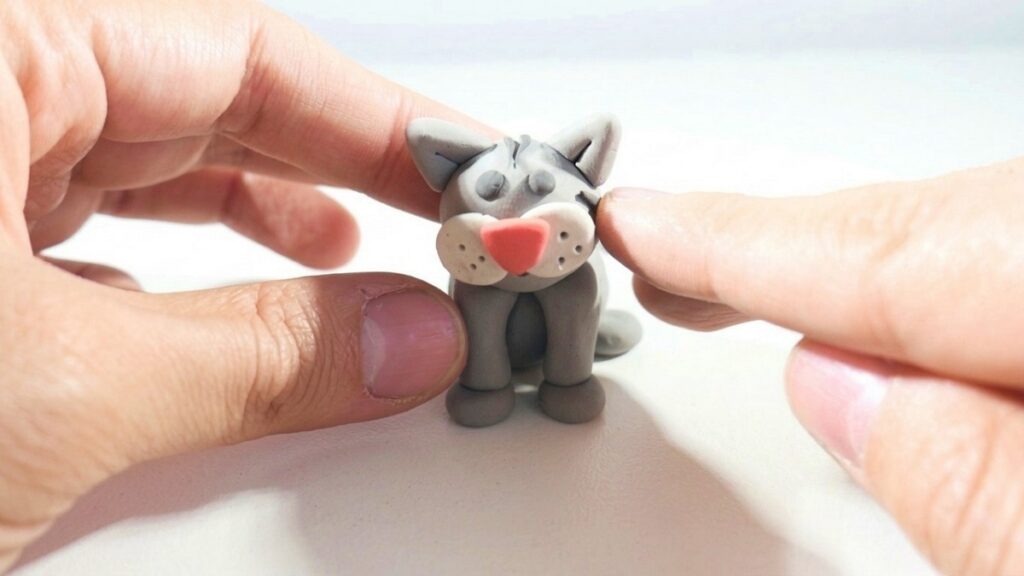
The face gives personality. Keep shapes simple and readable: two cheek forms, a nose, eyes, and ears placed clearly.
- Take a large gray ball for the head; flatten slightly to an oval and place atop the body.
- Form two white cheeks by flattening two small white balls and attach them to the front of the head.
- Make a small red triangle for the nose and place it centered between the cheeks.
- Roll two small black balls into eye forms and place them above the cheeks, keeping spacing even.
- Create two triangular gray ears from small balls, indent a center line with a toothpick, and attach them to the top of the head.
Face placement tips:
- Position cheeks so the nose sits centered and slightly lower than the eyes for a cute compact look.
- Keep eyes simple black dots to retain the charming, cartoon feel.
- Use the toothpick to gently blend seams without flattening the cheek volume.
Chapter 4: Adding Detail and Assembly
Add subtle facial details, reinforce head attachment, and create whiskers and hair elements.
- Use the toothpick to make small holes in the cheeks for whisker suggestion; make spacing regular and shallow.
- Carve a small mouth indentation beneath the cheeks using the toothpick.
- Break the toothpick in half and insert a short piece through the base of the head into the top of the body to secure the head assembly.
- Roll remaining black clay into thin strings and place two in front and two on the sides for stylized hair or whisker clusters.
Reinforcement and balance:
- The toothpick anchor prevents the head from detaching during play or display.
- Keep whisker strings thin but visible; too thick can distract from the simple face.
Chapter 5: Final Touches
Complete the figure by forming the tail and defining paw toes. Small finishing moves complete the illusion of life.
- Roll the last gray clay into a long thin strip and attach it to the rear of the body as the tail.
- Curl the tail slightly to create motion and a balanced silhouette.
- Use your cutter or blunt edge to make tiny toe lines on each foot; four small lines per paw are recommended.
- Gently smooth any fingerprints with a fingertip or a small soft brush to keep the final surface clean.
Display considerations:
- If you plan to preserve the piece, consider using a light varnish made for plasticine alternatives or mount it in a small display box.
- Keep colors distinct; avoid overblending edges so cheeks, nose, and eyes read clearly.
How the Timing Maps to the Build
- 0:00–0:21 — Preparation and color division: pause to measure ball sizes.
- 0:30–1:40 — Body, legs, feet, and head placement: work steadily and check angles.
- 2:00–3:26 — Facial elements: cheeks, nose, eyes, and ears.
- 3:51–4:40 — Whiskers, mouth, and head anchoring with toothpick.
- 5:28–6:00 — Tail, toe lines, smoothing, and final presentation.
Helpful Tips and Troubleshooting
- If the head wobbles after assembly, insert a slightly longer toothpick or use a short piece of wire for stronger anchoring.
- Too-soft clay can deform; rest the figure upright or chill briefly to firm the clay during longer sessions.
- If colors unintentionally mix, gently remove surface clay and replace with fresh material rather than smearing.
- To refine small details like the nose or toes, use the pointed end of the toothpick with light pressure; heavy pressure will flatten forms.
Your Finished Craft
When complete, you will have a compact, stylized plasticine cat that communicates expression through simple geometric shapes. The timed build encourages efficient work and consistent proportions when matching the video. Repeat this process with different color schemes, slightly different head sizes, or tail positions to explore personality variations without changing the core steps. Enjoy making your cat and share it with others to compare small adjustments that create distinct characters.