DIY Polymer Clay Botanical Earrings Idea for Nature Lovers
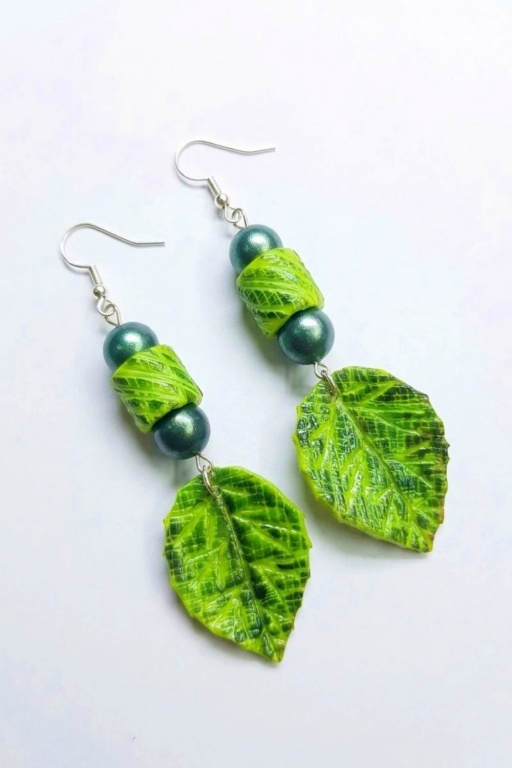
Create elegant Polymer Clay Botanical Earrings with this simple guide and add a touch of nature-inspired beauty to your accessory collection.
Creating your own accessories allows you to express your style in a truly personal way. This project focuses on crafting polymer clay earrings inspired by botanical designs, such as leaves, flowers, or natural patterns. Polymer clay is a versatile material that’s easy to mold, making it perfect for this type of DIY craft. Whether you’re a beginner or an experienced crafter, this project is simple to follow and doesn’t require specialized tools. You’ll find it exciting to take inspiration from nature and turn it into wearable art.
Elegant Polymer Clay Botanical Earrings You’ll Love

What makes this DIY project unique is its creative flexibility. You can design your earrings in any shape, size, or color to match your preferences or seasonal themes. From delicate green leaves to vibrant flower motifs, these pieces are lightweight and durable once baked. The steps are beginner-friendly and allow you to play with textures, layering, or painting details to give your designs depth. This makes it a perfect activity for personal crafting or shared moments with family and friends.
By the end of the project, you’ll create beautiful, nature-inspired earrings that are both stylish and meaningful. Whether you want to make accessories for everyday use or gifts for loved ones, this project offers endless possibilities. It’s a wonderful way to enjoy the creative process while crafting wearable botanical art that celebrates the beauty of nature.

Leaf Polymer Clay Earrings
Create lightweight, textured leaf earrings with coordinated cylindrical and circular beads. The design uses simple household tools for texture, PanPastel and mica powders for color and shine, and a mix of assembly methods (embedded pins, eye pins, and varnish) to achieve a professional finish.
Supplies and Equipment
- Polymer clay: lime green (base), black (for beads), additional small sheets as needed
- Thin metal scraper or thin metal sheet / stiff card / blunt side of tissue blade (for texturing)
- Rose leaf steel cutter or similar leaf cutter, rectangular and circular clay cutters
- Precision craft knife, long needle (for veins)
- PanPastel or soft chalk pastels: permanent green, chrome oxide green, black
- Mica powder (emerald green) and soft powder brush
- Small earbud or Q‑tip for fine color application
- Steel part from a precision knife (or any hollow cylindrical mold), silicone shaping tool
- Steel sewing pins, eye pins, head pins, or needles for bead holes
- Gloves (optional, to avoid fingerprints), small sanding tools
- Gloss varnish, soft varnish brush, jewelry glue (if needed)
- Oven and oven thermometer, baking tray, cutters or supports for drying varnish
- Drill or small hand tool for post-bake holes, jewelry pliers, shaped earring hooks, jump rings
Measurements and Specifications
- Base leaf thickness: medium (consistent sheet rolled to about 1.5–2 mm recommended)
- Bead wall thickness: thin enough to form a hollow cylinder but thick enough to retain shape after baking (approx. 1–1.5 mm)
- Pin insertion depth: ensure pins protrude enough to maintain holes but not through the outer surface
- Varnish layers: 1–2 thin coats, allowing 30 minutes between coats for drying
Getting Everything Ready
- Condition clay until soft and pliable; roll to consistent medium thickness.
- Preheat oven per manufacturer instructions and verify temperature with a thermometer.
- Arrange cutters, needles, pins, and texturing tools within easy reach.
- Prepare a clean, flat work surface and a container for small components.
Making Instructions
Step 1: Texture the Clay Base
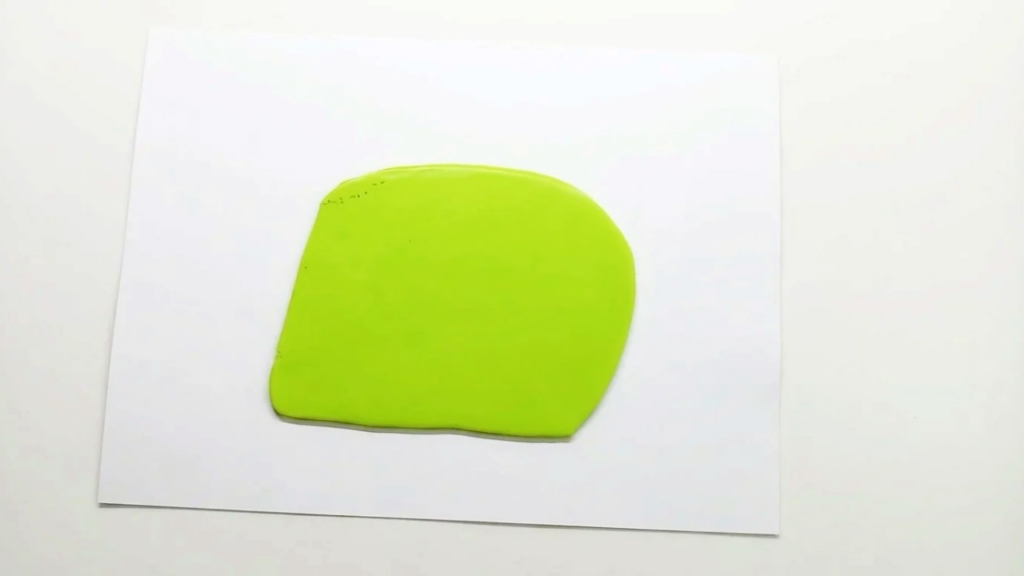
- Lay a medium-thickness lime green clay sheet on the work surface.
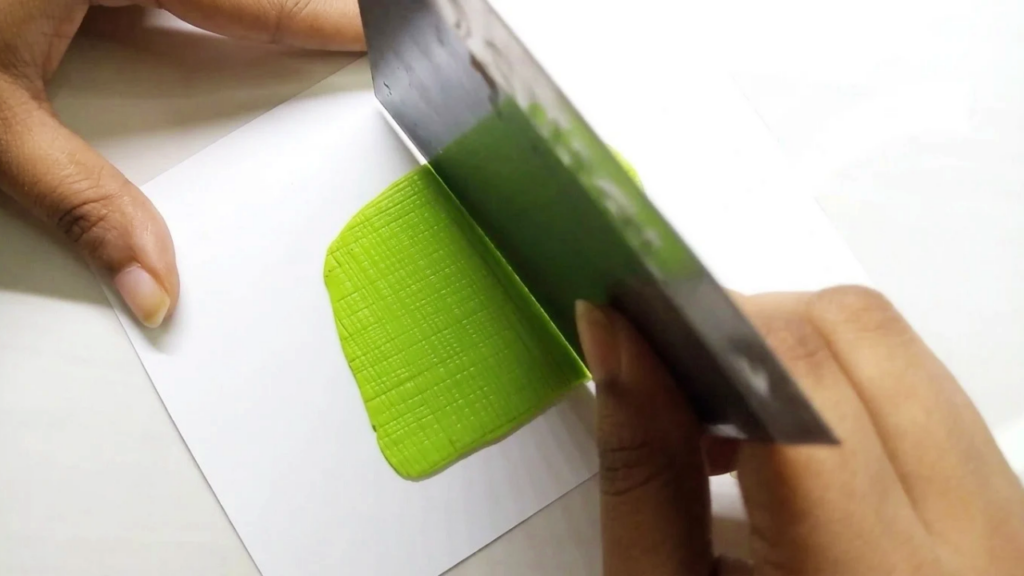
- Use a thin metal scraper or blunt side of a tissue blade as a texturing tool.
- Hold the texturing tool perpendicular to the clay and press lightly — do not press too deep.
- Make close, parallel horizontal lines across the surface, then add vertical lines to form a subtle grid texture.
- Inspect the texture and repeat lightly if some areas are faint; imperfections add natural character.
Step 2: Cut and Shape Leaves
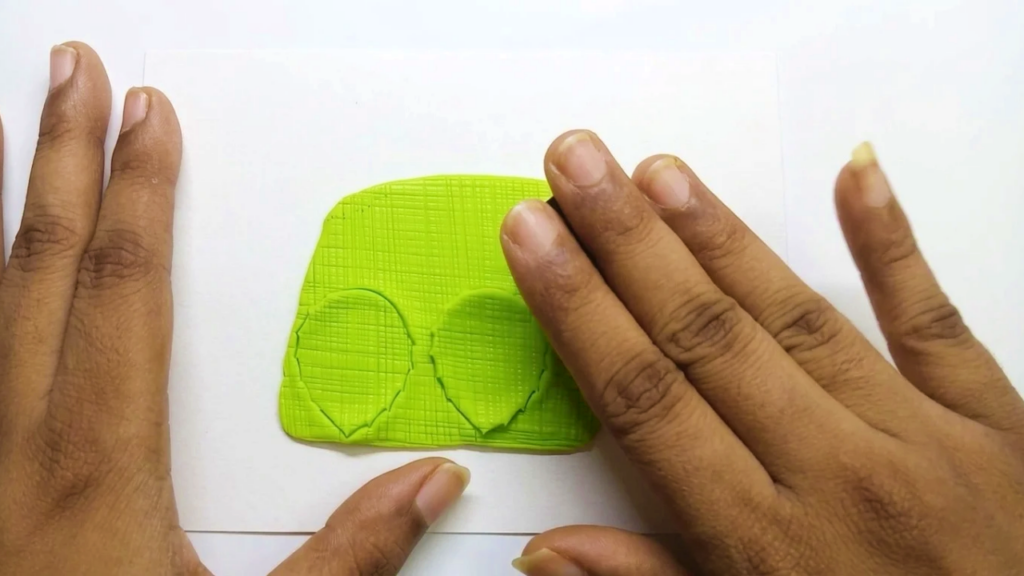
- Use a rose leaf steel cutter (or similar) to cut leaf shapes from the textured sheet.
- Peel away excess clay gently to preserve leaf edges.
- Use a long needle to draw veins on the leaves; keep marks shallow and parallel to the surface.
- Position the needle horizontally for control and natural vein lines.
- Slightly fold or cup leaves to add three-dimensional shape before baking.
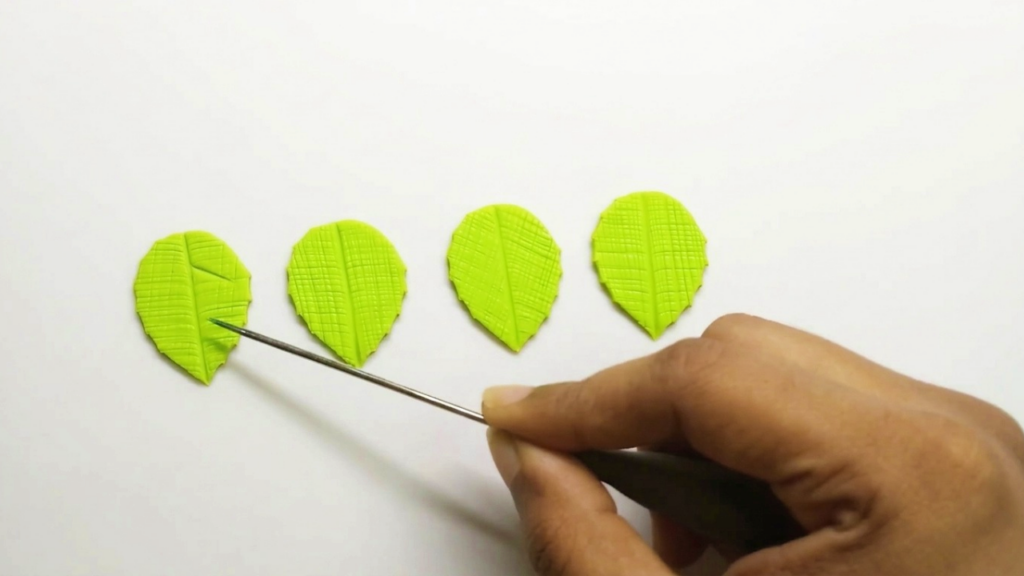
Step 3: Color the Leaves
- Apply PanPastel or soft chalk pastels: permanent green, chrome oxide green, and a touch of black.
- Use fingertips to apply color to upper surfaces only for natural shading.
- Apply black sparingly in recessed areas; it will blend with lighter shades later.
- Use an earbud or cotton swab to add color precisely into vein areas to accent texture.
- Finish with a light dusting of emerald green mica powder using a soft brush for subtle shine.
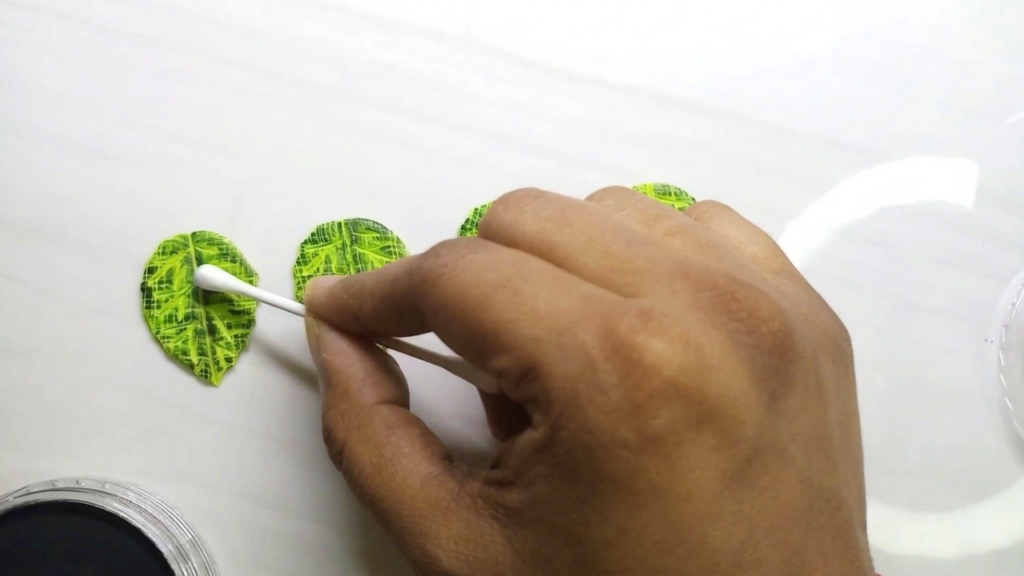
Step 4: Make Hollow Cylindrical Beads
- Roll a small sheet of clay and texture it using the same method as the leaves for consistency.
- Make diagonal stripes or other subtle markings with a needle for interest.
- Cut a rectangular strip with a rectangular clay cutter.
- Wrap the strip around a steel precision‑knife part (or any cylindrical metal form) to create a hollow tube.
- Trim the seam, then use a silicone tool to blend and texture the joining line so it looks organic.
- Make two identical cylindrical beads, remove excess clay, and smooth edges.

Step 5: Make Circular Beads
- Roll a thin sheet of black clay and cut small circles using a circular cutter.
- Stack two circle parts if desired for added thickness and roll gently to form a bead shape.
- Wear gloves to avoid fingerprints if required.
- Insert a steel sewing pin (or eye/head pin) into each bead like a screw to create and preserve the hole during baking.
- Repeat to make four circular beads and dust with emerald mica powder for shine.
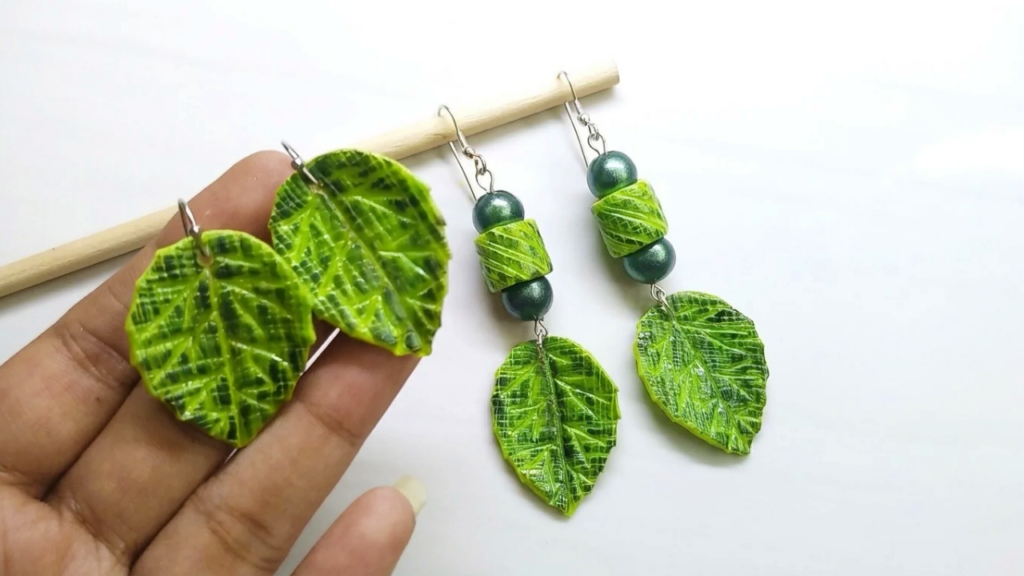
Assembly
- Bake leaf pieces, hollow cylindrical beads, and circular beads according to your polymer clay brand’s instructions; use an oven thermometer to ensure correct temperature.
- After baking and cooling, remove sewing pins from circular beads by loosening with a needle.
- Sand any rough edges lightly if needed.
- Seal mica powder on beads and leaf surfaces with a thin coat of gloss varnish using a soft brush; for leaves, a light gloss or glass varnish will give a waxy, leafy feel.
- Place varnished pieces on cutters or supports to dry flat and prevent drips; apply a second thin coat after 30 minutes if required.
- Drill holes where needed and use long eye pins to thread beads together: assemble three beads on an eye pin and attach to a shaped earring hook with pliers.
- Attach leaves directly to hooks for the simpler pair or combine leaves with bead clusters for the decorated pair.
Final Touches
- Inspect assemblies for loose parts and secure with jewelry glue where necessary.
- Ensure all metal findings are aligned and cuts are clean.
- Polish any visible varnish drips and touch up with an extra thin coat if needed.
Tips for Better Results
- Use light, controlled pressure when texturing; repeat gently rather than over‑pressing.
- Apply pastels with fingertips for natural color placement; use earbuds for fine lines.
- Insert pins like a screw to maintain bead shape and hole integrity during baking.
- Dry varnished pieces on supports to avoid pooling and drips.
Troubleshooting
- If beads collapse, review wall thickness and avoid overheating in the oven.
- If varnish shows streaks, sand lightly with fine grit and reapply a thin coat.
- For lifted embellishments, secure with clay glue before or after baking depending on the piece.
Creative Variations
- Swap lime green for autumnal or metallic-toned clay for seasonal looks.
- Add small seed beads or tiny rhinestones to the leaf center before baking for sparkle.
- Use translucent clay and mica powders for a glowing, layered effect.
These instructions follow the demonstrated process and provide clear, stepwise guidance so you can reproduce and customize the leafy earrings while maintaining quality and durability. Enjoy making your pair!