How to Crochet Hanging Plants With Princess Doll

Learn how to crochet cute hanging plants that can be customized in size with a step-by-step tutorial for all skill levels. The video also shows how to add safety eyes and create the plant’s leaves using a balloon stitch technique. Finally, it covers assembling the plant, attaching the leaves, stitching on the top cover, adding hanging chains, and embroidering facial expressions. Follow through with us for the complete tutorial!

Crochet Hanging Plant Tutorial
Skill Level: Beginner
Crochet an adorable hanging plant, focusing on its charming aesthetics. Learn to crochet the soft pot base and sculpt its unique shape, then bring it to life with safety eyes. The video creatively uses a “balloon stitch” for lush, organic-looking leaves, ultimately guiding you through assembly, adding functional hanging chains, and even embroidering sweet facial expressions to personalize your finished piece.
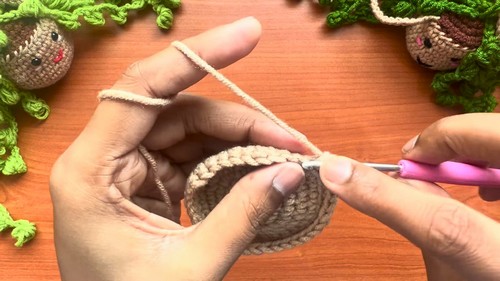
Pot Construction
- Base: Begin with a magic circle, then crochet six single crochets into it. Tighten the circle and slip stitch to close.
- Increasing Rounds:
- Round 2: Chain one, then work two single crochets into each stitch, resulting in 12 stitches.
- Round 3: Chain one, then alternate one single crochet and two single crochets in the next stitch, ending with 18 stitches.
- Round 4: Chain one, then work two single crochets, followed by two single crochets in the next stitch, for a total of 24 stitches.

- Round 5: Chain one, then work three single crochets, followed by two single crochets in the next stitch, for 30 stitches.
- Round 6: Chain one, then work four single crochets, followed by two single crochets in the next stitch.
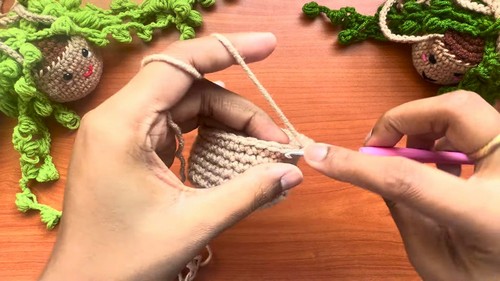
- Forming the Pot Shape: Chain one and lock the stitch. Work single crochets into the back loop only for one round to begin shaping the pot. For subsequent rounds, work single crochets into both loops until the desired pot height is achieved.
- Finishing the Pot: Slip stitch to secure the last round, leaving a long tail for stitching.
Assembly and Embellishments
- Mud Cover: Create a top cover for the pot using dark brown yarn, following the same increasing pattern as the pot’s base for the first few rounds.
- Attaching Eyes: Position the safety eyes on the pot and secure them with their washers. Trim any excess yarn from the back of the eyes.
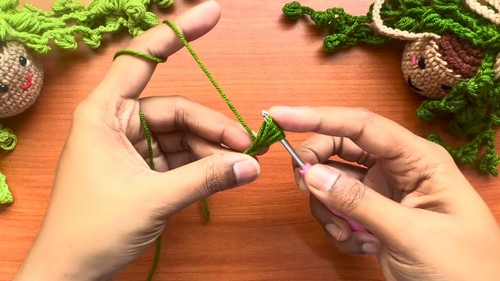
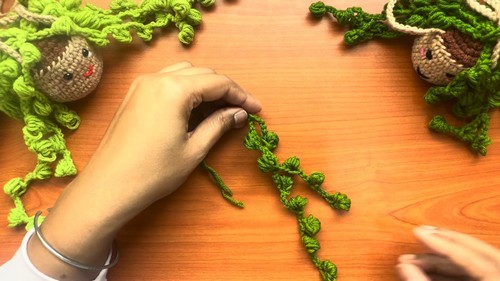
- Creating Leaves:
- Using green yarn, make a slip knot, leaving a long tail.
- Chain five.
- Yarn over, pull up a loop, and repeat this process four to five times into the first loop of the chain to create a “balloon stitch.”
- Yarn over and pull through all loops, then chain one to secure.
- Slip stitch into the base of the petal.
- Repeat the process, chaining four between each petal, to create a strand of leaves. Make multiple strands of varying lengths for a more natural look.
- Attaching Leaves: Insert the long tails of the leaf strands from the right side of the mud cover to the wrong side. Secure them with knots on the inside to prevent them from coming out.
- Stuffing and Closing: Stuff the pot with fiberfill cotton to give it a fluffy, full shape. Align the mud cover with the pot opening and stitch them together using the long tail left from the pot. Continue stuffing as needed to maintain the desired shape. Secure the stitching with a knot and hide the yarn tail inside.
- Hanging Chains: Create two chains using light brown yarn, each approximately 60 stitches long, leaving long tails at both ends for attachment.
- Attaching Chains: Attach one end of the first chain to one side of the pot. Cross it diagonally to the opposite side and attach the other end. Repeat with the second chain, attaching it to the remaining two sides of the pot in a crisscross pattern. Secure all ends with double knots and hide the tails.
- Facial Expressions:
- Mouth: Using black thread, embroider a smiling mouth onto the pot. Insert the needle from the bottom, bring it out at the center of where the mouth will be, then create a curve by bringing the needle back down into the pot. Secure with a knot and hide the tail.
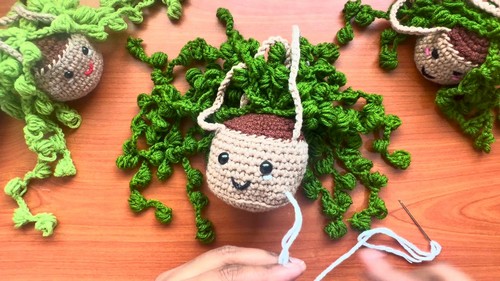
- Cheeks: Use white or pink thread to add small blush marks on either side of the mouth, similar to the mouth technique.
- Hanging Loop: Create a small loop by tying the top center of the crossed hanging chains to ensure stability when hung.