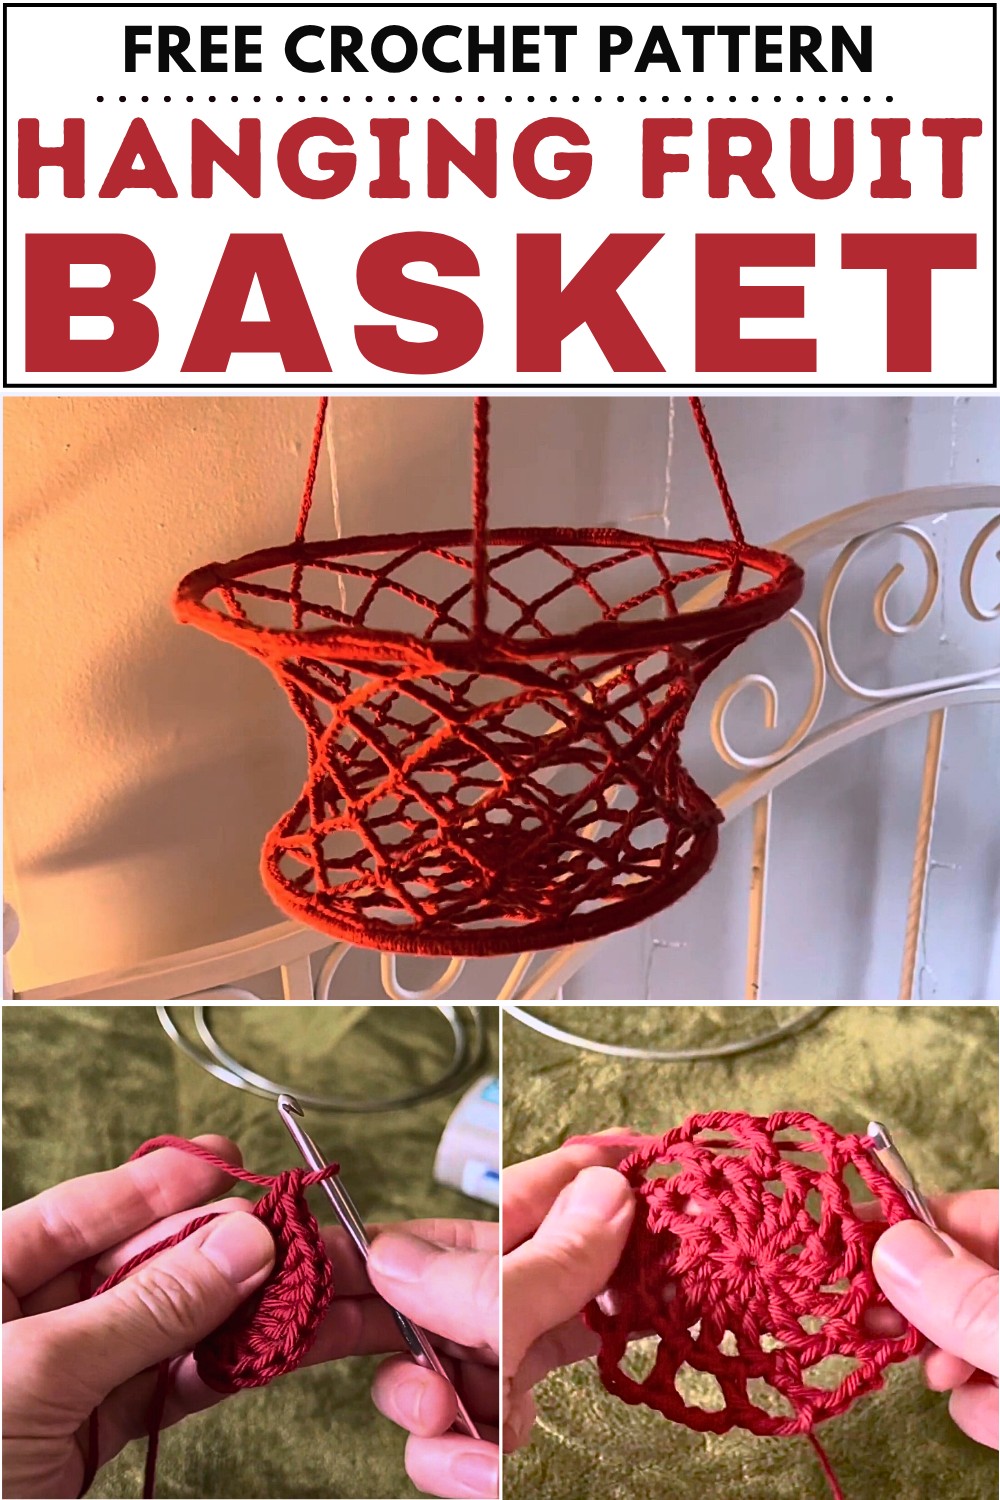
How to Crochet Hanging Basket for Kitchens

Learn how to crochet a hanging basket using two metal rings of different sizes, perfect for your fruits or yarn stash. With the mesh texture and quick completion, it is must have. The design provides a washable, functional, and visually appealing solution for kitchen storage. Let’s get started!
Crochet Hanging Basket Tutorial
The video provides a step-by-step guide to crocheting a hanging fruit basket, combining functionality with aesthetic appeal. The creator uses cotton yarn and metal rings to design a washable and practical kitchen accessory. Below is the detailed summary divided into headings for clarity:
Materials and Preparation
- Materials Used:
- Cotton yarn, which is ideal for its washable nature.
- Two metal rings: an 8-inch ring was used for the bottom of the basket, and a 10-inch ring was used for the top.
- Crochet Hook:
- The recommended 5.5mm hook couldn’t be found, so a 5mm hook was used instead.
- Setup:
- The creator decided to use different-sized rings to give the basket a tapered shape and ensure structural integrity.
Starting the Basket
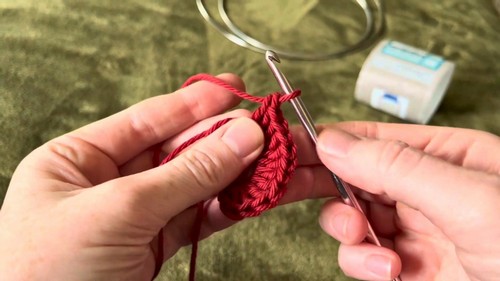
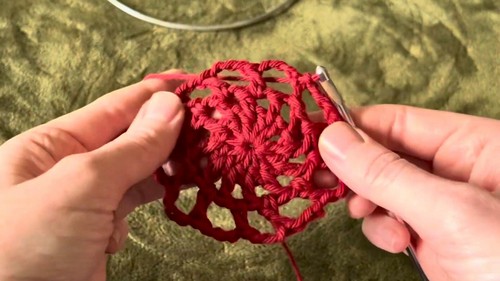
- Magic Circle Technique:
- The crochet process begins with a magic circle to form the base of the basket.
- Double crochet stitches are used to build the foundation.
- Initial Rows:
- The following rows involve creating double crochet stitches and chains to build a mesh-like structure. The stitches are placed between the spaces of the previous row.
- Adjustments:
- Chain counts are increased in each row to ensure the basket’s size gradually expands as it progresses.
Adding the Bottom Ring
- Attaching the Bottom Ring:
- Once the basket base is complete and expanded to its desired size, the 8-inch metal ring is attached.
- Single crochet stitches are used to fasten the edges of the basket to the metal ring securely.
- Stitch Adjustments:
- The creator ensures the stitches are spaced evenly to avoid sagging and maintain the basket’s shape.

Creating the Mesh Walls
- Building the Structure:
- Mesh rows with chains and single crochet stitches are crocheted upward to form the walls of the basket.
- Increasing Chain Length:
- As the basket progresses, chain lengths are increased for larger top dimensions, ensuring a smooth transition to the top ring.
Attaching the Top Ring
- Securing the 10-Inch Metal Ring:
- The top ring is attached similarly to the bottom ring, with single crochet stitches used to fasten the basket edges to the ring.
- More stitches are added for the top ring due to its larger size.

- Final Adjustments:
- The creator ensures the stitches are tight enough to prevent metal visibility and sagging.
Creating Hanging Straps
- Making Straps:
- A chain of 90 stitches is crocheted to form the straps, ensuring the basket can be hung securely.
- The straps are attached at evenly spaced points on the top ring to maintain balance.
Finishing Touches
- Securing and Weaving Ends:
- The creator secures all loose ends by tying knots and weaving them into the basket for a clean finish.
- Testing the Basket:
- The basket’s structure and hanging mechanism are tested by placing small items inside.

Final Product
- Design Features:
- The basket is washable and suitable for holding fruit or other kitchen goods.
- Personal Touch:
- This crochet fruit basket was handcrafted as a thoughtful birthday gift to match the recipient’s newly painted kitchen door.
- Versatility:
- The basket can be hung using rings or hooks and adjusted for different sizes based on individual needs.