How to Crochet Round Pillowcase for Home Decor

Learn how to crochet a custom rouund pillowcase using an old twin-sized comforter as the stuffing, perfect for beginners and experts. From decorative piping effects and adding a drawstring closure for easy removal and washing, to stuffing, the tutorial will provide you with everything.
The project uses nearly two full skeins of yarn and showcases a unique stitch pattern that avoids a striped look, resulting in a functional and aesthetically pleasing throw pillow design.
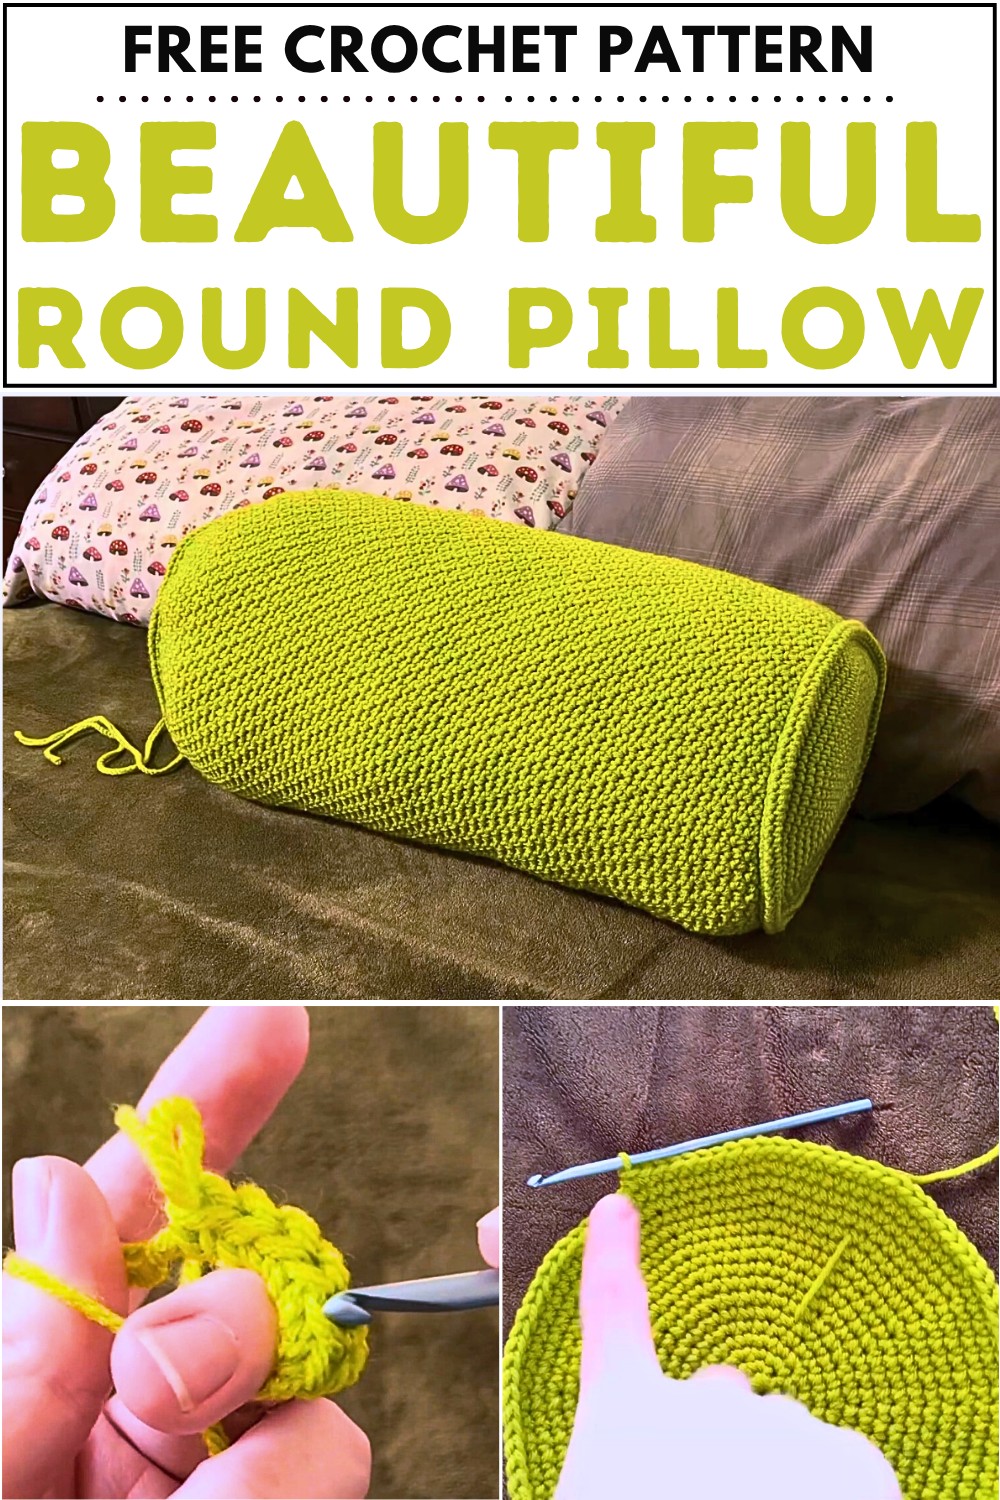
Beautiful Crochet Round Pillow Tutorial
Introduction
- The creator decides to make a crochet pillowcase for a throw pillow to avoid purchasing expensive pillow forms.
- She uses an old twin-sized comforter as the stuffing material, making the project cost-effective and sustainable.
- The yarn chosen is Hobby Lobby’s Key Lime color, though she mentions it initially doesn’t match her bed but will fit once other planned decorations are complete.

Preparation
- The comforter is folded tightly into the desired pillow shape.
- The creator uses a crochet hook that is slightly smaller than the recommended size for the yarn to ensure tight stitches, preventing the stuffing colors from showing through.
- She begins the project with a magic circle, progressing to create a flat circle until it matches the size of the tightly wrapped comforter.
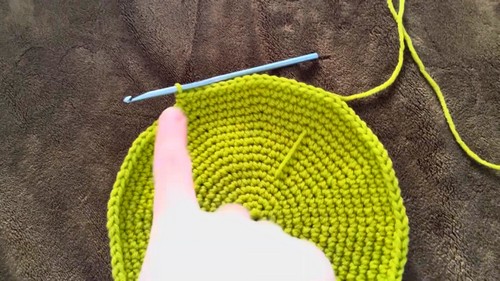
Creating the Base
- The circular base of the pillowcase is crocheted to fit snugly around the folded comforter.
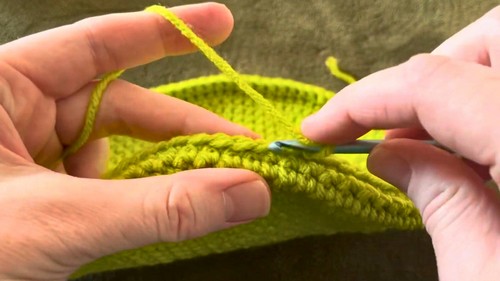
- The creator introduces a decorative detail at the corner by using a single crochet in only the front loop, which creates a visible piping effect.
- This effect is achieved by alternating rows between the front and back loops before uniting them.
Adding the Pattern
- A specific stitch pattern is chosen: single crochet followed by double crochet, repeating to create a textured design.
- The odd number of stitches ensures the pattern stacks neatly on top of each preceding row.
- She continues crocheting in rounds, building up the height of the pillowcase.
Finishing the Top Corner
- The top corner of the case mirrors the decorative piping effect used on the bottom corner.
- Adjustments are made to find the correct stitch count, ensuring symmetry.
- Three rows of single crochet loops are added to finish the corner.
Drawstring Closure
- A drawstring closure is added to allow easy removal of the comforter for washing while keeping the pillowcase secure.
- To create the drawstring panel, extra rows of single crochet are crocheted around the top, followed by a row of double crochet for added cinching strength.
- A tight chain (approximately 200 stitches) is made and threaded through the panel’s loops using a sharp needle, skipping every fourth loop.

Drawstring Mechanism
- The ends of the drawstring are threaded through a plastic drawstring toggle, which tightens the closure.
- Knots are tied at the ends of the string to secure positions.
- The creator suggests alternatives like adding a zipper instead of the drawstring if desired.
Final Product
- The completed pillowcase effectively encases the comforter with a snug fit while showcasing a textured stitch pattern that avoids a traditional striped appearance.
- She expresses satisfaction with both the aesthetic and functional aspects of the pillowcase.
- Nearly 2 full skeins of Hobby Lobby yarn were used for the project. Despite minor imperfections, the creator highlights its sustainability and ease of cleaning.

Closing Thoughts
- The creator demonstrates how the pillowcase can be washed separately from the comforter, making it practical for long-term use.
- She encourages viewers to try the project and share feedback, emphasizing the creative customization possibilities.