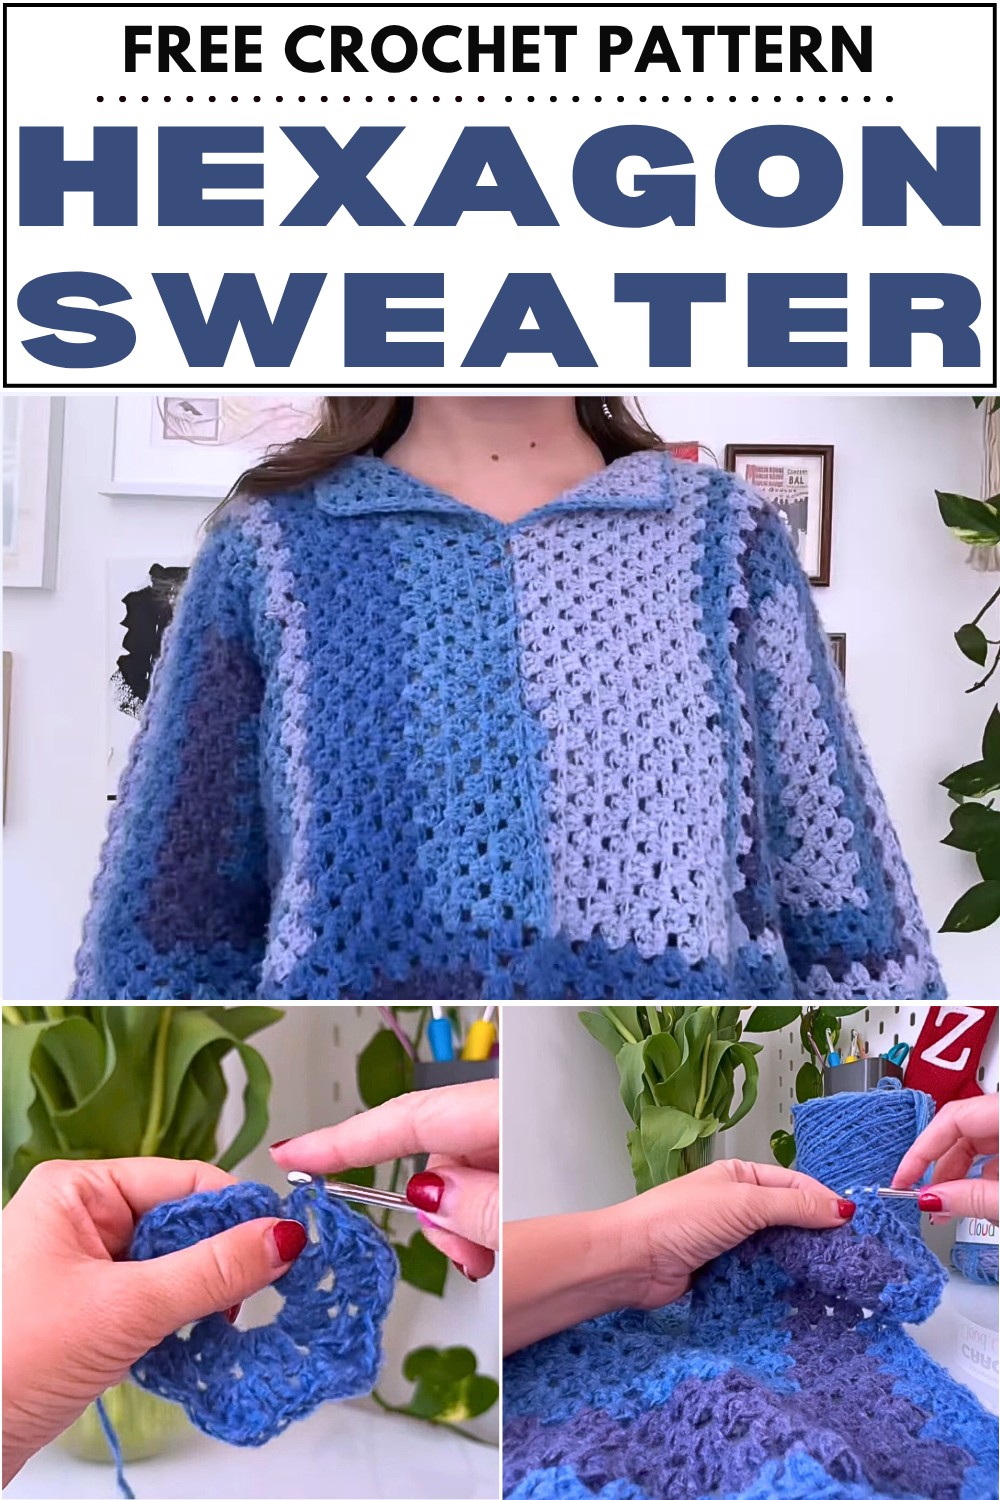
How to Crochet Hexagon Sweater Pattern for All Skills

Learn how to crochet a hexagon sweater using soft yarn with a step-by-step tutorial for all skill levels. The creator follows Passionate Kelsey’s tutorial, adding personal touches like sleeve adjustments and decrease techniques for a snug fit. Progress updates detail the construction of sleeves, cuffs, and the sweater’s front and back panels, blending creativity with technique. The finished piece is perfect to wear during summer!
Crochet Hexagon Sweater Tutorial
Overview
- The creator demonstrates her process of crocheting a hexagon sweater using Karen Cakes yarn, which lends a softer and fuzzier texture than her previous project.
- She references following Passionate Kelsey’s tutorial for detailed guidance on the hexagon and assembly, emphasizing that her video is meant as a “crochet along” rather than a full tutorial.
Materials Used
- Yarn: Karen Cakes (soft, fuzzy texture).
- Crochet Hook: 5.25mm (slightly larger than the 5mm hook used previously).
Progress Updates on Hexagon Base
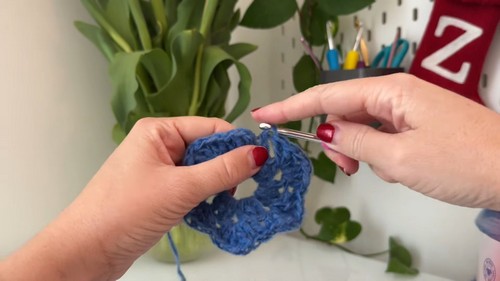
- The creator begins by crocheting hexagons, gradually building layers to eventually form the sweater’s sleeves.
- Updates are provided on the number of rows completed, showing how the hexagon folds into shape to create the armhole section.
- Visual aid highlights how folding the hexagon forms the foundation of the sleeves and structure of the sweater.

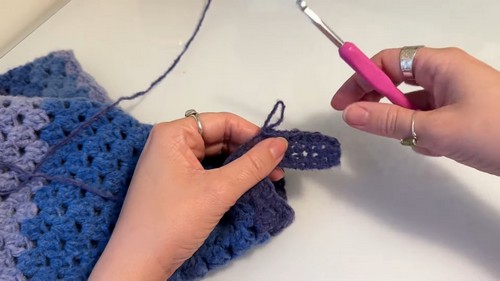
Creating and Adjusting Sleeves
- Sleeves are constructed by attaching the hexagonal pieces and expanding them.
- The creator uses a technique of alternating decreases to achieve a snug fit for the sleeves.
- Single crochets and decreases are added to taper the sleeve and cinch the cuffs for a cleaner finish.
- Ribbing is created by crocheting into back loops only, adding stretch and texture to the cuffs.
Tips and Techniques for Sleeves
- Recommends trying on sleeves frequently to ensure fit and adjust tension.
- Alternates decreases at specific points (shoulder and armpit) to prevent bagginess and ensure a tight-fitting design.
- Eliminates the traditional single crochet and chain-1 technique in ribbing to maintain uniformity in stitching.
Assembly of Hexagonal Panels
- The hexagonal panels are joined by attaching the left and right sides at the back.
- The sides are then connected at the front, leaving flaps for the neck section to fold open naturally.
- Assembling starts at the bottom of the sweater and progresses upward.
Enhancing the Bottom Portion
- The bottom portion of the sweater is extended to the desired length by adding granny clusters (three double crochets per cluster).
- The creator works in circular rounds to elongate the sweater, adjusting the length based on personal preference.
- While she keeps hers cropped to maintain the design style, viewers can add more rows for a longer sweater.

Final Result and Reflections
- The completed hexagon sweater features vibrant color transitions from Karen Cakes yarn, adding charm and uniqueness to the design.
- The cropped design complements the fitted sleeves, balancing comfort and style.
- The creator expresses her satisfaction with the sweater, encourages viewers to try the pattern for themselves, and invites feedback on their creations.
Additional Notes
- The creator stresses that this video is not an exhaustive tutorial but a personal walkthrough of her approach and adjustments while following Passionate Kelsey’s guide.
- Passionate Kelsey’s tutorial link is provided for viewers seeking an in-depth guide to constructing the hexagon sweater.