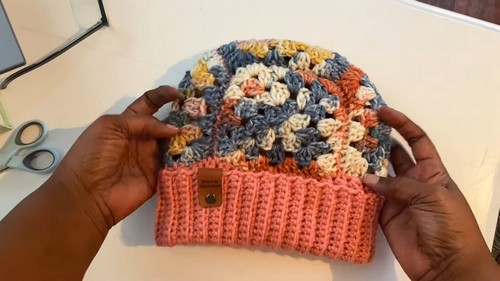
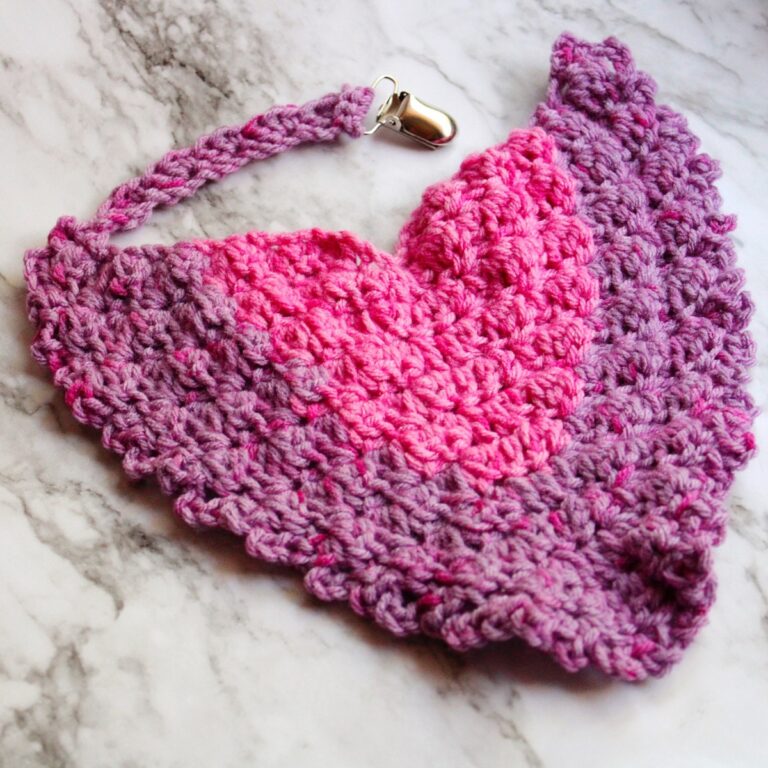
How to Crochet Granny Square Hat for Winter

Learn how to transform a granny square into a lovely winter beanie perfect for beginners with this granny square hat tutorial. Using variegated yarn and a simple granny square, you’ll crochet unique ribbed and colorful hats in any size. Perfect for cozy winter wear, these hats are both functional and fashionable.

Granny Square Hat Tutorial
This tutorial walks beginners through crocheting a stylish granny square hat with a thick, cozy brim. Using clusters of double crochets, viewers learn to build a square foundation, stitch panels together, and add a ribbed brim with 60 rows.
- Highlights:
- Both hats have a long brim that folds up, making them extra thick and warm for the ears.
- She used variegated yarn to make them, which is fast to work with.
- She incorporated scrap yarn for the rim from her previous projects.
- Deborah mentions the hats come together quickly and teases the tutorial for making them.
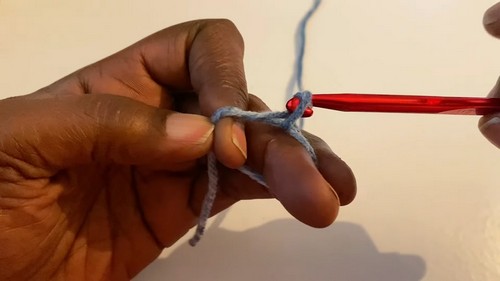
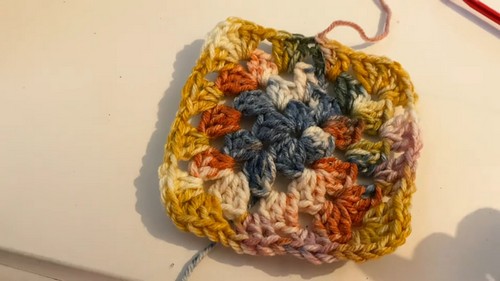
Step 1: Creating the Magic Circle
- Deborah begins by creating a magic circle.
- Clusters of three double crochets are made within the circle, followed by chaining to create spaces for further work.
- This initial work establishes the foundation of a granny square pattern.
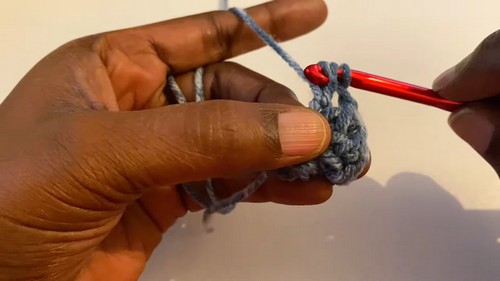
Step 2: Building the Granny Square
- Focuses on filling the open spaces with clusters of three double crochets and chaining between them.
- Corners are created by working two clusters into the same space with chaining in between.
- Emphasizes:
- Building a square by working only into spaces, not individual stitches.
- Consistency in the granny square structure.
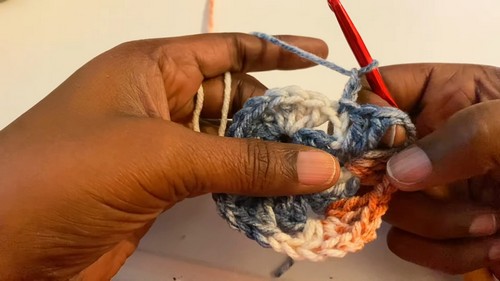
Step 3: Expanding the Granny Square
- Deborah continues to expand the square by repeating the process, adding more rows of clusters and corners.
- Clarifies:
- Each side panel consists of single clusters, while corners feature two clusters.
- She works up a total of four rows of the square as part of the pattern.
Step 4: Completing the Granny Squares
- Deborah finishes the granny squares and notes that five completed squares are needed for the hat.
- She prepares the squares for assembly by slip stitching around the edges to create clean connections.
Step 5: Joining the Granny Squares
- Panels are joined together using slip stitches, forming the top part of the hat.
- Deborah demonstrates her technique for working through back and front loops while slip stitching to avoid bulk.
Step 6: Creating the Brim
- Begins the brim of the hat by creating a separate piece:
- Starts with a chain of 26 stitches.
- Works single crochets, alternating between full stitches at the edges and back loops for the interior stitches.
- The brim is worked over 60 rows to achieve stretchiness and texture.
Step 7: Attaching the Brim to the Hat
- The brim is attached to the top part of the hat:
- Aligns the “wrong sides” of the pieces.
- Works single crochets along the rows of the brim and the edge of the hat.
- Ensures no gaps between stitches by carefully matching rows with spaces.
Step 8: Final Touches
- Deborah completes the hat by slip stitching the final join.
- Weaves in loose ends and turns the hat to the right side.
- Suggests adding an optional tag for added detail.
- Demonstrates the completed project, noting the stretchiness and comfort of the hat.