How to Crochet Granny Square Throw Pillow Cover (Complete Guide)

In this post, you’ll learn how to crochet a basic granny square throw pillow cover with a zipper. Perfect for beginners, the tutorial guides you through creating the granny square, changing colors, and assembling the cover using a darning needle. You’ll also receive tips for attaching the zipper, ensuring a snug fit for a 16×16-inch pillow.
Customize the color combination to suit any decor or festive season, and enjoy a fun, creative crochet project!

Crochet Granny Square Throw Pillow Cover Tutorial
The tutorial demonstrates how to create a basic granny square throw pillow cover with a zipper. It is beginner-friendly and customizable with different color combinations, such as festive seasonal colors. The finished pillow measures approximately 15 x 15 inches, suitable for a 16 x 16-inch pillow insert.
Materials Needed
- #4 medium weight yarn
- 4.00 mm hook
- Darning needle for assembly.
- 20-inch zipper (preferably a matching color to the yarn).
- Stitch markers for precise assembly.

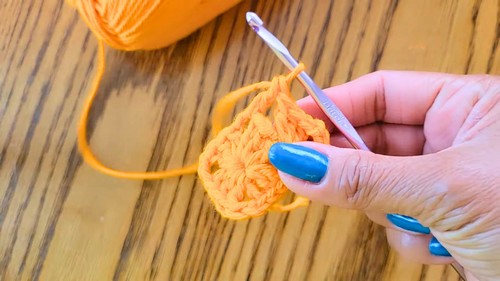
Granny Square Creation
- Foundation:
- The granny square starts with a ring, formed using either a slip knot and chain technique or a magic ring.
- The first round establishes the four corners with clusters of double crochet stitches, separated by chain spaces.
- Rounds:
- Each subsequent round builds on the pattern using clusters of double crochet stitches to expand the square.
- Corner spaces are created using chain spaces within each round.
- The tutorial demonstrates how to change yarn colors between rounds and offers tips on hiding the yarn tails.
- Size:
- The granny square is crocheted until it has reached the desired size, with 28 rounds recommended for a 15 x 15-inch cover.
Assembly Process
- Preparing the Square:
- Once the granny square is complete, it is flipped to the wrong side for preparation before folding.
- The square is folded in half, ensuring the corners and edges align perfectly.
- Joining Edges:
- Using a darning needle and yarn, the edges are sewn together along one side and up to two corners.
- The sewing involves aligning the clusters of double crochet stitches from both sides carefully.
- The yarn is pulled tightly to secure the stitches, and any loose yarn ends are woven in after completing the edges.
- Repeating for Both Sides:
- The same stitching process is repeated for the other side of the folded granny square.

Attaching the Zipper
- Zipper Placement:
- A 20-inch zipper is placed along one of the open edges.
- The tutorial recommends using a zipper that matches the yarn color for a seamless finish.
- Securing the Zipper:
- Specific sections along the zipper are secured in place with stitches to ensure exact alignment.
- Final Details:
- The zipper is fully attached, completing the pillow cover.

Finishing Touches
- The tutorial concludes with final weaving of any loose yarn ends.
- The completed granny square pillow cover is showcased, ready for use.

Conclusion
- The instructor encourages viewers to give a thumbs-up, subscribe to the channel, and experiment with different color schemes to personalize the project.
- It is noted that the project is beginner-friendly, simple, and versatile.