How to Crochet Beautiful Socks for Beginners

Learn how to crochet simple ribbed ankle socks using leftover yarn, perfect for cozying up your winter, with a step-by-step tutorial. These socks are super comfy to wear and quick to crochet. The final product, though chunky, works well for boots and ensures comfort with stretchable, customized sizing. Crochet a set for whole family!
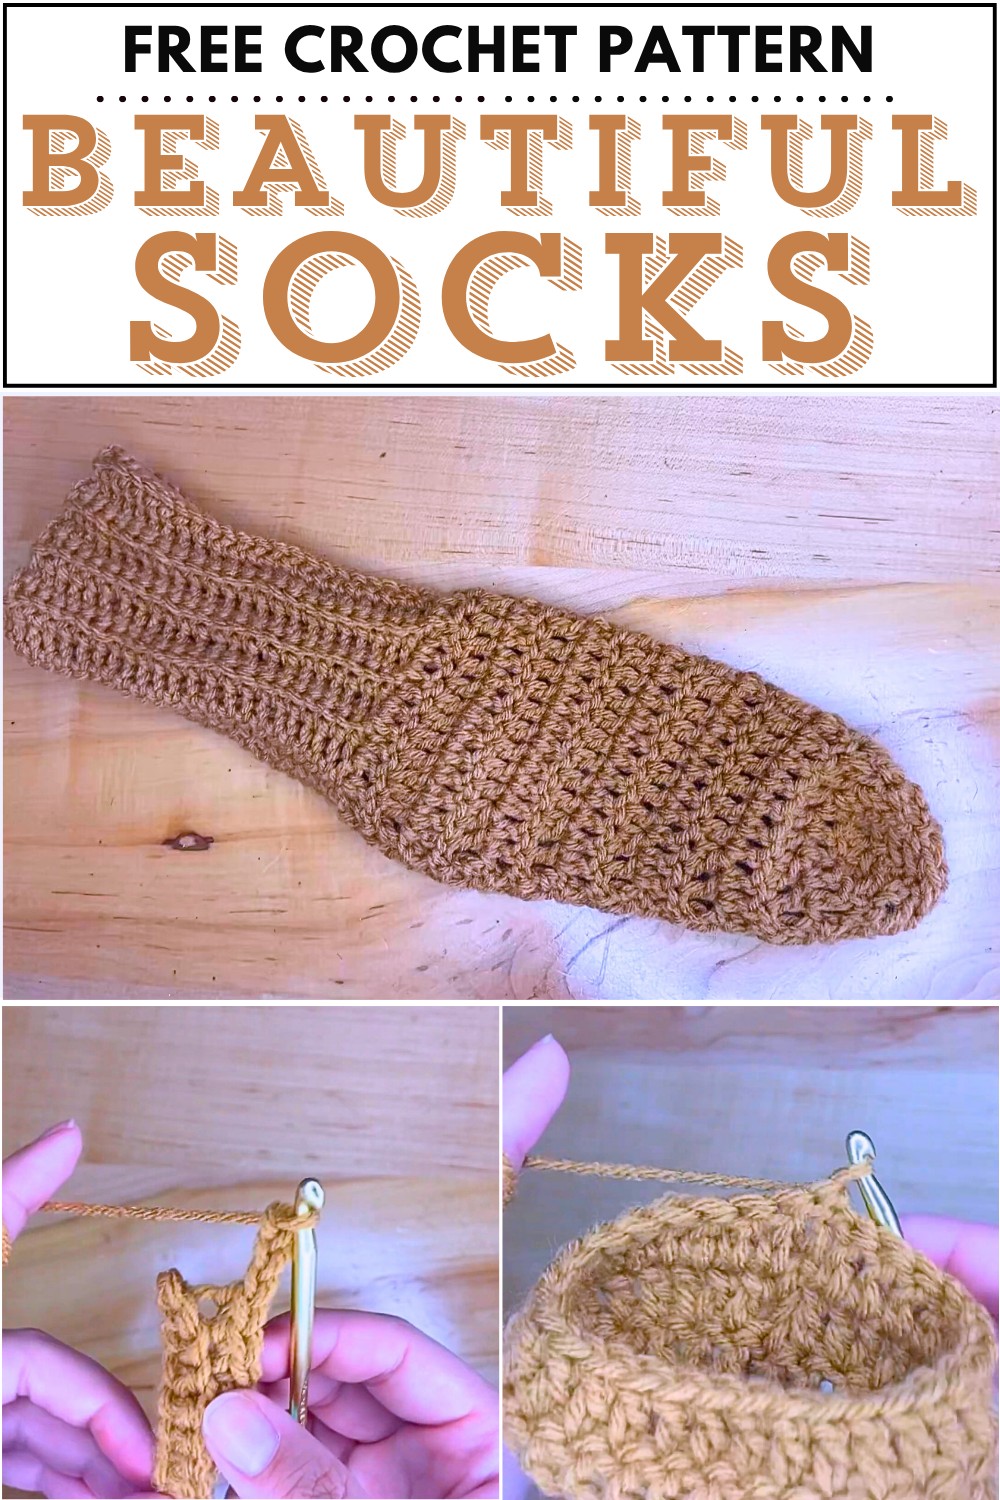
Skills Used: This tutorial incorporates a variety of fundamental crochet skills, making it accessible to beginners while still offering room for creative growth. Key techniques include creating a foundation chain, single crochet in the third loop, working in back loops for texture, and using double crochet stitches for structure. It also explores practical shaping methods like increasing and decreasing to form the heel and foot sections.
Skill Level: Beginner

Supplies Needed
Here are the supplies used in the video tutorial for crochet socks:
- Leftover yarn (camel color, approximately one skein). Use acrylic yarn.
- 5mm crochet hook
Pair of scissors - Darning needle
- Measuring tape (to measure ankle circumference for ribbing)
Crochet Socks Tutorial
This crochet tutorial by “Knits from Nicola” demonstrates how to create a cozy pair of ribbed chunky socks using leftover yarn. It’s suitable for beginners and focuses on simple stitches like single crochet, double crochet, and working in the back loops to add texture.
The tutorial emphasizes a practical approach, allowing crafters to customize the sock size based on their measurements (ankle circumference and foot length).
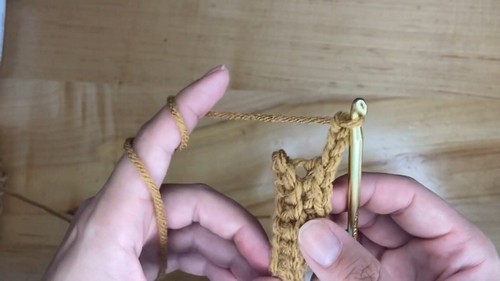
2. Ribbing (Ankle Section):
- Measure around the ankle, slightly above where the leg starts to narrow (e.g., 9 inches for the demo).
- Create a chain of 25 stitches for the foundation.
- Begin single crocheting into the third loop on the chain, then continue single crochet stitches all the way down.
- Chain 3, flip the work, and single crochet into the back loops only for texture.
- Repeat this process until you have 18 rows (or until it stretches to fit your ankle measurement).
- Slip stitch the edges to close the ribbing into a ring.

3. Foot Section:
- Chain 3 and start double crochet stitches into the spaces around the ribbing ring.
- At the end of the row, slip stitch into the top stitch, then turn the work and chain 3.
- Row 2: Add 3 increases where the heel starts to form—at the beginning, middle, and near the end.
- Increase by stitching twice into one space.
- Row 3: Double crochet all the way around without increases.
4. Heel Shaping (Alternate Rows):
- For even rows (4, 6, 8, etc.): Decrease at two points near the heel area.
- Create a decrease by combining two stitches into one (pulling yarn through both loops).
- For odd rows (5, 7, 9, etc.): No increases or decreases—just double crochet across.
- Continue this alternating pattern until Row 14 (or adjust based on shoe size), ensuring regular fit checks by trying on the sock.

5. Finishing the Foot Section:
- At the end of Row 14 (or appropriate row for your size), cut the yarn.
- Use a darning needle to sew the open end of the foot section together.
- Flip the sock inside out for a clean finish.

6. Final Product:
- The sock will look chunky but stretches well.
- Ideal for wearing with boots that have extra space, providing comfort and warmth.